Discussion Forum - Northstar Chevelle Club

Members Login
Username 
 
Password 
    Remember Me  
Post Info TOPIC: Winter work on 71 Convert, Round 3


1K+ Club

Status: Offline
Posts: 1299
Date:
Winter work on 71 Convert, Round 3
Permalink  


After taking a lot of pictures of Andrew and Stan's cars, plus a few measurements, i have concluded my car had major rework on the rear prior to the first yellow paint job.
Clues were Lead on the seams at the top, no blue layer on the rear fenders and a once green trunk lid. the final proof is the opening width at the top is ~3/16 to 1/4" wider than it should be, the bottom more like 1/8" too wide. Not sure what i will do with this information, the PO had used Bondo to fill the gaps. Have seen several ways that this can be fixed, not sure i like the prospect of any of them.
One more reason to just "Fix up" as a driver and refer-bush, Vs. a full restoration....

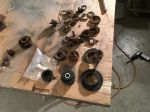
Also started the process of replacing the frame mount rubber bushings. After weeks of soaking with liquid wrench and PB Blaster, drilled 1/8' holes to access the cage nuts, the first 3 still broke off with out a lot of pressure. the 7/16" bolts snapped in areas where they were mote like 5/16th. will likely have to open up all of them from the top and replace the cage AY. Good news is this means thet progress is being made. Mitch's Sawzall attack under Andrews car was an inspiration to dig in and just do what it takes.

__________________

Bruce L. - Lakeville MN

1971 Malibu Convert


President

Status: Offline
Posts: 7257
Date:
Permalink  
 

12 years ago, I was in the same place with how to do repairs that seemed daunting. I read about how others had done the job and at the end of the day, bottom line is, you just need to get out the big tools and start slicing. it's difficult to get past the doubt of in-experience, but after a short time, and a couple successful repairs, you will gain the confidence to just dig in and git-r-done.

On the wide trunk opening, if there is work needed on the extension panel, between the top and trunk lid, you can slice that at the quarter seems and pull the side together rather easily with a come along and a couple home fashioned hooks to grab the seal gutter underneath. The trick will be to determine which side needs to move, or both, and how much, to keep the opening square with equal lengths. Drilling an 1/8" hole in the same place on both quarters, near the extension panel, as a measuring point is a good start for consistent numbers. If the hole would be an issue from too much curvature across the measured area, you can ad a Phillips head machine screw of appropriate length, to raise the measure point above the curvature.

I'm sure Karl would be pleased to run over from Crystal Lake and help with this, if you want.
Or, I could find a time on a weekend to run down and assist getting this set-up for you too.

__________________

Mitch D.   River Falls, WI

Lifetime member of the "Cars apart Club"

Some Assembly Required

1966 Chevelle SS 396 M20

1970 Chevelle SS 396 M20

1967 Camaro SS 350 rs


1K+ Club

Status: Offline
Posts: 1299
Date:
Permalink  
 

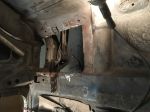
Almost ready to start replacing the passengers side frame cushions. Thinking they really needed to be replaced rolleyes
Despite weeks of soaking them with PB Blaster and 3M penetrating oil, they either broke or spun the cage nut mount (ordered a whole set)
A few more patches will be needed.


-- Edited by BLyke on Tuesday 8th of May 2018 10:09:14 PM

Attachments
__________________

Bruce L. - Lakeville MN

1971 Malibu Convert


President

Status: Offline
Posts: 7257
Date:
Permalink  
 

That car is darned lucky it came under your care...thumbsup

Is there a bolt in the mount hole under the seat on your convert ? I was surprised to find a dead plug mount on andrew's car in that position. There is a cage nut in the floor support for a bolt.


__________________

Mitch D.   River Falls, WI

Lifetime member of the "Cars apart Club"

Some Assembly Required

1966 Chevelle SS 396 M20

1970 Chevelle SS 396 M20

1967 Camaro SS 350 rs


1K+ Club

Status: Offline
Posts: 1299
Date:
Permalink  
 

Lost in the 60s wrote:

That car is darned lucky it came under your care...thumbsup

Is there a bolt in the mount hole under the seat on your convert ? I was surprised to find a dead plug mount on andrew's car in that position. There is a cage nut in the floor support for a bolt.


Yes there is, and it is under two layers of steel. thought i missed the location, so move over ~2 " and tried again, only to not find it. Good thing i was a welder in my younger days.

As far as the car being lucky... more like a shelter for strays? I always see the potential and thing the car can be saved.

Perhaps the next build will need to be a rust free rolling shell, the bolt on stuff is way more straight forward.


__________________

Bruce L. - Lakeville MN

1971 Malibu Convert


President

Status: Offline
Posts: 7257
Date:
Permalink  
 

There's a reason I travel so far from home for cars now....much less rust....and the adventure of retrieving them...cool


__________________

Mitch D.   River Falls, WI

Lifetime member of the "Cars apart Club"

Some Assembly Required

1966 Chevelle SS 396 M20

1970 Chevelle SS 396 M20

1967 Camaro SS 350 rs


1K+ Club

Status: Offline
Posts: 1299
Date:
Permalink  
 

yep

__________________

Bruce L. - Lakeville MN

1971 Malibu Convert


1K+ Club

Status: Offline
Posts: 1299
Date:
Permalink  
 

Guess when it has been a month since the last progress report, there may not have been much. rolleyes

Had some time this weekend and finished up the frame mount cushions. This included replacing all of the cage nuts and making new "plate nuts" for the ones on each side of the seat mounts, started welding up the patches for the holes that had to be cut. After that it will be on to some floor panel replacements.

Hope to keep the momentum on the "Summer Project", may even be able to avoid it becoming a "Winter Round 4"


-- Edited by BLyke on Sunday 10th of June 2018 09:56:44 PM

__________________

Bruce L. - Lakeville MN

1971 Malibu Convert


1K+ Club

Status: Offline
Posts: 1299
Date:
Permalink  
 

The potential progress has taken a sharp up tic as of today. As a result of further "reductions in force" my days of working for "the company formally known as Despatch" are over.
So on the plus side there should be time for summer work on the convert, which is nice,..... so I've got that going for merolleyes


__________________

Bruce L. - Lakeville MN

1971 Malibu Convert


President

Status: Offline
Posts: 7257
Date:
Permalink  
 

Sort of sorry to hear of your lay off. Retirement is fun for the first several months and then you run out of money for the big dreams...laughingOh, maybe you won't go buy an additional 3-4 cars...banghead

I did end up using the listing wire I got from you in my '62 seat upholstery. Much of the old stuff was stained and I didn't want to re-use it, so I ended up buying a 70 ft roll too. If you need more, let me know..thumbsup


__________________

Mitch D.   River Falls, WI

Lifetime member of the "Cars apart Club"

Some Assembly Required

1966 Chevelle SS 396 M20

1970 Chevelle SS 396 M20

1967 Camaro SS 350 rs


1K+ Club

Status: Offline
Posts: 1299
Date:
Permalink  
 

Lost in the 60s wrote:

Sort of sorry to hear of your lay off. Retirement is fun for the first several months and then you run out of money for the big dreams...laughingOh, maybe you won't go buy an additional 3-4 cars...banghead

I did end up using the listing wire I got from you in my '62 seat upholstery. Much of the old stuff was stained and I didn't want to re-use it, so I ended up buying a 70 ft roll too. If you need more, let me know..thumbsup


 Thanks Mitch, having a much smaller shop (and Lakeville ordinances) will help limit the size of the herd. As you know there is still plenty to do on the 71. Having ~6 to 8 times more hours for working on it should get it done a lot faster.


__________________

Bruce L. - Lakeville MN

1971 Malibu Convert


3K+ Club

Status: Offline
Posts: 4764
Date:
Permalink  
 

Sorry to hear that Bruce.  Something will work out assuming you want to find a replacement job?  I've got a few connections out there in the supply chain network if you're interested, as I think that's your profession?  Hit me up on Linkedin, and you can check out my network.

Or, maybe you're in a position where you can take a break from things, which would be a great position to be in with the vert project calling your name. 


__________________

Stan S.-Twin Cities 'South Metro'

1972 Malibu Convertible 2nd time around 

1999 SS Camaro LS1-6 speed

Forum influenced terms: 'Link Paste', 'Stanitized', & 'Revolving garage door...' 


1K+ Club

Status: Offline
Posts: 1299
Date:
Permalink  
 

Thanks Stan,
For the moment, it option #2, taking a break and test driving being retired.
Longer term is still TBD.

__________________

Bruce L. - Lakeville MN

1971 Malibu Convert


1K+ Club

Status: Offline
Posts: 1299
Date:
Permalink  
 

Time for a weekly update
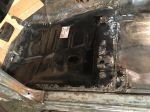
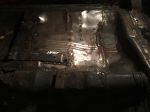
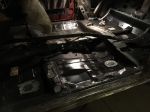
ready to weld in the new floor on the drivers side front, perhaps tomorrow.


Attachments
__________________

Bruce L. - Lakeville MN

1971 Malibu Convert


President

Status: Offline
Posts: 7257
Date:
Permalink  
 

That should be fun. A person can make more progress when having the time to putz all day, instead of trying to squeeze project time in after a work day...thumbsup


__________________

Mitch D.   River Falls, WI

Lifetime member of the "Cars apart Club"

Some Assembly Required

1966 Chevelle SS 396 M20

1970 Chevelle SS 396 M20

1967 Camaro SS 350 rs


1K+ Club

Status: Offline
Posts: 1299
Date:
Permalink  
 

Lost in the 60s wrote:

That should be fun. A person can make more progress when having the time to putz all day, instead of trying to squeeze project time in after a work day...thumbsup


 Yep, got it all tacked in before i had to head out this morning. did a few rounds of trimming and grinding to improve the gaps.

Made a~2 X 6" piece to go in a small area behind the front patch that was suspect


__________________

Bruce L. - Lakeville MN

1971 Malibu Convert


1K+ Club

Status: Offline
Posts: 1299
Date:
Permalink  
 

Front floor just needs a little more clean up and seam seal and it will be GTG.


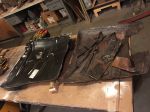
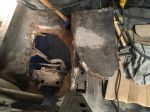
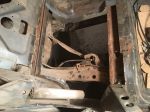
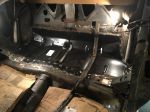
Cut out the major bad rust and previous work on the passengers side, leaving the solid area.

Considering attempting the full panel replacement. More work to remove and prepare but will look better, just in case it takes a while more to get the rear seat inrolleyes


-- Edited by BLyke on Wednesday 25th of July 2018 09:06:30 AM

Attachments
__________________

Bruce L. - Lakeville MN

1971 Malibu Convert


1K+ Club

Status: Offline
Posts: 1299
Date:
Permalink  
 

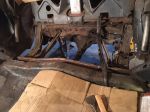
Had to go up higher too on the drivers side, removing flat patches on top of rusted parts and then cutting them out.

Will have to fab up the two layers then on to installing the the whole new panel.


-- Edited by BLyke on Tuesday 31st of July 2018 08:33:49 AM

Attachments
__________________

Bruce L. - Lakeville MN

1971 Malibu Convert


President

Status: Offline
Posts: 7257
Date:
Permalink  
 

It's going to be so purdy, when you are done.

Interesting that it has the control arm braces. Wonder if that is because it's a convert, or was the car an SS ?


__________________

Mitch D.   River Falls, WI

Lifetime member of the "Cars apart Club"

Some Assembly Required

1966 Chevelle SS 396 M20

1970 Chevelle SS 396 M20

1967 Camaro SS 350 rs


3K+ Club

Status: Offline
Posts: 4764
Date:
Permalink  
 

Lost in the 60s wrote:

It's going to be so purdy, when you are done.

Interesting that it has the control arm braces. Wonder if that is because it's a convert, or was the car an SS ?


Lookin' good Bruce.

Mitch-The braces must be a convertible thing as the '72 vert I had also had the factory braces like that and it was a Malibu/Non SS. 


__________________

Stan S.-Twin Cities 'South Metro'

1972 Malibu Convertible 2nd time around 

1999 SS Camaro LS1-6 speed

Forum influenced terms: 'Link Paste', 'Stanitized', & 'Revolving garage door...' 


1K+ Club

Status: Offline
Posts: 1299
Date:
Permalink  
 

Thanks Guys, it will be a lot better and covered by the rear seat  (that also need to get redone!)

Thinking the braces is convertible, as i have the build seat and the car was not a SS, but it will look a bit like one when it is done~?!


-- Edited by BLyke on Tuesday 31st of July 2018 10:53:50 AM

__________________

Bruce L. - Lakeville MN

1971 Malibu Convert


1K+ Club

Status: Offline
Posts: 1299
Date:
Permalink  
 

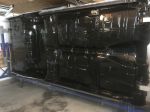
Getting there.


Attachments
__________________

Bruce L. - Lakeville MN

1971 Malibu Convert


2K+ Club

Status: Offline
Posts: 2437
Date:
Permalink  
 

Looks great Bruce, I just painted my on again off again floor pans and trunk project.


-- Edited by dashboard on Friday 3rd of August 2018 06:47:47 AM

Attachments
__________________

Kevin

Northwestern Ohio


1K+ Club

Status: Offline
Posts: 1299
Date:
Permalink  
 

dashboard wrote:

Looks great Bruce, I just painted my on again off again floor pans and trunk project.


-- Edited by dashboard on Friday 3rd of August 2018 06:47:47 AM


Thanks, yours actually look great (as in better than new)!

I'm happy with the improvement on mine and that there are no longer flat slabs of sheet metal scabbed here and there.


__________________

Bruce L. - Lakeville MN

1971 Malibu Convert


1K+ Club

Status: Offline
Posts: 1299
Date:
Permalink  
 

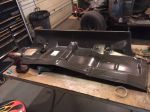
Mitch tried to warn me.. starting on the rear passengers floor next. Just got the pan delivered
When exactly will winter 2018/19 start??rolleyes


__________________

Bruce L. - Lakeville MN

1971 Malibu Convert


President

Status: Offline
Posts: 7257
Date:
Permalink  
 

BLyke wrote:

Mitch tried to warn me.. starting on the rear passengers floor next. Just got the pan delivered
When exactly will winter 2018/19 start??rolleyes


 In about 8 weeks, so you are ahead of schedule...thumbsup


__________________

Mitch D.   River Falls, WI

Lifetime member of the "Cars apart Club"

Some Assembly Required

1966 Chevelle SS 396 M20

1970 Chevelle SS 396 M20

1967 Camaro SS 350 rs


1K+ Club

Status: Offline
Posts: 1299
Date:
Permalink  
 

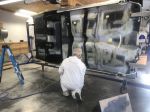
Replaced the passengers rear floor (that i had made a small patch in sometime ago) still need to clean up the welds and prime.
It was so much fun... will be ordering the rear drivers side, and then that is it........rolleyes

the passengers front will be just fine as is....


-- Edited by BLyke on Tuesday 4th of September 2018 05:48:01 PM


-- Edited by BLyke on Thursday 6th of September 2018 02:19:11 PM


-- Edited by BLyke on Thursday 6th of September 2018 02:20:18 PM


-- Edited by BLyke on Thursday 6th of September 2018 02:21:11 PM

Attachments
__________________

Bruce L. - Lakeville MN

1971 Malibu Convert


1K+ Club

Status: Offline
Posts: 1299
Date:
Permalink  
 

Thanks to Hank, Stan and Derek, I have made it back to the forum, after operator error on my part lost my info.
Floor is now sealed and the project is moving forward to the doors and front fenders.


__________________

Bruce L. - Lakeville MN

1971 Malibu Convert


1K+ Club

Status: Offline
Posts: 1299
Date:
Permalink  
 

Seams to be getting to the point where i will seal the deal?


Attachments
__________________

Bruce L. - Lakeville MN

1971 Malibu Convert


3K+ Club

Status: Offline
Posts: 4764
Date:
Permalink  
 

Looks good Bruce!

I noticed it looks like you used the galvanized floor plugs.  Just a note that paint doesn't like to stick to them, so suggest a good scuff with a Scotch brite pad before priming/painting.  Especially if you put any in the trunk area and try to spatter coat them.  I had issues with that when I restored the vert.


__________________

Stan S.-Twin Cities 'South Metro'

1972 Malibu Convertible 2nd time around 

1999 SS Camaro LS1-6 speed

Forum influenced terms: 'Link Paste', 'Stanitized', & 'Revolving garage door...' 


1K+ Club

Status: Offline
Posts: 1299
Date:
Permalink  
 

thanks for the tip on the plugs Stan.

__________________

Bruce L. - Lakeville MN

1971 Malibu Convert


President

Status: Offline
Posts: 7257
Date:
Permalink  
 

Looks great, Bruce. Can we expect to see the car at club events next year...stirpot


__________________

Mitch D.   River Falls, WI

Lifetime member of the "Cars apart Club"

Some Assembly Required

1966 Chevelle SS 396 M20

1970 Chevelle SS 396 M20

1967 Camaro SS 350 rs


Active Member

Status: Offline
Posts: 460
Date:
Permalink  
 

Looks good!

__________________

Larry L.

Coon Rapids


President

Status: Offline
Posts: 7257
Date:
Permalink  
 

Larry Lucast wrote:

Looks good!


 And what became of the buffing process on your car...headscratch


__________________

Mitch D.   River Falls, WI

Lifetime member of the "Cars apart Club"

Some Assembly Required

1966 Chevelle SS 396 M20

1970 Chevelle SS 396 M20

1967 Camaro SS 350 rs


1K+ Club

Status: Offline
Posts: 1299
Date:
Permalink  
 

Lost in the 60s wrote:

Looks great, Bruce. Can we expect to see the car at club events next year...stirpot


 That is the new plan, hopefully i will not need to buy a trailer to make it happen.


__________________

Bruce L. - Lakeville MN

1971 Malibu Convert


Vice President

Status: Offline
Posts: 478
Date:
Permalink  
 

BLyke wrote:
Lost in the 60s wrote:

Looks great, Bruce. Can we expect to see the car at club events next year...stirpot


 That is the new plan, hopefully i will not need to buy a trailer to make it happen.


 It's cheaper to rent a trailerlaughing


__________________

Bob W.

Lino Lakes


President

Status: Offline
Posts: 7257
Date:
Permalink  
 

Bobs_Place wrote:
BLyke wrote:
Lost in the 60s wrote:

Looks great, Bruce. Can we expect to see the car at club events next year...stirpot


 That is the new plan, hopefully i will not need to buy a trailer to make it happen.


 It's cheaper to rent a trailerlaughing


 That would be pretty cool....pull the vert with the '59...thumbsup


__________________

Mitch D.   River Falls, WI

Lifetime member of the "Cars apart Club"

Some Assembly Required

1966 Chevelle SS 396 M20

1970 Chevelle SS 396 M20

1967 Camaro SS 350 rs


1K+ Club

Status: Offline
Posts: 1299
Date:
Permalink  
 

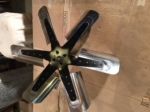
Did not take a before picture, but here is a bit of "extreme detailing" of the fan, which had rusty blue paint and dull blades with some sort of brown streaks.

Starting to get it back to the point it can be moved out of the garage so i can get it ready to prime.


Attachments
__________________

Bruce L. - Lakeville MN

1971 Malibu Convert


3K+ Club

Status: Offline
Posts: 4764
Date:
Permalink  
 

BLyke wrote:

Did not take a before picture, but here is a bit of "extreme detailing" of the fan, which had rusty blue paint and dull blades with some sort of brown streaks.

Starting to get it back to the point it can be moved out of the garage so i can get it ready to prime.


Looks good Bruce.  It looks like a factory fan but with stainless flex blades?  headscratch   


__________________

Stan S.-Twin Cities 'South Metro'

1972 Malibu Convertible 2nd time around 

1999 SS Camaro LS1-6 speed

Forum influenced terms: 'Link Paste', 'Stanitized', & 'Revolving garage door...' 


1K+ Club

Status: Offline
Posts: 1299
Date:
Permalink  
 

SShink wrote:
BLyke wrote:

Did not take a before picture, but here is a bit of "extreme detailing" of the fan, which had rusty blue paint and dull blades with some sort of brown streaks.

Starting to get it back to the point it can be moved out of the garage so i can get it ready to prime.


Looks good Bruce.  It looks like a factory fan but with stainless flex blades?  headscratch   

Ya, I think they might be SST.


__________________

Bruce L. - Lakeville MN

1971 Malibu Convert


3K+ Club

Status: Offline
Posts: 4764
Date:
Permalink  
 

FWIW Bruce, I had a flex fan like that and ended up replacing it with a factory AC fan to keep the temps in a normal range on a SBC.  If yours is staying cool, no worries.


__________________

Stan S.-Twin Cities 'South Metro'

1972 Malibu Convertible 2nd time around 

1999 SS Camaro LS1-6 speed

Forum influenced terms: 'Link Paste', 'Stanitized', & 'Revolving garage door...' 


1K+ Club

Status: Offline
Posts: 1299
Date:
Permalink  
 

Thanks Stan,
No A/C and the engine runs cool, at least as i recall from ~4 years ago. Lately is is always at room temperature.rolleyes

Saw one like this listed for $99 in a Chevelle catalog that came with the blue paint.


-- Edited by BLyke on Thursday 11th of October 2018 11:11:22 AM

__________________

Bruce L. - Lakeville MN

1971 Malibu Convert


1K+ Club

Status: Offline
Posts: 1299
Date:
Permalink  
 

Guess it is about time for a update.
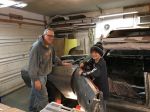
Beginning to reassemble the front end and wiring.
Plan is to lock down the semi-gloss parts and set the gaps, then pull the outside parts of for painting.

Grandson spent some time helping out and learning to read Assembly drawings and how to calculate the +/- tolerances, then how to measure them.


Attachments
__________________

Bruce L. - Lakeville MN

1971 Malibu Convert


President

Status: Offline
Posts: 7257
Date:
Permalink  
 

You're going to DRIVE that car next year, aren't you...cancan


__________________

Mitch D.   River Falls, WI

Lifetime member of the "Cars apart Club"

Some Assembly Required

1966 Chevelle SS 396 M20

1970 Chevelle SS 396 M20

1967 Camaro SS 350 rs


3K+ Club

Status: Offline
Posts: 4764
Date:
Permalink  
 

BLyke wrote:

Guess it is about time for a update.
Beginning to reassemble the front end and wiring.
Plan is to lock down the semi-gloss parts and set the gaps, then pull the outside parts of for painting.

Grandson spent some time helping out and learning to read Assembly drawings and how to calculate the +/- tolerances, then how to measure them.


There's very little yellow left on that car.  I like it!

Great teaching opportunities for the grandson too.   thumbsup


__________________

Stan S.-Twin Cities 'South Metro'

1972 Malibu Convertible 2nd time around 

1999 SS Camaro LS1-6 speed

Forum influenced terms: 'Link Paste', 'Stanitized', & 'Revolving garage door...' 


1K+ Club

Status: Offline
Posts: 1299
Date:
Permalink  
 

Lost in the 60s wrote:

You're going to DRIVE that car next year, aren't you...cancan


That is the plan!


__________________

Bruce L. - Lakeville MN

1971 Malibu Convert


1K+ Club

Status: Offline
Posts: 1299
Date:
Permalink  
 

SShink wrote:
BLyke wrote:

Guess it is about time for a update.
Beginning to reassemble the front end and wiring.
Plan is to lock down the semi-gloss parts and set the gaps, then pull the outside parts of for painting.

Grandson spent some time helping out and learning to read Assembly drawings and how to calculate the +/- tolerances, then how to measure them.


There's very little yellow left on that car.  I like it!

Great teaching opportunities for the grandson too.   thumbsup


 Thanks Stan,

All of the grand kids like to help and learn with hands on work,


__________________

Bruce L. - Lakeville MN

1971 Malibu Convert


1K+ Club

Status: Offline
Posts: 1299
Date:
Permalink  
 

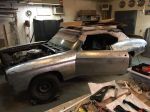
Ever wonder how to measure the exact width of a cowl hood? one way is with a wooden caliper like this.
setting up the fenders for proper gaps


-- Edited by BLyke on Thursday 15th of November 2018 11:50:06 AM

Attachments
__________________

Bruce L. - Lakeville MN

1971 Malibu Convert


3K+ Club

Status: Offline
Posts: 4764
Date:
Permalink  
 

BLyke wrote:

Ever wonder hos to measure the exact width of a cowl hood? one way is with a wooden caliper like this.
setting up the fenders for proper gaps


Nice template.  Hopefully the hood stamping is consistent from side to side, but that should get you in the general area from what I know... cuckoo

I'm sure Dashboard is happy that you're utilizing wood somehow in your project, as that's his thing.  razz


__________________

Stan S.-Twin Cities 'South Metro'

1972 Malibu Convertible 2nd time around 

1999 SS Camaro LS1-6 speed

Forum influenced terms: 'Link Paste', 'Stanitized', & 'Revolving garage door...' 


1K+ Club

Status: Offline
Posts: 1299
Date:
Permalink  
 

The hood is a GM OEM part and very consistent top to bottom thumbsup


__________________

Bruce L. - Lakeville MN

1971 Malibu Convert


«First  <  1 2 3 4 5 68  >  Last»  | Page of 8  sorted by
 
Quick Reply

Please log in to post quick replies.

Chatbox
Please log in to join the chat!