Discussion Forum - Northstar Chevelle Club

Members Login
Username 
 
Password 
    Remember Me  
Post Info TOPIC: Starting trunk repair


2K+ Club

Status: Offline
Posts: 2684
Date:
Starting trunk repair
Permalink  


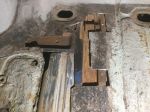
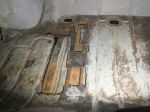
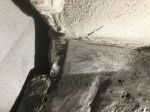
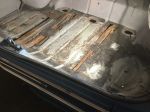
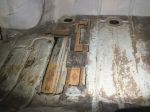
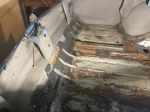
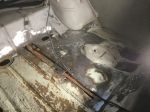
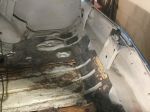
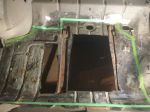
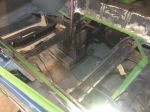
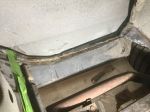
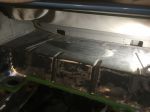
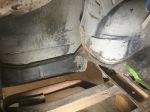
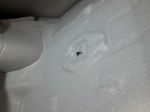
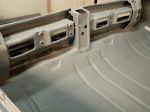
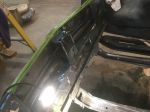
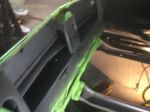
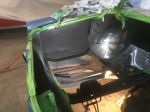
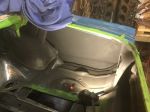
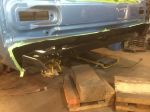
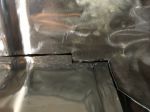
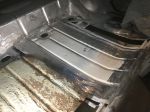
Starting to. umask the trunk floor braces.  I hope I can do the repair leaving the braces in place.  And have the car operational.  Here are some photos.


Attachments
__________________

Jim L

Lake City


2K+ Club

Status: Offline
Posts: 2684
Date:
Permalink  
 

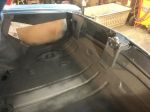
Pretty much done with the exploration step.  Now time to evaluate and make a plan.  I would like to keep the car on the road as much as possible.  Done think I should put more than 10 gallons of fuel in the tank as close to 1/2 of spotwelds for the floor/braces are gone.


it looks like I can retain all the trunk floor braces. Thinking of running the rear part of the floor pan up above  were the trunk  floor is spot-welded to the lower part of the tail panel area.  That way I can re-spot-weld the trunk section and flange the joint between the new part and the remaining part of the trunkfloor, probably about an inch below the 3 rear braces.  The underside of the flange joint will be hidden and I will grind down the weld on the inside of the trunk.

i will be replacing most of the floor sections in the center and the driver-side.  But undecided if I want to retain the big drain holes. Up in the air on how much of the right floor section to replace.  I think I will try to butt-weld the seam across the front of the trunk.  And grind down the welds below an inside the trunk.

the plan is to replace the center section first, then move on to the left and right sections first.  That way I can keep driving the car. Anyone with thoughts , let me know.


Attachments
__________________

Jim L

Lake City


1K+ Club

Status: Offline
Posts: 1299
Date:
Permalink  
 

Looks like you have a plan and are well on your way with the floor.
Thanks for the updates

__________________

Bruce L. - Lakeville MN

1971 Malibu Convert


1K+ Club

Status: Offline
Posts: 1169
Date:
Permalink  
 

Remove gas tank for safety purposes.
Karl

__________________

More ambition than brains,

If you have more than 5 of anything, best to stop counting!


1K+ Club

Status: Offline
Posts: 1299
Date:
Permalink  
 

more ambition than brains wrote:

Remove gas tank for safety purposes.
Karl


 For sure! 


__________________

Bruce L. - Lakeville MN

1971 Malibu Convert


2K+ Club

Status: Offline
Posts: 2684
Date:
Permalink  
 

BLyke wrote:
more ambition than brains wrote:

Remove gas tank for safety purposes.
Karl


 For sure! 


 Yes, I should have done that before cutting with the dremel.  It will be done before any more cutting and or welding.  Hope to do the pan in three step, so maybe will have to go through the process of tank removal around five time.

I think I will follow something similar to this guys repair.  Trying to retain the left and right drain holes, maybe the center one.  Hope to expose the 4 rear cage/nuts and remove the 4 bolts.


-- Edited by jim larson on Friday 14th of February 2020 06:04:50 PM

Attachments
__________________

Jim L

Lake City


2K+ Club

Status: Offline
Posts: 2684
Date:
Permalink  
 

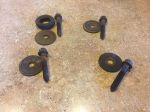
Well time to remove 4 rear mounting bolts so I know if I have to repair the cage nuts, etc.  pleasant surprise, they all came right out with a 3/8” ratchat. nana I have never seen body mount bolts in this good of a condition.


Attachments
__________________

Jim L

Lake City


1K+ Club

Status: Offline
Posts: 1299
Date:
Permalink  
 

That's pretty good success on the cage nuts Jim, I had one on the whole car that didn't have to be replaced.


__________________

Bruce L. - Lakeville MN

1971 Malibu Convert


2K+ Club

Status: Offline
Posts: 2439
Date:
Permalink  
 

more ambition than brains wrote:

Remove gas tank for safety purposes.
Karl


 It’s much safer and it’s also easier to paint the trunk underside.  


__________________

Kevin

Northwestern Ohio


President

Status: Offline
Posts: 7257
Date:
Permalink  
 

I'm thinking about the second time you have to wrestle with that tank, you'll just leave it out and finish the floor asap...laughing


__________________

Mitch D.   River Falls, WI

Lifetime member of the "Cars apart Club"

Some Assembly Required

1966 Chevelle SS 396 M20

1970 Chevelle SS 396 M20

1967 Camaro SS 350 rs


2K+ Club

Status: Offline
Posts: 2684
Date:
Permalink  
 

Lost in the 60s wrote:

I'm thinking about the second time you have to wrestle with that tank, you'll just leave it out and finish the floor asap...laughing


 My plan if reasonable isn’t to hook up an outboard boat fuel tank to the fuel line.  That way I can just disconnect the hose at the tank and lift it out of the trunk.  I have used a little platform on a floor jack to remove and install the tank in the past on my SS.  I wish I were as fast as you in getting things done.


__________________

Jim L

Lake City


2K+ Club

Status: Offline
Posts: 2684
Date:
Permalink  
 

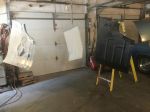
Here is a look at my current plan. Time to learn how to weld. Waiting on final painting of hood.


-- Edited by jim larson on Friday 28th of February 2020 08:51:48 AM

Attachments
__________________

Jim L

Lake City


2K+ Club

Status: Offline
Posts: 2684
Date:
Permalink  
 

Waiting for a few tools to arrive, hope I am done buying more. Trunk panels painted with 2K epoxy primer and bottom side with black.  Need more practice on welding And to start fitting the trunk panels.


Attachments
__________________

Jim L

Lake City


1K+ Club

Status: Offline
Posts: 1299
Date:
Permalink  
 

Looks like you are making good progress.

__________________

Bruce L. - Lakeville MN

1971 Malibu Convert


2K+ Club

Status: Offline
Posts: 2684
Date:
Permalink  
 

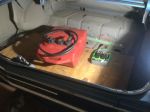
Now come the hard part, cutting the section to fit and learning to weld.  Unless I want to run with the 6 gallon outboard mo tor tank.  It’s hooked up and the car stated right off today.


__________________

Jim L

Lake City


1K+ Club

Status: Offline
Posts: 1299
Date:
Permalink  
 

When cutting error on the plus side and grid off as needed, for welding practice on the same gauge material with the and type of seems (butt or Lap)


-- Edited by BLyke on Monday 2nd of March 2020 10:12:17 AM

__________________

Bruce L. - Lakeville MN

1971 Malibu Convert


2K+ Club

Status: Offline
Posts: 2684
Date:
Permalink  
 

The back edge along the rear of the trunk will be a lap joint where the bottom is hidden inside the rear tail panel end piece.  The front side will be a butt or a lap not sure just yet.  the left side will be spot welded to the drop off  and the right edge will be lap or butt.  I was thinking of cutting the 3 sections to size and tack and screw into place.  Then scribe a line for the front and right side edge, then run green frog tape along the edge as a guide for cutting.  Then make my cuts.  I should have a little wiggle room at the rear edge.


__________________

Jim L

Lake City


1K+ Club

Status: Offline
Posts: 1299
Date:
Permalink  
 

Sounds like a good plan.

__________________

Bruce L. - Lakeville MN

1971 Malibu Convert


2K+ Club

Status: Offline
Posts: 2684
Date:
Permalink  
 

Making progress thanks to Mitch’s suggestions.  Drop-offs are excellent. Just a few little final cuts. Then clean, get metal prepaired, treat residual rust, and apply weld through. And start screwing sections into place.  Then more welding practice and dig in.


Attachments
__________________

Jim L

Lake City


President

Status: Offline
Posts: 7257
Date:
Permalink  
 

Looking good. Now is the time to blow all the crap out of that drop. There is a drain hole at the back too, but it may be behind the bumper now.


__________________

Mitch D.   River Falls, WI

Lifetime member of the "Cars apart Club"

Some Assembly Required

1966 Chevelle SS 396 M20

1970 Chevelle SS 396 M20

1967 Camaro SS 350 rs


2K+ Club

Status: Offline
Posts: 2684
Date:
Permalink  
 

Just finished that this afternoon.  Stapels, bottle caps, sealant, paper, and a clip.  One side was missing the plugs, the other side still had both.  Bumper and brackets all finished and ready for install after the fuel tank is back in.  Tomorrow I plan to clean up the bottom for paint and grind down the areas when the flange will be welded.  I am still thinking about leaving the seam and about two inches  of the wheelhouse and leave the body mount brace in place.  I guess I won't fully decide until I have the center section screwed down by about 6 screws. 


__________________

Jim L

Lake City


President

Status: Offline
Posts: 7257
Date:
Permalink  
 

Use a drill and drill thru the spot welds for the mount bracket. You can then remove the old floor flange and slip the new one between. This will help you "fit" the new pan radius to the wheel house anyway. It may take some re-shaping and pie cutting to get the radius to match. Plug weld the holes shut after the pan is welded in up top. The brace holes will require welding under the car, but only for ~ 3 plugs. You'll be a pro welder by the time you need to do those...thumbsup


__________________

Mitch D.   River Falls, WI

Lifetime member of the "Cars apart Club"

Some Assembly Required

1966 Chevelle SS 396 M20

1970 Chevelle SS 396 M20

1967 Camaro SS 350 rs


1K+ Club

Status: Offline
Posts: 1299
Date:
Permalink  
 

Looking good!

__________________

Bruce L. - Lakeville MN

1971 Malibu Convert


2K+ Club

Status: Offline
Posts: 2684
Date:
Permalink  
 

Lost in the 60s wrote:

Use a drill and drill thru the spot welds for the mount bracket. You can then remove the old floor flange and slip the new one between. This will help you "fit" the new pan radius to the wheel house anyway. It may take some re-shaping and pie cutting to get the radius to match. Plug weld the holes shut after the pan is welded in up top. The brace holes will require welding under the car, but only for ~ 3 plugs. You'll be a pro welder by the time you need to do those...thumbsup


 Investigated that bracket a little more today.  It seems the flange that slips down behind the wheel-house is about 1" long where the new one is only about 1/2" long.  Just did a little estimate of the difference between welding in the panel replacing my  1st option and only saves me about 10" of a butt or flange weld.  But I would have to  drill out the spot-welds.  I will have to grind and most likely bondo and or seam seal the weld either way.

Right now I got into exploring removing all that old crap someone spray on the quarters, wheel-houses, the upper trunk, and tail panel.  I think I should do that  first since it will be a lot easier standing thenow open  hole.  What else can someone do during these times.  Its coming pretty good except in the bottom of the trunk and the inner wheelhouses where  someone sprayed some  gunky stuff over the original finish and then spayed a gray coating over that.  Upper trunk pan is coming off relatively ease if one can ever say that painful job is easy. I wish I could hire some kid that is laying around and playing video games.


-- Edited by jim larson on Sunday 22nd of March 2020 03:27:18 PM

Attachments
__________________

Jim L

Lake City


Vice President

Status: Offline
Posts: 478
Date:
Permalink  
 

jim larson wrote:
Lost in the 60s wrote:

Use a drill and drill thru the spot welds for the mount bracket. You can then remove the old floor flange and slip the new one between. This will help you "fit" the new pan radius to the wheel house anyway. It may take some re-shaping and pie cutting to get the radius to match. Plug weld the holes shut after the pan is welded in up top. The brace holes will require welding under the car, but only for ~ 3 plugs. You'll be a pro welder by the time you need to do those...thumbsup


 Investigated that bracket a little more today.  It seems the flange that slips down behind the wheel-house is about 1" long where the new one is only about 1/2" long.  Just did a little estimate of the difference between welding in the panel replacing my  1st option and only saves me about 10" of a butt or flange weld.  But I would have to  drill out the spot-welds.  I will have to grind and most likely bondo and or seam seal the weld either way.

Right now I got into exploring removing all that old crap someone spray on the quarters, wheel-houses, the upper trunk, and tail panel.  I think I should do that  first since it will be a lot easier standing thenow open  hole.  What else can someone do during these times.  Its coming pretty good except in the bottom of the trunk and the inner wheelhouses where  someone sprayed some  gunky stuff over the original finish and then spayed a gray coating over that.  Upper trunk pan is coming off relatively ease if one can ever say that painful job is easy. I wish I could hire some kid that is laying around and playing video games.


-- Edited by jim larson on Sunday 22nd of March 2020 03:27:18 PM


 Jim

I usually don't like to chime in on body repair issues like this as this is not my expertise and, I think with the skills between Karl and Mitch and probably some others in the club we have some real talent hear.

Now for what its worth,  picture #2, unless I'm missing something, rather than trying to but weld the long diagonal at the left foreword corner, you are so close to the wheel house pinch weld, so follow the tap line to the inner wheel house and replace right up and around to the drop. Plug welds at the pinch weld are so much easier to do then but welding. You can hide a lot at with seam sealer at the floor to wheel house joint if you need to. If the pinch weld is fat, then drilling the spot welds and removing that part of the floor and allows you to clean up the rust from that part of the seam.


__________________

Bob W.

Lino Lakes


2K+ Club

Status: Offline
Posts: 2684
Date:
Permalink  
 

Yes Bob I am also considering a butt weld about 7/16” following the wheelhouses and then straight across.


__________________

Jim L

Lake City


2K+ Club

Status: Offline
Posts: 2684
Date:
Permalink  
 

Not only is China responsible for keeping us home; but cheap alunimunparts.  5-9 business days be for the replacement part will be here.


-- Edited by jim larson on Monday 23rd of March 2020 02:48:01 PM

Attachments
__________________

Jim L

Lake City


President

Status: Offline
Posts: 7257
Date:
Permalink  
 

Probably not designed for 22 gauge, only up to 19...rolleyes


__________________

Mitch D.   River Falls, WI

Lifetime member of the "Cars apart Club"

Some Assembly Required

1966 Chevelle SS 396 M20

1970 Chevelle SS 396 M20

1967 Camaro SS 350 rs


Mega Poster

Status: Offline
Posts: 718
Date:
Permalink  
 

That sure is a lot of work but you’re doing a very nice job from what it looks. I remember when I did Stan’s trunk in his car the previous owner had used a quarter inch plate for his trunk pan removing the old one probably lighten it up by 50 pounds or more. Keep up the good work looking forward to seeing your pictures as it continues. Stay safe and healthy.

__________________


2K+ Club

Status: Offline
Posts: 2439
Date:
Permalink  
 

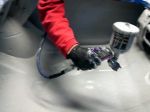
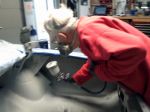
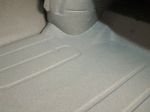
There is light at the end of the tunnel, I sprayed my trunk repair that I started over two years ago today with Zolatone 20. Yep, that's me with the two week overdue haircut


Attachments
__________________

Kevin

Northwestern Ohio


1K+ Club

Status: Offline
Posts: 1299
Date:
Permalink  
 

Looking good!

__________________

Bruce L. - Lakeville MN

1971 Malibu Convert


2K+ Club

Status: Offline
Posts: 2684
Date:
Permalink  
 

Hey Kevin thanks, your success give me  encouragement.  Your trunk looks good, what Zolatone color did use?. Hopfully 2-3 more days of final sanding and cleaning.  I am taking the frame down to bare steel.  Then I want to paint that with 2k epoxy. Then the same for trunk side of wthe tail panel, the inside of the quarters, and the outer wheelhouses in the trunk, then a finish coat on the frame.

When that is all done then back to fitting and welding in the trunk floor panels. Finally finish the 2k epoxy primer and completer the trunk with zolatone.


Attachments
__________________

Jim L

Lake City


President

Status: Offline
Posts: 7257
Date:
Permalink  
 

Might as well do it all now, being house bound. You can't go running off somewhere fishing for weeks now...laughing


__________________

Mitch D.   River Falls, WI

Lifetime member of the "Cars apart Club"

Some Assembly Required

1966 Chevelle SS 396 M20

1970 Chevelle SS 396 M20

1967 Camaro SS 350 rs


2K+ Club

Status: Offline
Posts: 2439
Date:
Permalink  
 

jim larson wrote:

Hey Kevin thanks, your success give me  encouragement.  Your trunk looks good, what Zolatone color did use?. Hopfully 2-3 more days of final sanding and cleaning.  I am taking the frame down to bare steel.  Then I want to paint that with 2k epoxy. Then the same for trunk side of wthe tail panel, the inside of the quarters, and the outer wheelhouses in the trunk, then a finish coat on the frame.

When that is all done then back to fitting and welding in the trunk floor panels. Finally finish the 2k epoxy primer and completer the trunk with zolatone.


 Jim, The Zolatone I used was Silver Gray. Not sure if that's your color but there are several other colors available.  

If I could make a suggestion, it may conflict with the purest Chevelle restorer but here it is. There are several excellent products out there, 2K primer is one of them, there are others available, less wis-bang but for your application more than adequate.  

I would clean the frame then paint it with Rustoleum Rusty Metal Primer followed with two coats of Rustoleum Enamel semi-gloss black all applied with a roller and paintbrush or if you feel the need spray it. Laying on your back cleaning, masking, protecting the rest of the body and spraying is ugly work and very time consuming.  I did my Elky underside and five years later it looked excellent. Rustoleum is inexpensive, easy to apply can be easily touched up if needed.  

Don't allow yourself to get sucked into the rolling snowball thing and still be under the car this summer. Clean things up finish welding the trunk, paint the underside, spray Zolatone in the trunk and you can be driving the car with the top down in six weeks. 

Like I said, not for the puritan.   


__________________

Kevin

Northwestern Ohio


1K+ Club

Status: Offline
Posts: 1169
Date:
Permalink  
 

Satin Rustoleum is a "Fabulous" product.
Sprays out well, covers, dries fast.

Agree with Kevin, use it wherever and whenever you can.

Karl

__________________

More ambition than brains,

If you have more than 5 of anything, best to stop counting!


2K+ Club

Status: Offline
Posts: 2684
Date:
Permalink  
 

Thanks guys,  I took Kevins advise yesterday.  Products not available in little old Lake City, so I ordered from Amazon.  Just final cleaning of the frame and the inside of the trunk that I want to paint before I go back to fitting and welding the panels.  2k Epoxy primer for trunk tail panel, quarter panels, outer wheel-houses, and upper trunk floor.  Then Rust-Oleum Rusty Primer for the frame followed by Rust-Oleum Semi-gloss Enamel.


__________________

Jim L

Lake City


1K+ Club

Status: Offline
Posts: 1299
Date:
Permalink  
 

more ambition than brains wrote:

Satin Rustoleum is a "Fabulous" product.
Sprays out well, covers, dries fast.

Agree with Kevin, use it wherever and whenever you can.

Karl


Not sure if it is "Fabulous" or not, but totally trust Karl's opinion.

Satin Rustoleum has been my go to paint on the 71 for a lot of items by default.rolleyes


__________________

Bruce L. - Lakeville MN

1971 Malibu Convert


2K+ Club

Status: Offline
Posts: 2684
Date:
Permalink  
 

A little more progress. Frame has finish coats of Rust-Oleum on. 2k epoxy primer on certain areas.   I think it need a bit more primer for good coverage or maybe just go over it with a black black Rust-Oleum finish coat.  Then I can put the extension light housing back on along with the bumper.  So car will be drivable with Mercury Outboard gas tank.  Then  back to fitting sections an welding.

How do the quarter panels and tail panels  look Mitch?  Wish I ha d known about the spray at any angle spay cap earlier.


-- Edited by jim larson on Wednesday 8th of April 2020 11:17:35 AM

Attachments
__________________

Jim L

Lake City


President

Status: Offline
Posts: 7257
Date:
Permalink  
 

If you are going to spray the quarter and tail panels with Zolatone, they are probably good. If not and they will remain black, the paint looks thin in the pics.

__________________

Mitch D.   River Falls, WI

Lifetime member of the "Cars apart Club"

Some Assembly Required

1966 Chevelle SS 396 M20

1970 Chevelle SS 396 M20

1967 Camaro SS 350 rs


2K+ Club

Status: Offline
Posts: 2684
Date:
Permalink  
 

Lost in the 60s wrote:

If you are going to spray the quarter and tail panels with Zolatone, they are probably good. If not and they will remain black, the paint looks thin in the pics.


 yes the plan is for zolatone; however I just ordered some more paint and plan to spray the quarters and the tail panel again,  yes kind of thin.  


__________________

Jim L

Lake City


2K+ Club

Status: Offline
Posts: 2439
Date:
Permalink  


Jim, your so lucky your drop down panels where in good shape, I had to hand make mine. Zolatone covers very well, from what I can see it looks like your ready to spray what you have prepared. Is there a reason you’re not welding the pan in place now? The frame looks good. Did you spray it with a gun? Frame may need touch up after welding so make sure you sequence correctly..
I not sure I understand the outboard motor fuel tank, unless you want to us the car for fishing. Your very close to being done once the pan is in.
I’ve pasted a link below for Zoltone application Ztone recommends specific colors for the base coat depending on top coat.
I used 1/2 gal of Ztone (three coats) for a heavy application to the trunk pan, inner quarters and inner wheel wells and rear bulkhead where the taillights are mounted; I think the trunk in the 65 Buick is longer than the Chevelle.


www.quest-ip.com/wp-content/uploads/2014/04/Zolatone-20-Series-TDS.pdf

__________________

Kevin

Northwestern Ohio


2K+ Club

Status: Offline
Posts: 2684
Date:
Permalink  
 

Depending upon how my welding skills progress I may just tack weld and screw down.  The get the body guy in town to finish welding when he has freed up time.  So I have a outboard motor gas tank with the hose hooked up to the gas line.  Just a quick disconnect like is the fishing boat.  I just throw in a piece of plywood and strap thins down.

if things go as planned no welding from under the car.


__________________

Jim L

Lake City


2K+ Club

Status: Offline
Posts: 2684
Date:
Permalink  
 

Specter section welded in.  Went pretty well except front seam that I cut a little short. More grinding to do tomorrow and then I can start on the other sections.


Attachments
__________________

Jim L

Lake City


2K+ Club

Status: Offline
Posts: 2684
Date:
Permalink  
 

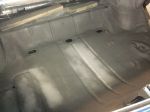
Just applied epoxy primer this morning.  Still some filler to apply, then another coat of the 2k epoxy primer.  Probably will wait until fall for the spatter paint or Zolatone.  I have to buy a spray gun.  Now if. The body shop gets to  the hood I should be good for the summer.


Attachments
__________________

Jim L

Lake City


2K+ Club

Status: Offline
Posts: 2439
Date:
Permalink  
 

Looks great Jim. will you be installing the fuel tank now?


__________________

Kevin

Northwestern Ohio


President

Status: Offline
Posts: 7257
Date:
Permalink  
 

jim larson wrote:

Just applied epoxy primer this morning.  Still some filler to apply, then another coat of the 2k epoxy primer.  Probably will wait until fall for the spatter paint or Zolatone.  I have to buy a spray gun.  Now if. The body shop gets to  the hood I should be good for the summer.


 Jim, I have a spray gun you/we can use for the Zolatone, don't go buy one just for that.

What size tip do they recommend ? I have 3 to chose from.


__________________

Mitch D.   River Falls, WI

Lifetime member of the "Cars apart Club"

Some Assembly Required

1966 Chevelle SS 396 M20

1970 Chevelle SS 396 M20

1967 Camaro SS 350 rs


2K+ Club

Status: Offline
Posts: 2684
Date:
Permalink  
 

dashboard wrote:

Looks great Jim. will you be installing the fuel tank now?


 I have a little work underneath.  All original undercoating remains. Except where the driver side section was replaced.  I plan to apply some in that area so it matches the right side and the wheel wells.  Then the fuel tank goes in.  It has been completely stripped, primed with 2k epoxy, and sprayed with a tank tone.  Tank straps are also done, so hope to be done with all that by Monday or Tuesday.  Then drive with the spare hood until the one at the body shop gets mine painted.


__________________

Jim L

Lake City


2K+ Club

Status: Offline
Posts: 2684
Date:
Permalink  
 

Lost in the 60s wrote:
jim larson wrote:

Just applied epoxy primer this morning.  Still some filler to apply, then another coat of the 2k epoxy primer.  Probably will wait until fall for the spatter paint or Zolatone.  I have to buy a spray gun.  Now if. The body shop gets to  the hood I should be good for the summer.


 Jim, I have a spray gun you/we can use for the Zolatone, don't go buy one just for that.

What size tip do they recommend ? I have 3 to chose from.


 Thanks for the offer Mitch.  I first think I should buy a filter and moisture remover or is that not necessary  for applying Zolatone? From what I’d read your suppose to just use a cheap HVLP gun.  I think there are instructions as to the size tip.  I’ll get back to you as it gets closer to the fall.


__________________

Jim L

Lake City


President

Status: Offline
Posts: 7257
Date:
Permalink  
 

Gun has a filter in it and I use a disposable drier that screws right on the air intake of the gun, no high buck, special "stuff" needed. I'm sure we can clean it good after use with lacquer thinner. The paint goes in a "sleeve" and keeps the canister clean, but also allows the gun to be used upside down for spraying at odd angles, which the trunk will be.

__________________

Mitch D.   River Falls, WI

Lifetime member of the "Cars apart Club"

Some Assembly Required

1966 Chevelle SS 396 M20

1970 Chevelle SS 396 M20

1967 Camaro SS 350 rs


2K+ Club

Status: Offline
Posts: 2684
Date:
Permalink  
 

Lost in the 60s wrote:

Gun has a filter in it and I use a disposable drier that screws right on the air intake of the gun, no high buck, special "stuff" needed. I'm sure we can clean it good after use with lacquer thinner. The paint goes in a "sleeve" and keeps the canister clean, but also allows the gun to be used upside down for spraying at odd angles, which the trunk will be.


 Sounds like a plan.   Are you working now or home most weekdays for a tour?


__________________

Jim L

Lake City

1 2  >  Last»  | Page of 2  sorted by
 
Quick Reply

Please log in to post quick replies.

Chatbox
Please log in to join the chat!