Discussion Forum - Northstar Chevelle Club

Members Login
Username 
 
Password 
    Remember Me  
Post Info TOPIC: Factory Five Mk4 Roadster Build - 40 Watt Garage


Active Member

Status: Offline
Posts: 474
Date:
RE: Factory Five Mk4 Roadster Build - 40 Watt Garage
Permalink  


Nice work John.

Neat idea for the bushing on the shift fork.

you‘ll be glad to have a few small projects behind you when the big parts arrive..


__________________

Chris S.

Oak Grove

'68 Malibu (His)

'68 442 (Hers)


2K+ Club

Status: Offline
Posts: 2791
Date:
Permalink  
 

Still putzing around with "accessory" parts.

I had two items on backorder with my package from Forte's Performance - the engine plastic and the ECU. The plastic showed up yesterday, and just screamed for a little attention.

A little "Ford Blue" on the VC/Injector covers really made them pop. It took more time and patience than anything (and about 6 X-Acto blades), but the result is nice!


Attachments
__________________


John D. - St. Louis Park, MN.

1965 El Camino - LT-1, 4L60e, 4wh discs, SC&C susp.
2013 F-150 Platinum - Twin Turbo 3.5

2018 Factory Five MkIV Roadster build thread


2K+ Club

Status: Offline
Posts: 2791
Date:
Permalink  
 

Talked to the shipping dispatcher for Stewart Transport on Monday afternoon. She assures me that my kit will be loaded today, and be delivered this week.

Fingers_Crossed.jpg      breath01.jpg    


Attachments
__________________


John D. - St. Louis Park, MN.

1965 El Camino - LT-1, 4L60e, 4wh discs, SC&C susp.
2013 F-150 Platinum - Twin Turbo 3.5

2018 Factory Five MkIV Roadster build thread


2K+ Club

Status: Offline
Posts: 2791
Date:
Permalink  
 

It is ON THE TRUCK!nana

I have double verification - I called FFR yesterday and spoke to the delivery/warehouse manager. In his words "Yeah, I think I'm happier than you, your kit's been here awhile! It is on the truck."
Later in the afternoon the driver called me with his preliminary schedule. I'm his last stop. His route is MA to FL, then working north. From my house he heads back to MA for another load. It's looking like mid to late next week.

(FFR must have wanted "me" outta there! 1st kit on the truck... which also means last off)


__________________


John D. - St. Louis Park, MN.

1965 El Camino - LT-1, 4L60e, 4wh discs, SC&C susp.
2013 F-150 Platinum - Twin Turbo 3.5

2018 Factory Five MkIV Roadster build thread


Member

Status: Offline
Posts: 26
Date:
Permalink  
 

One of the coolest projects I saw. I really like the dashboard.

__________________


Mega Poster

Status: Offline
Posts: 711
Date:
Permalink  
 

If your work really really fast like the car shows you can have it done for the State Fair Event.


__________________


2K+ Club

Status: Offline
Posts: 2791
Date:
Permalink  
 

TODAY IS THE DAY!

There will be a semi-truck at the end of my driveway, mid/late morning, but before noon.

If anyone wants to stop by, feel free to do so! (I might put you to work schlepping boxes though...)

__________________


John D. - St. Louis Park, MN.

1965 El Camino - LT-1, 4L60e, 4wh discs, SC&C susp.
2013 F-150 Platinum - Twin Turbo 3.5

2018 Factory Five MkIV Roadster build thread


President

Status: Offline
Posts: 7274
Date:
Permalink  
 

Shoot me your address in a PM.


__________________

Mitch D.   River Falls, WI

Lifetime member of the "Cars apart Club"

Some Assembly Required

1966 Chevelle SS 396 M20

1970 Chevelle SS 396 M20

1967 Camaro SS 350 rs


Founding Member

Status: Offline
Posts: 2750
Date:
Permalink  
 

Looking forward to seeing it!

__________________

Derek Kiefer - Mantorville, MN

69 Malibu Pro-Touring stroker LS1-383/T56 - 69 SS396-325/3spd project


President

Status: Offline
Posts: 7274
Date:
Permalink  
 

It's in his garage, but he may have gone to work right after we unloaded it...dunno

Chassis and body look to be really high quality fit and finish. Now he just has 25 boxes of parts to put on it...whew


__________________

Mitch D.   River Falls, WI

Lifetime member of the "Cars apart Club"

Some Assembly Required

1966 Chevelle SS 396 M20

1970 Chevelle SS 396 M20

1967 Camaro SS 350 rs


2K+ Club

Status: Offline
Posts: 2791
Date:
Factory Five Mk4 Roadster Build - 40 Watt Garage - It's Here!!
Permalink  


Foremost I'd like to thank Mitch and my two new FFR buddies Jeff & John for stopping by and helping unload. Mitch was in the trailer with the driver bringing stuff forward, Jeff was loading & toting boxes, and John was shooting the pictures. (I think the Stewart driver was relieved too... saved him a lot of trips!)

And no, I didn't go to work on it "right after" you guys went home - I took a potty break and THEN went to work razz  
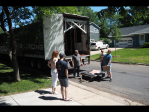
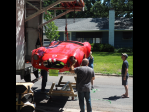
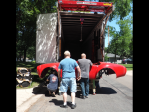
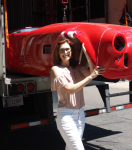
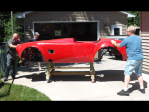
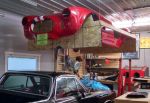
. I also waited for my neighbor to go inside, didn't need that distraction - Mitch eek2

In all there were 26 boxes, 4 wheel/tire assy's, and the body & chassis. As the boxes come off the truck, they are checked off on the master list.
The dolly worked perfectly, rolls very easily and is rock-stable.

I spend the rest of the day (and into the evening) doing inventory of the box contents. There's a VERY detailed packing list that literally lists every bolt/nut/washer in every box. Hardware "kits" are pre-bagged and numbered for the sub-assembly they serve, and the box contents are pretty much geared to a sub-assembly (front suspension in box 14, rear suspension in box 17, etc.)

I have one more box to inventory (stainless sidepipes/exhaust) and that's done. So far I only have one "missing" item, and a few pieces on back-order, none of them mission critical to get started.


Attachments
__________________


John D. - St. Louis Park, MN.

1965 El Camino - LT-1, 4L60e, 4wh discs, SC&C susp.
2013 F-150 Platinum - Twin Turbo 3.5

2018 Factory Five MkIV Roadster build thread


3K+ Club

Status: Offline
Posts: 4764
Date:
Factory Five Mk4 Roadster Build - 40 Watt Garage
Permalink  


Momentous day John!  Let the fun begin!  nana

Looks like you even broke a sweat.  More of that to come, and hopefully no blood and tears.  thumbsup


-- Edited by SShink on Tuesday 3rd of July 2018 07:37:42 AM

__________________

Stan S.-Twin Cities 'South Metro'

1972 Malibu Convertible 2nd time around 

1999 SS Camaro LS1-6 speed

Forum influenced terms: 'Link Paste', 'Stanitized', & 'Revolving garage door...' 


President

Status: Offline
Posts: 7274
Date:
Permalink  
 

It was rather humid and it didn't take much exertion to break a sweat. The unloading process went very smooth and quick.

I don't remember where you got the specs for the chassis cart, but the frame tubes dropped into the 4 radiused posts like it had been there a hundred times before, it didn't even rock...very impressive...tiphat

John, I thought you had gotten a call to go into "work", not work on the car and I have no idea what you are referring to as a distraction...dunno  

I-know-nothing-schultz.jpg


-- Edited by Lost in the 60s on Tuesday 3rd of July 2018 08:08:40 AM

__________________

Mitch D.   River Falls, WI

Lifetime member of the "Cars apart Club"

Some Assembly Required

1966 Chevelle SS 396 M20

1970 Chevelle SS 396 M20

1967 Camaro SS 350 rs


2K+ Club

Status: Offline
Posts: 2791
Date:
Permalink  
 

Just razzin' you Mitch...
(but there may be a safety protocol needed "No power tools in use at the 40 Watt on sunny summer days when Katie, Kelsey, Addie, or Chelsea are home" rolleyes tsktsk dunno)

The frame dimensions are on the FFR forum, but it's pretty basic. The main 4-inch tubes are 24" on center - It's "builder's discretion" after that. 

Most of the guys build a glorified flat cart about 8" high, and then fight it while running plumbing, and see a chiropractor after the cockpit work.

I wanted something that would get the car low enough to do the under-chassis systems (brakes & fuel) without doing abs crunches, and high enough to do the cockpit tin/wiring/suspension without stooping over all day. Plus have it safe, solid, and mobile without a lot of structure in the way.


__________________


John D. - St. Louis Park, MN.

1965 El Camino - LT-1, 4L60e, 4wh discs, SC&C susp.
2013 F-150 Platinum - Twin Turbo 3.5

2018 Factory Five MkIV Roadster build thread


2K+ Club

Status: Offline
Posts: 2791
Date:
Permalink  
 

Made some progress today.
Got the body off the chassis, and built a rig to store it for the next however-many-months.

"Blackie" is a bit nervous, but I'm ok with it.


Attachments
__________________


John D. - St. Louis Park, MN.

1965 El Camino - LT-1, 4L60e, 4wh discs, SC&C susp.
2013 F-150 Platinum - Twin Turbo 3.5

2018 Factory Five MkIV Roadster build thread


3K+ Club

Status: Offline
Posts: 4764
Date:
Permalink  
 

Maybe throw another 2x4 on the bottom between the two plywood panels?  I'd feel better with a little more rigidity there.

What are your plans for when the white stuff returns?  Surely you're not putting Sheryl's car outside????  razz


__________________

Stan S.-Twin Cities 'South Metro'

1972 Malibu Convertible 2nd time around 

1999 SS Camaro LS1-6 speed

Forum influenced terms: 'Link Paste', 'Stanitized', & 'Revolving garage door...' 


2K+ Club

Status: Offline
Posts: 2791
Date:
Permalink  
 

There is another 2x4 spanning between the OSB, down near bottom-center... Just can't see it.
It looks a little willy, but all the weight (+/- 150lbs) is transferred to the 4 corners.
There's also a "spreader" spanning the cockpit opening fore/aft to keep the body from flexing at the door openings.

I'll have to find a place to store Blackie for the winter.


__________________


John D. - St. Louis Park, MN.

1965 El Camino - LT-1, 4L60e, 4wh discs, SC&C susp.
2013 F-150 Platinum - Twin Turbo 3.5

2018 Factory Five MkIV Roadster build thread


3K+ Club

Status: Offline
Posts: 4764
Date:
Permalink  
 

John D wrote:

There is another 2x4 spanning between the OSB, down near bottom-center... Just can't see it.
It looks a little willy, but all the weight (+/- 150lbs) is transferred to the 4 corners.
There's also a "spreader" spanning the cockpit opening fore/aft to keep the body from flexing at the door openings.

I'll have to find a place to store Blackie for the winter.


I figured you wouldn't let things get too wonky John.

Let's stay in touch on the Blackie storage.  Looks like I'm going to be able to make the 30x32 shop work, so might have some room.  I'll post more as things get finalized.


__________________

Stan S.-Twin Cities 'South Metro'

1972 Malibu Convertible 2nd time around 

1999 SS Camaro LS1-6 speed

Forum influenced terms: 'Link Paste', 'Stanitized', & 'Revolving garage door...' 


President

Status: Offline
Posts: 7274
Date:
Permalink  
 

SShink wrote:

Let's stay in touch on the Blackie storage.  Looks like I'm going to be able to make the 30x32 shop work, so might have some room.  I'll post more as things get finalized.


 Are you limited to that size by code/lot size ?

Bigger really is better, when it comes to a building...thumbsup


__________________

Mitch D.   River Falls, WI

Lifetime member of the "Cars apart Club"

Some Assembly Required

1966 Chevelle SS 396 M20

1970 Chevelle SS 396 M20

1967 Camaro SS 350 rs


3K+ Club

Status: Offline
Posts: 4764
Date:
Permalink  
 

Lost in the 60s wrote:
SShink wrote:

Let's stay in touch on the Blackie storage.  Looks like I'm going to be able to make the 30x32 shop work, so might have some room.  I'll post more as things get finalized.


 Are you limited to that size by code/lot size ?

Bigger really is better, when it comes to a building...thumbsup


Don't want to derail JD's post with this, but yes I'm limited to 960 S.F. since I fall in the 0-2 acre category per East Bethel city code.  


__________________

Stan S.-Twin Cities 'South Metro'

1972 Malibu Convertible 2nd time around 

1999 SS Camaro LS1-6 speed

Forum influenced terms: 'Link Paste', 'Stanitized', & 'Revolving garage door...' 


2K+ Club

Status: Offline
Posts: 2791
Date:
Permalink  
 

I've been on the road all last week (Brookings SD), with an itch I couldn't scratch! hyper
Lucky for me I have a wonderful/beautiful/compassionate woman who told me "I know it's killing you, go out to the shop and work on your car... BUT - You're taking me out to dinner tonight!" DEAL!! cool

Sat. 7/14
Some of the 1st steps in the build manual instruct you to pull all the tins, save the screws, and get started with the front wheelhouse "F" panels and suspension.
However this got me thinking.
Looking at the panel attachment/alignment from the factory - It's really pretty damn good! Whoever's putting the panels in, and running the TEK screws in is doing a very good job. Why waste all this work? I decided to work on the footbox & firewall tins first. I've got all the tins from the firewall forward fitted, trimmed, holes deburred, and in a pile for paint.

The only trimming needed was where a panel layed down/ended on a flat near a weld bead. (I'm guessing the tins were laid out off of the CAD file for the frame, and if there was no weld bead, the edges would line up exactly.) I had to trim off between 1/8 & 3/16 in a few areas to get the panel to sit flat. No big deal.
Also, when the panels are Cleco'd together, I marked any areas or corners that really should have a radius on them.

After all the holes were drilled and the panels removed, I twirled the countersink (by hand!) in each hole to break the burr off, used file & snips to make any radii I noted.

Sunday will probably be deburring the long edges & cleaning, and shooting the panels with some acid-etch primer. (Haven't decided on final color yet).

You'll also see a few reasons for my "elevated" chassis dolly.

Off to Wausau WI for this week...


Attachments
__________________


John D. - St. Louis Park, MN.

1965 El Camino - LT-1, 4L60e, 4wh discs, SC&C susp.
2013 F-150 Platinum - Twin Turbo 3.5

2018 Factory Five MkIV Roadster build thread


President

Status: Offline
Posts: 7274
Date:
Permalink  
 

Looking great on the tin work.

Just a word of caution on the primer. You may want to decide on the final color product and use the primer they recommend. Not all paints get along with acid etch primer and very few gun paints will adhere well to an aerosol primer. I think the tins would be well served with a single stage urethane, as it is very durable by itself and has clear in it for a shine, if wanted. Hopefully Karl will ad his vast experience...


__________________

Mitch D.   River Falls, WI

Lifetime member of the "Cars apart Club"

Some Assembly Required

1966 Chevelle SS 396 M20

1970 Chevelle SS 396 M20

1967 Camaro SS 350 rs


2K+ Club

Status: Offline
Posts: 2791
Date:
Permalink  
 

The tins with be rattle can'd, and I'll be using some tried & true products that are compatible. 99% of the tin will be concealed by the body, or carpeted... I just want something on it for corrosion protection. (Believe it or not there were a few sweat drips on the floorpan, and now a week later it's a white corrosion spot!)

I'm bending towards leaving the exposed aluminum in the engine bay raw, but clear coated.

What I'm really curious about is either a seam-sealer or panel bonding goo. Something I can brush or run a bead before I final rivet the panels together.

__________________


John D. - St. Louis Park, MN.

1965 El Camino - LT-1, 4L60e, 4wh discs, SC&C susp.
2013 F-150 Platinum - Twin Turbo 3.5

2018 Factory Five MkIV Roadster build thread


Mega Poster

Status: Offline
Posts: 706
Date:
Permalink  
 

I would go with a seam sealer between the panels, rivet them together, etch prime it, use an epoxy paint and then finish it with a roll on bed liner in a can (if not is a hot zone). You will never have to worry about corrosion of those panels and the bedliner material will dampen any tinny sounds.


-- Edited by Enganeer on Monday 16th of July 2018 06:52:13 PM

__________________

John E - Rogers, MN

Instructions? All I need is the exploded view.
70 El Camino soon to be ls1/t56
64 Malibu SS


1K+ Club

Status: Offline
Posts: 1175
Date:
Permalink  
 

I would probably prep and refinish all individual pieces before final assembly.
Assemble, seam seal, light scuff and re-spray completed assembly.

If I missed in post:
You mentioned aluminum, but also described panels as "tin"
Panels are which material, steel or aluminum.
Rivets compatible product?

Paint:

Soap and water wash, blow dry.
Surface sand, 240 grit, and scuff pad
Remove all lettering.
Solvent clean.
Tack towel for dust.
Spray desired product.

I have started using a lot of semi-gloss (satin) black Rustoleum aerosol.
Confirm correct product if panels are aluminum.
They also have one product that is a primer and color.
Or, prime and topcoat.

A two part epoxy, plus single stage top coat would also be great, other that safety and re-touch issues.

I doubt you will put snow tires and chains on this treasure and drive in winter.
If it is like my Biscayne, it will rarely get any kind of H2o except by getting caught out.

There are also some structural panel bonding materials out there that are designed to work with rivets.

If that product is used and riveted, eliminates need to caulk, just clean off squeeze out and re-spray.

It will never come apart then.

Great to see you are having so much fun, you deserve it!

Karl


beers


-- Edited by more ambition than brains on Tuesday 17th of July 2018 07:54:25 AM

__________________

More ambition than brains,

If you have more than 5 of anything, best to stop counting!


Active Member

Status: Offline
Posts: 461
Date:
Permalink  
 

I just want to know, when you were sitting in the chassis, did you you make "VROOM" noises?

__________________

Larry L.

Coon Rapids


3K+ Club

Status: Offline
Posts: 4764
Date:
Permalink  
 

Larry Lucast wrote:

I just want to know, when you were sitting in the chassis, did you you make "VROOM" noises?


He better have or that's 3 checks off his gearhead card!   gearbanger


__________________

Stan S.-Twin Cities 'South Metro'

1972 Malibu Convertible 2nd time around 

1999 SS Camaro LS1-6 speed

Forum influenced terms: 'Link Paste', 'Stanitized', & 'Revolving garage door...' 


President

Status: Offline
Posts: 7274
Date:
Permalink  
 

Larry Lucast wrote:

I just want to know, when you were sitting in the chassis, did you you make "VROOM" noises?


 I'm pretty sure I heard him do that, faintly, while we were strapping the chassis on his cart, right off the truck...cool


__________________

Mitch D.   River Falls, WI

Lifetime member of the "Cars apart Club"

Some Assembly Required

1966 Chevelle SS 396 M20

1970 Chevelle SS 396 M20

1967 Camaro SS 350 rs


2K+ Club

Status: Offline
Posts: 2791
Date:
Permalink  
 

I would probably prep and refinish all individual pieces before final assembly.
Assemble, seam seal, light scuff and re-spray completed assembly.

If I missed in post:
You mentioned aluminum, but also described panels as "tin"
Panels are which material, steel or aluminum.
Rivets compatible product?

Sorry for the confusion... I'm using the word "tins" as referring to all of the footbox/interior/trunk panels/etc. - and everything is .040 6062 aluminum sheetgoods. There is no coating on anything, raw aluminum. 


I doubt you will put snow tires and chains on this treasure and drive in winter.
If it is like my Biscayne, it will rarely get any kind of H2o except by getting caught out.

Yes, as you surmised it won't be caught out in the rain... the $4k soft-top "option" wasn't in the budget.!


There are also some structural panel bonding materials out there that are designed to work with rivets.

If that product is used and riveted, eliminates need to caulk, just clean off squeeze out and re-spray.

It will never come apart then.

Yup... everything is riveted (aluminum pop rivets) either alum to alum, or alum to steel. My concern/question is a product to use between the alum to alum "footbox" and other panels to bond them together, bridge some gaps/fill holes, create a water-tight seal, and have a "toolable" and paintable squeeze-out.

FFR suggests using clear silicone sealant between panels (??!!) That's great if you don't want a structural bond that's paintable (?)...


__________________


John D. - St. Louis Park, MN.

1965 El Camino - LT-1, 4L60e, 4wh discs, SC&C susp.
2013 F-150 Platinum - Twin Turbo 3.5

2018 Factory Five MkIV Roadster build thread


2K+ Club

Status: Offline
Posts: 2791
Date:
Permalink  
 

No, I hold the corners of my "Man Card" very dear... I did not yet make "Vroom Vroom" noises holding my lacquered mahogany steering wheel - Yet.

I have to save the corners - this thing has an assembly manual thicker than an LA phonebook. I can only "ask for directions" so many times!


__________________


John D. - St. Louis Park, MN.

1965 El Camino - LT-1, 4L60e, 4wh discs, SC&C susp.
2013 F-150 Platinum - Twin Turbo 3.5

2018 Factory Five MkIV Roadster build thread


1K+ Club

Status: Offline
Posts: 1175
Date:
Permalink  
 

We have gone through several different iterations of the "proper" method to panel bond and rivet ford truck panels.
The OEM keeps changing their minds, they are really clueless.

I can review current approach with my staff if you like.
As stated, properly applied bonding product with squeeze out will seal pretty well
Clean excess, prime and use a light coat of caulk edge of flange should look great!
I think the adhesive has to be metal to metal, no paint or primer on bonding surface.
Thus, uniform application of bonding product, and uniform squeeze out, with excess removed, but spread along flange.

Will follow up after my research is complete.

Karl


__________________

More ambition than brains,

If you have more than 5 of anything, best to stop counting!


President

Status: Offline
Posts: 7274
Date:
Permalink  
 

A bonding agent between the panels will add strength to the assembly of panels, along with waterproofing. If strength isn't a concern, then your plan to prepaint and then assemble with sealer after, for waterproofing, should be fine. I use Cresco brand sealer and a very small, fine, bristle brush, impervious to lacquer thinner, and smooth the sealer into a barely noticeable seam that can be painted. The only caveat would be in the engine compartment, if you want to leave the aluminum bare, then a bonding agent to serve both purposes would be best, to minimize seeing the sealer.

OR, this weekend, find Race Coatings at SMN and talk to Clinton about the possibility of powdercoating the panels that aren't going to be seen and, possibly Cermachroming the engine bay panels. I don't know how much heat is needed for the Cermachroming process and the aluminum panels my not be suitable for that, due to the possibility of warping, but powdercoating the engine bay panels silver, or a contrasting color is doable.

https://www.racecoatings.com/our-services


__________________

Mitch D.   River Falls, WI

Lifetime member of the "Cars apart Club"

Some Assembly Required

1966 Chevelle SS 396 M20

1970 Chevelle SS 396 M20

1967 Camaro SS 350 rs


2K+ Club

Status: Offline
Posts: 2791
Date:
Factory Five Mk4 Roadster Build - Front Suspension
Permalink  


July has been crazy at the 40 Watt - Between holiday time at the lake, and business travel, I've been "home" about 6 days! Brookings SD for a week, Wausau WI the next, and now I'm writing from Greenville SC.
Sorry I missed y'all at SMN, but I had too many irons in the fire catching up on "honey do's", taking care of Nana Ruth, and (of course) getting in some wrench time on the roadster project.

I Love New Parts! They just bolt together without a fuss. I got to spend a few hours last Friday night, and last Saturday night working on the MkIV.

Friday:
After gathering all my parts together I got started assembling. I am impressed with the weld & jig quality by FFR. I didn't have any problem getting the lower A-Arms into the sockets, although getting a wrench on the upper A-Arm cross-shaft nuts is a bit tricky.

I have the exact same style upper A-Arms on Blackie, and I learned an important lesson installing those - lube the crap out of the adjustment sleeves before bolting them on the car.
antiseize.png

Shock & coil assembly is straightforward (why don't they include an adjustment spanner??)
Spindle & steer-arms is also straightforward, standard suspension stuff.


Attachments
__________________


John D. - St. Louis Park, MN.

1965 El Camino - LT-1, 4L60e, 4wh discs, SC&C susp.
2013 F-150 Platinum - Twin Turbo 3.5

2018 Factory Five MkIV Roadster build thread


President

Status: Offline
Posts: 7274
Date:
Factory Five Mk4 Roadster Build - 40 Watt Garage
Permalink  


Wow, looks great and SO clean !!

If it were me, I would put 90° grease fittings in the lower arms to point straight down. Would most likely make it easier to get a zerk coupling on it later. I see the uppers are already pointing up...

I was hoping to see you at SMN. I had Clinton all primed to shoot you a club discount on powder and ceramic coating on your panels. He didn't get much business from the show and was looking for work.

Reason for the shocks to be upside down from what we know ? I've seen it on mud trucks and dirt buggies. Something about keeping dirt off the piston rod and out of the seals ?

__________________

Mitch D.   River Falls, WI

Lifetime member of the "Cars apart Club"

Some Assembly Required

1966 Chevelle SS 396 M20

1970 Chevelle SS 396 M20

1967 Camaro SS 350 rs


2K+ Club

Status: Offline
Posts: 2791
Date:
Permalink  
 

Saturday night - Rear suspension.

I've wanted to get that 85lb. lump of aluminum and the rear knuckles/hubs off the bench for 2 months.

I stacked a couple of milk-crates, and set the diff on them. Slid it under the car. With an old bath towel on the crossmember to protect the paint, a few drift punches, rubber mallet, and the needed bolts at the ready time to grunt the SOB into place.
It really wasn't too bad. I only had to lift it about 6" up-n-into it's spot, and quick like a bunny slide a drift punch into a rear hole to hold it there. Another drift in the other hole and it was resting nearly in place.
With it "pinned"/almost lined up, now I could finagle it around a bit and get bolts into holes and such. Only took about an hour to get everything locked down.

The rear control arms & toe-rods were a different story. They are a TIGHT fit. It took some considerable thumping with the rubber mallet to get them started into their homes. Once between the welded frame tabs & thumped to where a hole lined up, Mr. Drift Punch was my best friend.
(Once the arms were lined up, and bolts pushed through, everything swings & pivots with little effort and no binding - just a testament as to how accurate and square the jigging & welding at FFR is.)

None of the arm bolts are tight, and I didn't install the coil-over setups... 'cause I'm going to replace the axle-shaft seals on the differential before installing the shafts.


-- Edited by John D on Thursday 26th of July 2018 05:12:36 PM

Attachments
__________________


John D. - St. Louis Park, MN.

1965 El Camino - LT-1, 4L60e, 4wh discs, SC&C susp.
2013 F-150 Platinum - Twin Turbo 3.5

2018 Factory Five MkIV Roadster build thread


2K+ Club

Status: Offline
Posts: 2791
Date:
Permalink  
 

Don't know about why the "body up" orientation of the shocks, other than (maybe) reduction of unsprung weight?

I just couldn't do the SMN's... too much doo-doo going on around here.

I'm still really curious about a bonding goo/seam sealer for the panels.

__________________


John D. - St. Louis Park, MN.

1965 El Camino - LT-1, 4L60e, 4wh discs, SC&C susp.
2013 F-150 Platinum - Twin Turbo 3.5

2018 Factory Five MkIV Roadster build thread


1K+ Club

Status: Offline
Posts: 1175
Date:
Permalink  
 

Will confirm rivet-bonding process tomorrow.
We are installing a box side on a late model f150 right now.

Karltiphat

P.S.
Your pictures reinforce why we specialize in LATE model collision repair, not restoration.rolleyes
We still have to deal with Minnesota cars, but nothing like the restoration specialists.banghead
Looks really beautiful.

Karl, againbeamup


__________________

More ambition than brains,

If you have more than 5 of anything, best to stop counting!


Mega Poster

Status: Offline
Posts: 711
Date:
Permalink  
 

John, another option is maybe stop by Crystal airport and talk to some of the mechanics to see what they use on airframes. FAA is very knows what works and what doesn't when it comes to paints and primers and fasteners. Maybe learn how to buck old school rivets really give it that hand build feel.


__________________


1K+ Club

Status: Offline
Posts: 1175
Date:
Permalink  


Apparently no big secrets on the "rivet-bond"
Memorize and adhere to instructions on product.
If they are different than my process, follow their directions.

Bare metal on both surfaces, rough it up for "tooth"
Clean, clean, clean.
I would probably final clean with alcohol.
Apply adhesive, clamp snugly for alignment, rivet from center out.
Clean excess, shouldn't be too much.
Most products advise leaving panels alone for 12-24 hours after bonding.

Took some pictures today of the truck we are finishing up.
Will post tomorrow.

We actually have a mega buck specialty self piercing gun.
We can do traditional blind, self piercing, with or without adhesive.
Also have a machine set up to wire feed weld if required.

As stated, we are still learning ourselves, and the recommended process and products keep changing.

Have fun!
Karl


__________________

More ambition than brains,

If you have more than 5 of anything, best to stop counting!


1K+ Club

Status: Offline
Posts: 1175
Date:
Permalink  
 

IMG_4547.JPGIMG_4548.JPGIMG_4550.JPG

First picture previous rivet-bond-caulk by different facility.

Decent job, fairly typical appearance.

Second, self piercing by us, caulking could have been neater.IMG_4549.JPG

Third, our product used.

Fourth, standard rivet.

With your detail I am thinking the rivet seam would be clean, only the trimmed up squeeze through.

Hope this helps.

Karl


Attachments
__________________

More ambition than brains,

If you have more than 5 of anything, best to stop counting!


2K+ Club

Status: Offline
Posts: 2791
Date:
Factory Five Mk4 Roadster Build - 40 Watt Garage - Front Brake Lines
Permalink  


After my 3 back to back weeks on the road, and the pending Powercruise event at BIR, I've had this week off. Lotsa catching up on "Honey-Do's", Blackie's ready to romp at BIR, and some serious Roadster build time.

The last few sessions have been brake lines.
FFR is somewhat vague on how and where to run them... "We usually run the fuel down the passenger side, and the brakes down the driver's side. Stay away from heat sources, and don't run lines below the bottom of the main 4" tubes" is about the extent of their input. The FFR forum does have some suggestions & photo's of other builds, but it's really builder's discretion. FFR supplies 4) 60", 2) 24", and 1) 6" stick of brake line tubing, a few unions, and a bunch of rubberized clamps.

It was time to put on the thinking cap, do the "sit and stare at it" thing for awhile, and then start bending.

Fronts:


Attachments
__________________


John D. - St. Louis Park, MN.

1965 El Camino - LT-1, 4L60e, 4wh discs, SC&C susp.
2013 F-150 Platinum - Twin Turbo 3.5

2018 Factory Five MkIV Roadster build thread


2K+ Club

Status: Offline
Posts: 2791
Date:
RE: Factory Five Mk4 Roadster Build - Front Brake Lines pt.2
Permalink  


These shots detail the hard lines from the footbox out to the transitions


Attachments
__________________


John D. - St. Louis Park, MN.

1965 El Camino - LT-1, 4L60e, 4wh discs, SC&C susp.
2013 F-150 Platinum - Twin Turbo 3.5

2018 Factory Five MkIV Roadster build thread


2K+ Club

Status: Offline
Posts: 2791
Date:
RE: Factory Five Mk4 Roadster Build - 40 Watt Garage - Rear Brake Lines
Permalink  


Shots of the rear lines and flex hoses...


Attachments
__________________


John D. - St. Louis Park, MN.

1965 El Camino - LT-1, 4L60e, 4wh discs, SC&C susp.
2013 F-150 Platinum - Twin Turbo 3.5

2018 Factory Five MkIV Roadster build thread


2K+ Club

Status: Offline
Posts: 2791
Date:
RE: Factory Five Mk4 Roadster Build - 40 Watt Garage - Footbox Plumbing
Permalink  


This is where it got interesting. Not a lot of room, and the only access when the panels are riveted together is through a small hatch in the top, or upside down on your head in the footbox. I really wanted to make it serviceable down the road. None the less, if a master cylinder needs replacement there will be a LOT of swearing involved.

The hardest obstacle was keeping the lines away from the header & sidepipe location(s)... especially the rear. I've got to get out of the footbox and down the framerail, but I want to keep it out of the engine compartment. I found a neat little channel between some of the chassis tubing to break the rear feed line out of the footbox, clear of the pedals, and out down the frame.


Attachments
__________________


John D. - St. Louis Park, MN.

1965 El Camino - LT-1, 4L60e, 4wh discs, SC&C susp.
2013 F-150 Platinum - Twin Turbo 3.5

2018 Factory Five MkIV Roadster build thread


1K+ Club

Status: Offline
Posts: 1304
Date:
Factory Five Mk4 Roadster Build - 40 Watt Garage
Permalink  


Looking good John.
does it feel a bit odd to be dealing with clean rust free parts?

__________________

Bruce L. - Lakeville MN

1971 Malibu Convert


2K+ Club

Status: Offline
Posts: 2791
Date:
Permalink  
 

A little more progress on the braking system today.
I received my Tilton 3-chamber reservoir yesterday, and spent a few hours fabbing a mounting bracket for it. Today was drilling, "NutSert'ing" the framerail, and getting it mounted and the supply hoses routed.

(FFR supplies a nice little billet reservoir, hose, and a "Tee" hose barb. They give you the parts for a single reservoir to feed the F & R masters, but nothing for a hydraulic clutch. I'm not crazy about billet parts, and the idea of having a single reservoir for the entire brake system is oogie to me. I also needed something for my clutch, so the Tilton piece was a no-brainer... I'm a $Hundo$ lighter for it, but it's a nice piece and fills the bill perfectly)


Attachments
__________________


John D. - St. Louis Park, MN.

1965 El Camino - LT-1, 4L60e, 4wh discs, SC&C susp.
2013 F-150 Platinum - Twin Turbo 3.5

2018 Factory Five MkIV Roadster build thread


Active Member

Status: Offline
Posts: 461
Date:
Permalink  
 

Your craftsmanship is amazing. Each piece is a work of art.

__________________

Larry L.

Coon Rapids


2K+ Club

Status: Offline
Posts: 2791
Date:
Permalink  
 

Been awhile since an update - had a lot of "things" going on around the 40 Watt - and also a LOT of (for lack of a better term) nervous energy to expend.

Two updates coming... the Emergency Brake cable system, and the Ford Coyote "clutch position sensing" needs.

E-brakes:
FFR doesn't supply parts for the 2015 & up E-brake system when you're using the Mustang calipers. They'll gladly provide the complete cable system when you purchase the Wilwood brake upgrade, but you're on your own using the OEM.

FFR also recommends a slightly scary routing of the cables, running them under the 4" frame cross-tube to get to the lever assembly. This puts the cables as the lowest element of the car, subject to road debris and speedbumps. The frame tube does provide the best radius of pull, giving a straight shot to the lever assy, but induces friction and hazard damage.

There's a popular modification in the FFR community, and this is my take on it. There's a lot of room in the transmission tunnel where the E-brake cables route into, and the addition of a pulley system moves the cables out from under the car (sacrificing the best "angle of pull") but moves the cables out of harm's way.

I re-used the E-brake cables from the Mustang take-out IRS assembly I bought. Luckily the proprietary ends of the cable sheath are threaded. Spin them off, cut the sheath, spin the ends back on.


Attachments
__________________


John D. - St. Louis Park, MN.

1965 El Camino - LT-1, 4L60e, 4wh discs, SC&C susp.
2013 F-150 Platinum - Twin Turbo 3.5

2018 Factory Five MkIV Roadster build thread


2K+ Club

Status: Offline
Posts: 2791
Date:
Permalink  
 

Coyote Clutch Lever Position Switch

One of the requirements of the wiring/ECU/Etc of putting a crate Coyote into whatever is the ECU needs to know where the clutch is.
You can easily "dummy" this out by twisting the two wires together and being good to go - but this would negate the safety aspect of starting without the clutch in, or "cutting power" during shifts.

FFR supplies some beautiful laser-cut brackets for a cable clutch car... but they've not addressed the builders using a hydraulic clutch yet.

I took their cable-clutch bracket and adapted it for use with the hydraulic clutch setup provided by Wilwood. The objective is to give the ECU a signal when the clutch pedal is fully engaged/depressed.


Attachments
__________________


John D. - St. Louis Park, MN.

1965 El Camino - LT-1, 4L60e, 4wh discs, SC&C susp.
2013 F-150 Platinum - Twin Turbo 3.5

2018 Factory Five MkIV Roadster build thread


President

Status: Offline
Posts: 7274
Date:
Permalink  
 

Maybe you should make a few more of those brackets to sell to other FFR owners with hydraulic clutches...thumbsup


__________________

Mitch D.   River Falls, WI

Lifetime member of the "Cars apart Club"

Some Assembly Required

1966 Chevelle SS 396 M20

1970 Chevelle SS 396 M20

1967 Camaro SS 350 rs

«First  <  1 2 3 48  >  Last»  | Page of 8  sorted by
 
Quick Reply

Please log in to post quick replies.

Chatbox
Please log in to join the chat!