Discussion Forum - Northstar Chevelle Club

Members Login
Username 
 
Password 
    Remember Me  
Post Info TOPIC: Fender Removal


2K+ Club

Status: Offline
Posts: 2737
Date:
Fender Removal
Permalink  


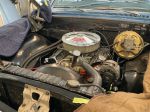
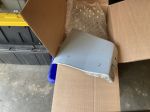
I got a little impatient. So. I took the hood off today.  When I get that off we’ll have to look for suggestions of how to proceed.  I spent parts of the last two days watching videos of how to weld sheet metal.  I am a little hesitant.  The patch from Dynacorn arrived, it looks good, and it measures 18g I think the fender is 29g.  


-- Edited by jim larson on Monday 11th of September 2023 02:43:11 PM

Attachments
__________________

Jim L

Lake City


President

Status: Offline
Posts: 7328
Date:
Permalink  
 

Does it have the inner brace attached too ? It does look much better than the other patches we were looking at.

__________________

Mitch D.   River Falls, WI

Lifetime member of the "Cars apart Club"

1966 Chevelle SS 396 M20

1970 Chevelle SS 396 M20

1967 Camaro SS/RS 350 M20


2K+ Club

Status: Offline
Posts: 2737
Date:
Permalink  
 

No inner brace attached.  That has to be ordered separate.  Got my fingers crossed that I can reuse original brace.  i am thinking that I cane soak that part of the fender in a container with evaporust.


__________________

Jim L

Lake City


President

Status: Offline
Posts: 7328
Date:
Permalink  
 

I think I saved a good brace from a fender I scrapped years ago, but don't recall which side it was for. I'll look to be certain, but I believe I saw it recently when searching for another part.
If there are a few holes, they can be patched over and not seen.

__________________

Mitch D.   River Falls, WI

Lifetime member of the "Cars apart Club"

1966 Chevelle SS 396 M20

1970 Chevelle SS 396 M20

1967 Camaro SS/RS 350 M20


President

Status: Offline
Posts: 7328
Date:
Permalink  
 

I found the brace and it's not as good as I remembered. It's quite rusty at the bottom where it folds to become the lower bolt flange. I'll hang onto it until you see how yours is. It would still be useful for above the rusted area.

__________________

Mitch D.   River Falls, WI

Lifetime member of the "Cars apart Club"

1966 Chevelle SS 396 M20

1970 Chevelle SS 396 M20

1967 Camaro SS/RS 350 M20


2K+ Club

Status: Offline
Posts: 2737
Date:
Permalink  
 

A friend is coming over tonight To help me lift the fender off.   Only 3 loose bolts holding the fender on.  I have another pair of  fenders but the braces are toast. I think the brace is good to go.  I hope the fender rote  has not creeped too far.  The filler panel moldings and clips look pretty good.


Attachments
__________________

Jim L

Lake City


2K+ Club

Status: Offline
Posts: 2737
Date:
Permalink  
 

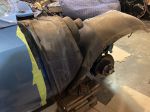
Well its off. Better. Than I had hoped for. Think I will take off the drivers side. Then make a plan.

__________________

Jim L

Lake City


2K+ Club

Status: Offline
Posts: 2737
Date:
Permalink  
 

a couple of phitos


Attachments
__________________

Jim L

Lake City


2K+ Club

Status: Offline
Posts: 2737
Date:
Permalink  
 

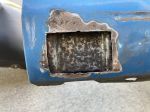
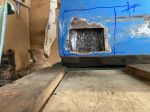
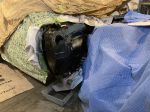
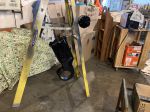
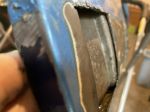
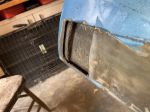
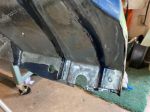
Today I cut out a little more of the hole to get to good material.  And cleaned the brace a bit.  Brace looks like it wI’ll clean up.  I am soaking it in Evapo-rust.  Screws and nut assemblies, shims also soaking.  i think I may have to cut out more (to blue line) to get the brace cleaned .  I don’t really want to replace to large an area.  And then I can keep the shape as best  as possible.  I have decided I had better work on one side at a time.  Now I will have to clean and paint the inner fender.  It still has all of the original undercoating intact.


-- Edited by jim larson on Wednesday 13th of September 2023 12:50:43 PM


-- Edited by jim larson on Wednesday 13th of September 2023 01:06:42 PM

Attachments
__________________

Jim L

Lake City


President

Status: Offline
Posts: 7328
Date:
Permalink  
 

Let the evaporust work for a few days. If you can keep the cut 1/2" below the trim line, it will be easier to blend the weld.


__________________

Mitch D.   River Falls, WI

Lifetime member of the "Cars apart Club"

1966 Chevelle SS 396 M20

1970 Chevelle SS 396 M20

1967 Camaro SS/RS 350 M20


2K+ Club

Status: Offline
Posts: 2444
Date:
Permalink  
 

jim larson wrote:

Think I will take off the drivers side. Then make a plan.


Be careful that’s how it starts. You’re at the very edge of the slippery slope. 


__________________

Kevin

Northwestern Ohio


1K+ Club

Status: Offline
Posts: 1197
Date:
Permalink  
 

There still appear to be pinholes at top of cutout.

Rust is a "Cancer" surgical removal of affected area is almost mandatory.

There is no "radiation", "Chemo" or other options except for fresh material.

Envirorust will not adequately neutralize the corrosion beyond the surface in my opinion.

On a positive note, we can cheat a little as many of our cars see seasonal use only, rarely get wet and we can load repaired area with a rustproof type material.

Keep the moisture and air away and it will dramatically slow the progression of any corrosion.

Do not forget to use weld through primer, unless Mitch has other ideas.

Remember the "SLOPE" 

A very wise paintless dent person once told me how he approached Massive PDR repairs.

"JUST LIKE EATING AN ELEPHANT, ONE BITE AT A TIME"

Allow yourself to learn the first panel.

Best to you!

Karl


__________________

More ambition than brains,

If you have more than 5 of anything, best to stop counting!


2K+ Club

Status: Offline
Posts: 2737
Date:
Permalink  
 

The guy who restored the car in 97 used some sort of bracket, 2 per side to hold the rocker molding on as opposed to the clips. Used screws to hold that to the rocker panel. So they drilled holes in the rocker panel/fender. Maybe I should put back the original style clips.  That may be the pin hole you’re referring to.  Working on getting the junk the restorer sprayed all over the underside and the factory undercoat or sound deadener off.  Going slow but coming along.

Wondering how we could place the rusted area as all of it is hidden by the fender brace, unless you drill holes in the brace from the backside.


Attachments
__________________

Jim L

Lake City


2K+ Club

Status: Offline
Posts: 2444
Date:
Permalink  
 

Have you considered doing a lap joint repair with your patch panel using a panel adhesive? You could avoided all the heat issues generated with welding and it would probably be much quicker.


-- Edited by dashboard on Saturday 16th of September 2023 07:18:03 AM

__________________

Kevin

Northwestern Ohio


2K+ Club

Status: Offline
Posts: 2737
Date:
Permalink  
 

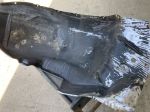
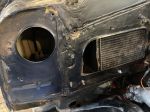
It was difficult getting the 58 yr old dirt and rust  off the cowl area.  And the fan/heater core.  interesting that the area was pained the original Danube Blue Body color.  I dropped the inner fender off at a body shop here in lake city to have any rust pits sandblasted and filled.  Slow but steady progress.

Soft-Seal kit,  what a good substance to hold the seal in place?


-- Edited by jim larson on Wednesday 20th of September 2023 05:56:35 PM


-- Edited by jim larson on Wednesday 20th of September 2023 06:29:59 PM

Attachments
__________________

Jim L

Lake City


2K+ Club

Status: Offline
Posts: 2737
Date:
Permalink  
 

Moving slowly.  Should get the inner fender back this week. After painting it, it’s  time to get back to the fender.


Attachments
__________________

Jim L

Lake City


2K+ Club

Status: Offline
Posts: 2737
Date:
Permalink  
 

dashboard wrote:

Have you considered doing a lap joint repair with your patch panel using a panel adhesive? You could avoided all the heat issues generated with welding and it would probably be much quicker.


-- Edited by dashboard on Saturday 16th of September 2023 07:18:03 AM


 Just can’t get comfortable with a lap joint to glue on panels. Or repo stuff if there’s a better way.


__________________

Jim L

Lake City


President

Status: Offline
Posts: 7328
Date:
Permalink  
 

Bonding the patch on the inside of the fender and securing with drill screws would be an acceptable method of repair. As said, it will eliminate all chance of warping and the filler may even be less than dealing with a weld line.

__________________

Mitch D.   River Falls, WI

Lifetime member of the "Cars apart Club"

1966 Chevelle SS 396 M20

1970 Chevelle SS 396 M20

1967 Camaro SS/RS 350 M20


2K+ Club

Status: Offline
Posts: 2737
Date:
Permalink  
 

Lost in the 60s wrote:

Bonding the patch on the inside of the fender and securing with drill screws would be an acceptable method of repair. As said, it will eliminate all chance of warping and the filler may even be less than dealing with a weld line.


 Thanks Mitch.  I am not familiar with this approach, I will have to research videos.  With the brace on the inside I don’t think I understand.


__________________

Jim L

Lake City


Founding Member

Status: Offline
Posts: 2789
Date:
Permalink  
 

Lost in the 60s wrote:

Bonding the patch on the inside of the fender and securing with drill screws would be an acceptable method of repair. 


 With the fender off the car, and given the small area being bonded, some big C-clamps could be used instead of screws so you don't leave any extra holes to fill. 


__________________

Derek Kiefer - Mantorville, MN

69 Malibu Pro-Touring stroker LS1-383/T56 - 69 SS396-325/3spd project


Vice President

Status: Offline
Posts: 484
Date:
Permalink  
 

Are you bonding to the inside, if so with the brace directly behind the patch area I don't think you'll ever get the metal clean enough, (rust free with the proper scratch, 80 grit as I recall).

Bonding to the out side, could you put a flange in the fender? Than can you get the flange tool between the skin and brace?

Or just patch over the hole?

A lap joint is the easiest to weld, than prim and seam seal the joint, again, might be tough to do with the brace in the way.

I have always butt welded to make panel repairs, and blown through during the repair, easy to do.


__________________

Bob W.

Lino Lakes


President

Status: Offline
Posts: 7328
Date:
Permalink  
 

There really isn't a flat surface in that whole area to use a clamp and not have it flatten a radius, same with attempting to flange the area. A flanger always flattens the metal before it crimps it. I tried this with the quarter skins on my '66 to lap outside and ended up having to dolly it all back into shape and drill screw them on the inside. If it can't be bonded from the inside, I would be inclined to still overlap from the inside and weld on the outside. I would still use drill screws to pull it tight against the original metal, and then fill the holes. I've gotten very good at plug welding drill holes...doh


__________________

Mitch D.   River Falls, WI

Lifetime member of the "Cars apart Club"

1966 Chevelle SS 396 M20

1970 Chevelle SS 396 M20

1967 Camaro SS/RS 350 M20


2K+ Club

Status: Offline
Posts: 2737
Date:
Permalink  
 

Derek69SS wrote:
Lost in the 60s wrote:

Bonding the patch on the inside of the fender and securing with drill screws would be an acceptable method of repair. 


 With the fender off the car, and given the small area being bonded, some big C-clamps could be used instead of screws so you don't leave any extra holes to fill. 


 If the patch goes beyond the brace towards the tire I kind of understand what you are saying.  It seems the Fender skin is folded over the brace and spot welded in spots as there appears to be a gap between the fender skin and the brace.  At the rear of the brace wouldn’t this method weld everything together?


__________________

Jim L

Lake City


2K+ Club

Status: Offline
Posts: 2737
Date:
Permalink  
 

Lost in the 60s wrote:

There really isn't a flat surface in that whole area to use a clamp and not have it flatten a radius, same with attempting to flange the area. A flanger always flattens the metal before it crimps it. I tried this with the quarter skins on my '66 to lap outside and ended up having to dolly it all back into shape and drill screw them on the inside. If it can't be bonded from the inside, I would be inclined to still overlap from the inside and weld on the outside. I would still use drill screws to pull it tight against the original metal, and then fill the holes. I've gotten very good at plug welding drill holes...doh


 I think you were going to help me with the welding mid October if it worked out?  So whatever way you decide is the way we will go.    My thoughts were to have it ready for you to proceed.  I just need to know what I need on hand for preparation.   Inner wheelhouse and fender on bolted lightly.  Materials? Tools?


__________________

Jim L

Lake City


President

Status: Offline
Posts: 7328
Date:
Permalink  
 

No inner house, we will add that after the patch is positioned and tacked/screwed.
I'll bring my welder and tools, as I'm quite familiar with them. You have 240v in the garage, right ?
Yes, sometime after the cruise on the 7th, or whenever you get the inner back and are ready.

__________________

Mitch D.   River Falls, WI

Lifetime member of the "Cars apart Club"

1966 Chevelle SS 396 M20

1970 Chevelle SS 396 M20

1967 Camaro SS/RS 350 M20


2K+ Club

Status: Offline
Posts: 2737
Date:
Permalink  
 

Lost in the 60s wrote:

No inner house, we will add that after the patch is positioned and tacked/screwed.
I'll bring my welder and tools, as I'm quite familiar with them. You have 240v in the garage, right ?
Yes, sometime after the cruise on the 7th, or whenever you get the inner back and are ready.


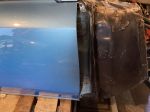
 A little hiccup. No 240.  I have my brother-in-laws welder, it’s 120.  I can get my friend Duane to hook up 240 as I do have a big enough service to run a 240 service.

Duane said he needs to know what kind of plug you have,  that will tell him what he needs to know regarding circuit breaker, extension wire size and wire size he needs.

I started cleaning the fender this morning.


Attachments
__________________

Jim L

Lake City


President

Status: Offline
Posts: 7328
Date:
Permalink  
 

I'll send a pic in the morning of my plug for him to see.
Fender looks really clean. I'm hoping I can slip the patch in between the fender and brace from the front. It looks like it should fit.

__________________

Mitch D.   River Falls, WI

Lifetime member of the "Cars apart Club"

1966 Chevelle SS 396 M20

1970 Chevelle SS 396 M20

1967 Camaro SS/RS 350 M20


2K+ Club

Status: Offline
Posts: 2737
Date:
Permalink  
 

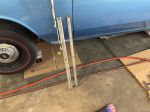
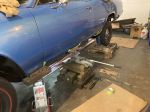
Fender repair is back on the table. After a diversion to replacing body bushings.  Nice to have nothing broken or needing repair. Was able to reuse bolts and washers.


-- Edited by jim larson on Sunday 8th of October 2023 06:53:49 PM

Attachments
__________________

Jim L

Lake City


2K+ Club

Status: Offline
Posts: 2444
Date:
Permalink  
 

The underside of your car looks pretty clean.

__________________

Kevin

Northwestern Ohio

Page 1 of 1  sorted by
 
Quick Reply

Please log in to post quick replies.

Chatbox
Please log in to join the chat!