Discussion Forum - Northstar Chevelle Club

Members Login
Username 
 
Password 
    Remember Me  
Post Info TOPIC: 300 deluxe rejuvenation


1K+ Club

Status: Offline
Posts: 1728
Date:
RE: 300 deluxe rejuvenation
Permalink  


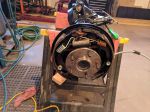
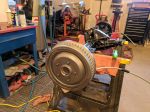
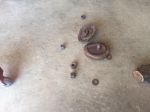
Rear end is all together with brakes and drums. I did end up using drums for a 73 Chevelle wagon the impala drums did not have a deep enough offset to cover the brake shoes completely. All the control arm bushings are pressed in and ready to go. Getting very close to bringing the car up to start tearing it apart.


Attachments
__________________

Chris P
East Central, Mn

66 Chevelle 300 deluxe


President

Status: Offline
Posts: 7257
Date:
Permalink  
 

Get it up there before the snow flies...hyper


__________________

Mitch D.   River Falls, WI

Lifetime member of the "Cars apart Club"

Some Assembly Required

1966 Chevelle SS 396 M20

1970 Chevelle SS 396 M20

1967 Camaro SS 350 rs


1K+ Club

Status: Offline
Posts: 1728
Date:
Permalink  
 

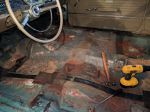
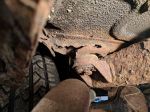
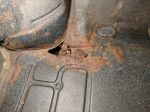
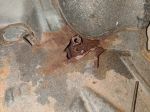
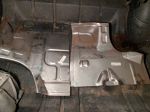
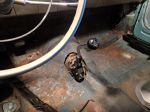
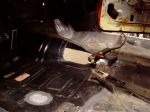
Car is in the garage and things have started happening. Interior, gas tank,  exhaust, and e brake cables have all been removed. Got all the body mount bolts out except the two in the trunk pan. Going to have to put a couple patch panels back there to make it solid again. Here are a few pictures.


Attachments
__________________

Chris P
East Central, Mn

66 Chevelle 300 deluxe


President

Status: Offline
Posts: 7257
Date:
Permalink  
 

Dang, the inside of that car is pretty darn clean...thumbsup

May as well order up some floor pans and a center support and keep going once the trunk pan/mount areas are done. It really isn't that bad looking at the pics..cool


__________________

Mitch D.   River Falls, WI

Lifetime member of the "Cars apart Club"

Some Assembly Required

1966 Chevelle SS 396 M20

1970 Chevelle SS 396 M20

1967 Camaro SS 350 rs


President

Status: Offline
Posts: 7257
Date:
Permalink  
 

How is the trunk pan to inner houses going forward to the seat and the area over the axle, that we replaced on Jim's ? From what I can see, it doesn't look bad. If that is all good, you have a very solid car, compared to most from this area.

__________________

Mitch D.   River Falls, WI

Lifetime member of the "Cars apart Club"

Some Assembly Required

1966 Chevelle SS 396 M20

1970 Chevelle SS 396 M20

1967 Camaro SS 350 rs


2K+ Club

Status: Offline
Posts: 2680
Date:
Permalink  
 

What do you plan to do to keep moisture from setteling between trunk floor brace, frame brackets, washer and the rubber bushings?  You will probably have to fix the frame bracket holes along with the trunk floor/ mount brace.  I was thinking of adding black RTV between the metal areas and the rubber bushing.

How was the area around the upper trunk floor crossmember/inner wheelhouse/upper trunk floor where I Was fortunate to has Mitch fix?


__________________

Jim L

Lake City


President

Status: Offline
Posts: 7257
Date:
Permalink  
 

jim larson wrote:

What do you plan to do to keep moisture from setteling between trunk floor brace, frame brackets, washer and the rubber bushings?  You will probably have to fix the frame bracket holes along with the trunk floor/ mount brace.  I was thinking of adding black RTV between the metal areas and the rubber bushing.

How was the area around the upper trunk floor crossmember/inner wheelhouse/upper trunk floor where I Was fortunate to has Mitch fix?


 Paint will be the best protection. RTV will release from the rubber bushing fairly quickly and humidity/road spray could still work it's way in. The RTV may prevent it from drying as quickly as leaving it alone.


__________________

Mitch D.   River Falls, WI

Lifetime member of the "Cars apart Club"

Some Assembly Required

1966 Chevelle SS 396 M20

1970 Chevelle SS 396 M20

1967 Camaro SS 350 rs


2K+ Club

Status: Offline
Posts: 2680
Date:
Permalink  
 

Lost in the 60s wrote:
jim larson wrote:

What do you plan to do to keep moisture from setteling between trunk floor brace, frame brackets, washer and the rubber bushings?  You will probably have to fix the frame bracket holes along with the trunk floor/ mount brace.  I was thinking of adding black RTV between the metal areas and the rubber bushing.

How was the area around the upper trunk floor crossmember/inner wheelhouse/upper trunk floor where I Was fortunate to has Mitch fix?


 Paint will be the best protection. RTV will release from the rubber bushing fairly quickly and humidity/road spray could still work it's way in. The RTV may prevent it from drying as quickly as leaving it alone.


 Paint it is.


__________________

Jim L

Lake City


1K+ Club

Status: Offline
Posts: 1728
Date:
Permalink  
 

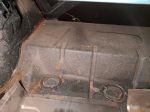
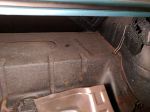
Top side of the floor not bad, bottom side not so much. It will get a full floor someday but not right now. Here are some pictures of the area behind he back seat and the trunk patch panels I have.


Attachments
__________________

Chris P
East Central, Mn

66 Chevelle 300 deluxe


President

Status: Offline
Posts: 7257
Date:
Permalink  
 

Those panels are plenty big enough to get the necessary patch out of. Do you have the body mounts too ?

__________________

Mitch D.   River Falls, WI

Lifetime member of the "Cars apart Club"

Some Assembly Required

1966 Chevelle SS 396 M20

1970 Chevelle SS 396 M20

1967 Camaro SS 350 rs


1K+ Club

Status: Offline
Posts: 1728
Date:
Permalink  
 

Yep I have a new body mount kit.


__________________

Chris P
East Central, Mn

66 Chevelle 300 deluxe


2K+ Club

Status: Offline
Posts: 2680
Date:
Permalink  
 

I only did my repair the way I did it; because I have no compressor or air tools, no welder or welding skills.  If I had such I would have done a full trunk replacement.  My car was repaired in 1994 the way you are approaching yours.  Full trunk with braces looks to be about $600 plus shipping. I think Mitch did the full trunk thing.


Don’t forget to add bushing just in front of rear wheel, most 66 Chevelle’s did’t have one there, converts did, gives better clearance for brake and fuel lines.


-- Edited by jim larson on Tuesday 26th of December 2017 08:35:28 AM

__________________

Jim L

Lake City


President

Status: Offline
Posts: 7257
Date:
Permalink  
 

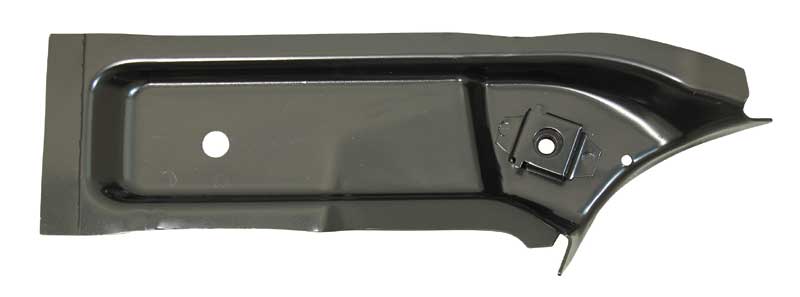
Sorry, I meant the mount brace, under the floor...

AMD #820-3464-L, R

820-3464-L_800.jpg


__________________

Mitch D.   River Falls, WI

Lifetime member of the "Cars apart Club"

Some Assembly Required

1966 Chevelle SS 396 M20

1970 Chevelle SS 396 M20

1967 Camaro SS 350 rs


1K+ Club

Status: Offline
Posts: 1728
Date:
Permalink  
 

Those braces are on the bottom of each patch panel in the pictures.


__________________

Chris P
East Central, Mn

66 Chevelle 300 deluxe


President

Status: Offline
Posts: 7257
Date:
Permalink  
 

67ss wrote:

Those braces are on the bottom of each patch panel in the pictures.


 Really ? I've never seen patch panels come that way. What brand are they ? could be useful in the future.

OK, going back and looking at the panels again, I see the rows of spot welds. May make lining up the panel a little more tricky...but we shall prevail.


-- Edited by Lost in the 60s on Tuesday 26th of December 2017 04:07:37 PM

__________________

Mitch D.   River Falls, WI

Lifetime member of the "Cars apart Club"

Some Assembly Required

1966 Chevelle SS 396 M20

1970 Chevelle SS 396 M20

1967 Camaro SS 350 rs


1K+ Club

Status: Offline
Posts: 1728
Date:
Permalink  
 

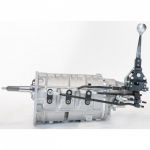
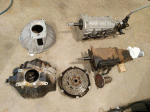
Mitch here is the transmission I am putting in for size reference.


Attachments
__________________

Chris P
East Central, Mn

66 Chevelle 300 deluxe


President

Status: Offline
Posts: 7257
Date:
Permalink  
 

Looks like it may just slide right in...

Shifter might line right up with the correct '66 collar.

sherm705-40CW__ra_p.jpg


__________________

Mitch D.   River Falls, WI

Lifetime member of the "Cars apart Club"

Some Assembly Required

1966 Chevelle SS 396 M20

1970 Chevelle SS 396 M20

1967 Camaro SS 350 rs


1K+ Club

Status: Offline
Posts: 1728
Date:
Permalink  
 

Have that piece ready and waiting.


__________________

Chris P
East Central, Mn

66 Chevelle 300 deluxe


1K+ Club

Status: Offline
Posts: 1728
Date:
Permalink  
 

Lost in the 60s wrote:
67ss wrote:

Those braces are on the bottom of each patch panel in the pictures.


 Really ? I've never seen patch panels come that way. What brand are they ? could be useful in the future.

OK, going back and looking at the panels again, I see the rows of spot welds. May make lining up the panel a little more tricky...but we shall prevail.


-- Edited by Lost in the 60s on Tuesday 26th of December 2017 04:07:37 PM


 Mr Kevin got back to me the patch panels are from Ames performance in Iowa.


__________________

Chris P
East Central, Mn

66 Chevelle 300 deluxe


President

Status: Offline
Posts: 7257
Date:
Permalink  
 

Ames is in New Hampshire. I bought a lot of parts from them for the GTO. They have some period correct pieces that the Chevelle vendors don't.

__________________

Mitch D.   River Falls, WI

Lifetime member of the "Cars apart Club"

Some Assembly Required

1966 Chevelle SS 396 M20

1970 Chevelle SS 396 M20

1967 Camaro SS 350 rs


1K+ Club

Status: Offline
Posts: 1728
Date:
Permalink  
 

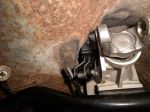
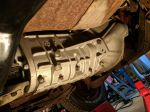
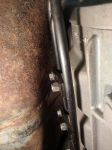
Finally get some time to work on the Chevelle and it has to be almost 100 degrees out, never fails. Well it was a good day nonetheles. Old transmission removed and test fitted the new one. Fits in the tunnel with about 3/8 clearance at the closest point. One of the shift linkage arms is rubbing but I am going to see if I can drop the shifter on its mount and that should resolve that issue. Had to slot the transmission mount and the crossmember mount holes to get the crossmember to fit in the last set of holes on the frame.


-- Edited by 67ss on Monday 28th of May 2018 06:01:33 PM

Attachments
__________________

Chris P
East Central, Mn

66 Chevelle 300 deluxe


1K+ Club

Status: Offline
Posts: 1728
Date:
Permalink  
 

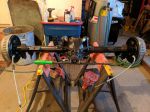
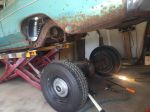
Wife and child we gone for the weekend so I got some Chevelle time today. Thanks to Chris S for coming over and helping out. Today was out with the one wheel wonder 10 bolt and in with the 12 bolt posi along with some practically new used shocks. Take off from Bryan’s coil over conversion. I can’t believe we only had to heat one bolt and that was for holding the lower part of the spring to the perch. All 8 control arm bolts came right out, I can’t believe for how rusty the frame is that everything seems to come loose. 


-- Edited by 67ss on Sunday 29th of July 2018 07:26:33 PM

Attachments
__________________

Chris P
East Central, Mn

66 Chevelle 300 deluxe


2K+ Club

Status: Offline
Posts: 2680
Date:
Permalink  
 

Looking good!  Is that the rear that has the bigger Impala drums on the rear?  Whats left before it is on the road.  I am thinking about looking at a 66 Malibu in IA with a 454 and a TH 350 rebuilt in 2010, with 10,000 miles since the rebuild.  Looks nice from the photos he sent me, new interior and paint in 2010. Also full quarters, trunk, and floor pans replaced at that time.  Price is reasonable, but will have to see the body work and paint in person.


__________________

Jim L

Lake City


1K+ Club

Status: Offline
Posts: 1728
Date:
Permalink  
 

jim larson wrote:

Looking good!  Is that the rear that has the bigger Impala drums on the rear?  Whats left before it is on the road.  


 Yes this rear end has the 11" drum brake swap on it. I still have lots to do yet. Front brake swap, modify shifter handle, new belts and hoses, get driveshaft built, and others things I am not remembering. Not sure if it will be driving before winter or not.


__________________

Chris P
East Central, Mn

66 Chevelle 300 deluxe


Vice President

Status: Offline
Posts: 478
Date:
Permalink  
 

What's the plan for the front brake swap, factory disc or aftermarket?


__________________

Bob W.

Lino Lakes


3K+ Club

Status: Offline
Posts: 4764
Date:
Permalink  
 

Chris, I'm sure you're appreciating the extra room with the diff out of the garage and under the car assuming the old one went out to the pole barn for storage.  It's amazing how much space they take up and are always in the way when they're not under a car.

Lookin' good though, and just one more step forward towards getting it on the road.  


__________________

Stan S.-Twin Cities 'South Metro'

1972 Malibu Convertible 2nd time around 

1999 SS Camaro LS1-6 speed

Forum influenced terms: 'Link Paste', 'Stanitized', & 'Revolving garage door...' 


President

Status: Offline
Posts: 7257
Date:
Permalink  
 

67ss wrote:
 get driveshaft built,

 Just cut down the one you have for now. You don't need a super driveshaft for the 283...dunno


__________________

Mitch D.   River Falls, WI

Lifetime member of the "Cars apart Club"

Some Assembly Required

1966 Chevelle SS 396 M20

1970 Chevelle SS 396 M20

1967 Camaro SS 350 rs


1K+ Club

Status: Offline
Posts: 1728
Date:
Permalink  
 

Bobs_Place wrote:

What's the plan for the front brake swap, factory disc or aftermarket?


 I am leaning towards factory front disc but with wilwood calipers.


Mitch the driveshaft does not need to be cut I am pretty sure it is the same length even with the other trans but I upgraded everything to 1350 joints. Again over kill right now but for future upgrades I figured it was worth it.

Yes Stan I am glad to have it not be in the way and open up more floor space. Nice to also be using all these parts I have had sitting on shelves for years.


__________________

Chris P
East Central, Mn

66 Chevelle 300 deluxe


1K+ Club

Status: Offline
Posts: 1728
Date:
Permalink  
 

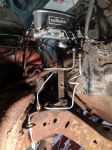
Today was modifying the stock shifter lever to work with the Long shifter assembly. Here are a couple picture one on the shifter that came with ihe trans and the modified stock lever. I liked how it turned out other then the whole thing sticks out of the floor pretty far. 


Attachments
__________________

Chris P
East Central, Mn

66 Chevelle 300 deluxe


Secretary

Status: Offline
Posts: 2988
Date:
Permalink  
 

Liking it!

Now you need a cool shift knob!

__________________

Bryan-NW 'burbs
1972 Malibu
Vaguely stock appearing, and the opposite of restored.
1999 std bore 5.7, Vortec heads, Holley Stealth Ram, GM cam
700R4, Viking coilovers, 12 bolt 4.10 posi, and a whole bunch more


1K+ Club

Status: Offline
Posts: 1728
Date:
Permalink  
 

Finally got to work on it Sunday. No new pictures but progress was made. Got the bellhousing shimmed and offset dowel pins aligned, clutch, and transmission is all in and staying in. Intalled the new e-brake cables and adjusted.

Next is upgrading the master cylinder and front brakes.

Bob I did not have any problems with the travel of the e-brake cables as we discussed the other day.


__________________

Chris P
East Central, Mn

66 Chevelle 300 deluxe


Vice President

Status: Offline
Posts: 478
Date:
Permalink  
 

I don't recall which cables you we using, are you using the original cable that came with the car or the cables that came with the brake assemblies?


__________________

Bob W.

Lino Lakes


1K+ Club

Status: Offline
Posts: 1728
Date:
Permalink  
 

Bobs_Place wrote:

I don't recall which cables you we using, are you using the original cable that came with the car or the cables that came with the brake assemblies?


 I bought repop cables for the chevelle application.


__________________

Chris P
East Central, Mn

66 Chevelle 300 deluxe


1K+ Club

Status: Offline
Posts: 1728
Date:
Permalink  
 

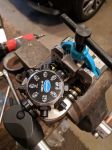
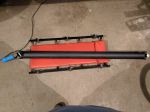
Mocked up the new master cylinder, proportioning valve, and bent all new front brake lines. I put in a new prebent front to rear brake line a few weeks ago. So now all the brake lines are new. Still have to paint and install the spindles, calipers and rotors,  Hoping to do that this week. I bought an Eastwood brake flaring tool and it works great, I would highly recommend it.

I had a new driveshaft made about a month ago, it is 3.5 diameter and has 1350 joints.

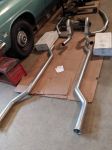
I also bought a prebent exhaust kit I am going to try out. Reviews on it were good, it is 2.5 inch mandrel bent. The tail pipes are not what I want so I will have to revamp them some. 


Attachments
__________________

Chris P
East Central, Mn

66 Chevelle 300 deluxe


1K+ Club

Status: Offline
Posts: 1299
Date:
Permalink  
 

Looking good

__________________

Bruce L. - Lakeville MN

1971 Malibu Convert


President

Status: Offline
Posts: 7257
Date:
Permalink  
 

Appears to be plenty of material on the tail pipes to have them re-bent and cut off the way you want. If you end up getting all new tail pipes made up, I'd be interested in purchasing these from you.

__________________

Mitch D.   River Falls, WI

Lifetime member of the "Cars apart Club"

Some Assembly Required

1966 Chevelle SS 396 M20

1970 Chevelle SS 396 M20

1967 Camaro SS 350 rs


1K+ Club

Status: Offline
Posts: 1728
Date:
Permalink  
 

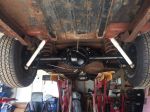
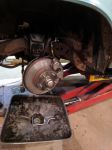
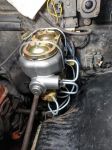
Well the disc brake swap has been a fight for me. Between having way to much pedal travel to not enough pressure to the front calipers. The pedal travel issue was narrowed down to the aftermarket caliper brackets being bent wrong and binding the rear brake pad between the back of the rotor and caliper bracket. Installed the factory brackets I had but didn’t want to spend the time to clean them and problem solved. My pressure problem required going from a 7/8“ master to a 1” bore master. Here are a couple pictures of the final results.


Attachments
__________________

Chris P
East Central, Mn

66 Chevelle 300 deluxe


President

Status: Offline
Posts: 7257
Date:
Permalink  
 

It stinks that you had so many issues and with new parts.
Glad you got past that obstacle. The car should be on the road soon, eh...stirpot


__________________

Mitch D.   River Falls, WI

Lifetime member of the "Cars apart Club"

Some Assembly Required

1966 Chevelle SS 396 M20

1970 Chevelle SS 396 M20

1967 Camaro SS 350 rs


1K+ Club

Status: Offline
Posts: 1728
Date:
Permalink  
 

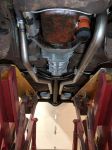
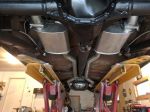
Got the exhaust on last weekend. I am very happy with how it turned out, for a prebent kit it fit very well. Was able to modify the tail pipes to exit out a way I liked that I think looks good.


-- Edited by 67ss on Tuesday 12th of November 2019 03:35:58 PM

Attachments
__________________

Chris P
East Central, Mn

66 Chevelle 300 deluxe


1K+ Club

Status: Offline
Posts: 1728
Date:
Permalink  
 

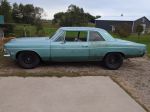
it is a runner and driver again. It went up and down the road in front of my house. The interior still needs to be put back in but at least I can move it around now.

The front end came out lower then expected and the tires were rubbing when turning.  I have now installed a spacer that will raise it up an inch. The rear end is sitting higher then it used to and I may lower it in the future but am going to let it be for now.


-- Edited by 67ss on Sunday 29th of September 2019 07:52:34 PM

Attachments
__________________

Chris P
East Central, Mn

66 Chevelle 300 deluxe


Treasurer

Status: Offline
Posts: 835
Date:
Permalink  
 

Cool!  How was the shifter and transmission or was it too short a test to tell?


__________________

Michael S. - Cambridge
'71 Malibu


Active Member

Status: Offline
Posts: 460
Date:
Permalink  
 

Some of you sure have a lot more ambition than I do. That is real progress.

__________________

Larry L.

Coon Rapids


President

Status: Offline
Posts: 7257
Date:
Permalink  
 

Damn cool that you drove it !!
Does it ride stiff in the back too ? did you tighten the control arm bolts with the axle hanging ?

__________________

Mitch D.   River Falls, WI

Lifetime member of the "Cars apart Club"

Some Assembly Required

1966 Chevelle SS 396 M20

1970 Chevelle SS 396 M20

1967 Camaro SS 350 rs


2K+ Club

Status: Offline
Posts: 2680
Date:
Permalink  
 

Looks like the dog is ready for a drive.  Where did you buy the spacers? Neat lift, I think I need one of those.


-- Edited by jim larson on Monday 30th of September 2019 08:51:56 AM

__________________

Jim L

Lake City


1K+ Club

Status: Offline
Posts: 1728
Date:
Permalink  
 

OscarZ wrote:

Cool!  How was the shifter and transmission or was it to short a test to tell?


Transmission and shifter seem to work well so far, can't wait to get it out on a longer drive though.


Mitch, I did tighten the bolts with the car at ride height. I did put KYB gas shocks in it and I think they are pushing the car up with the tired springs. So I suspect with some more drive time and getting the interior in the rear will come down.


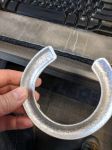
Jim, I got the spring spacers from summit racing. Part number GLS-1103


__________________

Chris P
East Central, Mn

66 Chevelle 300 deluxe


1K+ Club

Status: Offline
Posts: 1728
Date:
Permalink  
 

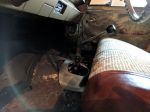
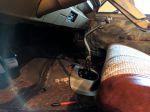
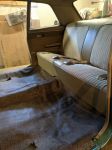
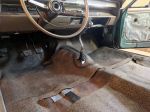
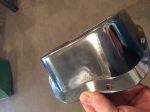
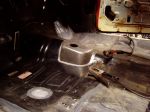
Brought up the Chevelle to start installing the interior. I brought the seats to a detail shop to have them cleaned up, they did a great job and they don’t smell as musty anymore. Dropped steering column parts at the painter to get paint matched to the dash so I can get the correct column installed. I managed to get the rubber flooring back in and made the nerve racking cut in the floor for the shifter. Just need to find a shifter boot that I like and will work. This shifter sits way higher then the stock shifter so the boot won’t work. Back seat and door panels are in. Just need to install front seat, front door panels and kick panels. But waiting till I work out the shifter boot as I might have to pull the flooring out. Excited to put some miles on it this year.


Attachments
__________________

Chris P
East Central, Mn

66 Chevelle 300 deluxe


President

Status: Offline
Posts: 7257
Date:
Permalink  
 

1967 GTO non console 4 speed boot riser might take up most of that height. You can buy chrome ones and put over the mat and look decent, if the black doesn't suit your fancy.

s-l300.jpg


__________________

Mitch D.   River Falls, WI

Lifetime member of the "Cars apart Club"

Some Assembly Required

1966 Chevelle SS 396 M20

1970 Chevelle SS 396 M20

1967 Camaro SS 350 rs


1K+ Club

Status: Offline
Posts: 1728
Date:
Permalink  
 

I have this for 67 Chevelle non console cars but it is not fitting the floor well since the shifter is farther back then stock.


Attachments
__________________

Chris P
East Central, Mn

66 Chevelle 300 deluxe


President

Status: Offline
Posts: 7257
Date:
Permalink  
 

The Pontiac mount is larger and may fit the floor better. How much further back ? There is a large flat area on top that may provide enough travel to move the boot opening back a couple inches and fill the void at the front with metal. Here is a pic of the one I put in my '66 and then removed... you can get an idea how large the floor hole is in relation to the smaller tunnel hump at the rear of the opening. Is your shifter back more than that ?

P1010226.JPGP1010228.JPG


Attachments
__________________

Mitch D.   River Falls, WI

Lifetime member of the "Cars apart Club"

Some Assembly Required

1966 Chevelle SS 396 M20

1970 Chevelle SS 396 M20

1967 Camaro SS 350 rs


1K+ Club

Status: Offline
Posts: 1728
Date:
Permalink  
 

I don’t think my rubber flooring will sit on that hump correctly. If I was putting in new carpet I could order something to match that.


__________________

Chris P
East Central, Mn

66 Chevelle 300 deluxe

«First  <  1 2 3  >  Last»  | Page of 3  sorted by
 
Quick Reply

Please log in to post quick replies.

Chatbox
Please log in to join the chat!