Discussion Forum - Northstar Chevelle Club

Members Login
Username 
 
Password 
    Remember Me  
Post Info TOPIC: 402 BBC Freshen & 200-4R Trans Swap Post


Active Member

Status: Offline
Posts: 491
Date:
RE: 402 BBC Freshen & 200-4R Trans Swap Post
Permalink  


I have the 802 heads....Nothing special on them...

__________________

'Gear Lube' 
emoticon-tv-002.gif


3K+ Club

Status: Offline
Posts: 4764
Date:
Permalink  
 

gearlube wrote:

I have the 802 heads....Nothing special on them...


Mine are 3993820's, so I still think they will be pretty comparable.  If mine does close to Tom's, that's fine with me as I'm hoping for 400hp/400+ ft. lbs. using the test headers.


__________________

Stan S.-Twin Cities 'South Metro'

1972 Malibu Convertible 2nd time around 

1999 SS Camaro LS1-6 speed

Forum influenced terms: 'Link Paste', 'Stanitized', & 'Revolving garage door...' 


1K+ Club

Status: Offline
Posts: 1728
Date:
Permalink  
 

Both sets of heads are typical oval port design and should flow about the same. Gearlubes have small chambers so that is why I mentioned a slight difference in compression ratios between the two. But I suspect stan's results will be very close to gearlubes on the dyno, yes the dyno headers will put stan's numbers slightly higher.

This is great to see some real numbers to help me decide on a cam for my buddies 396.

__________________

Chris P
East Central, Mn

66 Chevelle 300 deluxe


Active Member

Status: Offline
Posts: 446
Date:
Permalink  
 

Stan,

Question a little off topic, but what Torque converter did you go with?

__________________

Loren B. - Princeton, MN

1969 Chevelle SS Convertible, Bright Torch Red, 396, 200-4R, 12 bolt 3.73 Posi

1969 Chevrolet C20, Orange/White, 350, 4-spd, 4.11

1980 Camaro, RS, Impulse Blue, 350, 200-4R, 3.73 Posi

1967 Chevelle Malibu 2-DR Hardtop.  In process


3K+ Club

Status: Offline
Posts: 4764
Date:
Permalink  
 

69SSConv wrote:

Stan,

Question a little off topic, but what Torque converter did you go with?


Loren, not off topic at all.  The answer is on Page 2 of this 'blog'.

The torque converter is an 11" 2400 rpm PTC (Performance Torque Converter) non-electronic lockup type.

This was Master Trans' recommendation based on the engine configuration (c.i., cam, heads, etc.).


__________________

Stan S.-Twin Cities 'South Metro'

1972 Malibu Convertible 2nd time around 

1999 SS Camaro LS1-6 speed

Forum influenced terms: 'Link Paste', 'Stanitized', & 'Revolving garage door...' 


3K+ Club

Status: Offline
Posts: 4764
Date:
Permalink  
 

Made some progress this weekend on cleaning up and painting some misc. parts. 

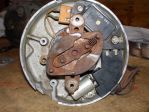
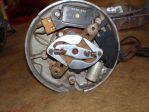
Also found another reason the 402 wasn't running it's best.  The disty weights were trapped one on top of each other, and I could see where they were rubbing the underside of the rotor, so I don't know how it was advancing the timing much at all.  I replaced the weights, springs, and bushings with a Mr. Gasket HEI kit, and we'll spin it up at Competition Engines before starting it up at the dyno to check the advance.  It's amazing that this engine ran as well as it did with 1 dead cylinder (burnt exhaust valve) and bad timing...  The big blocks are pretty strong even when they aren't running optimally.

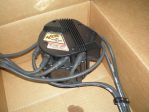
I painted the Accel high voltage coil that goes on the top of the disty cap from light gray to satin black so that it will blend in more.  That always bugged me when looking at the engine.

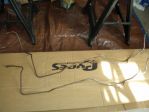
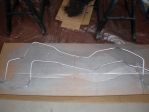
The trans cooler lines were too far rusted to polish up, so I painted them with an aluminum color instead. 

Now onto cleaning up and painting the engine bay. 

Attachments
__________________

Stan S.-Twin Cities 'South Metro'

1972 Malibu Convertible 2nd time around 

1999 SS Camaro LS1-6 speed

Forum influenced terms: 'Link Paste', 'Stanitized', & 'Revolving garage door...' 


President

Status: Offline
Posts: 7259
Date:
Permalink  
 

Those weights haven't moved since the moment they were pinched by the rotor. The marks on the rotor are just the clean spots from contact. It appears you removed the main shaft to install that kit ?

The coil cover looks much better black...emote.img?ID=15282

Wear gloves when you pick those trans lines up. Aluminum paint always rubs off for me.

__________________

Mitch D.   River Falls, WI

Lifetime member of the "Cars apart Club"

Some Assembly Required

1966 Chevelle SS 396 M20

1970 Chevelle SS 396 M20

1967 Camaro SS 350 rs


3K+ Club

Status: Offline
Posts: 4764
Date:
Permalink  
 

Lost in the 60s wrote:

It appears you removed the main shaft to install that kit ?


Nope, just took off the springs, the weights, and then the center plate and reinstalled in the reverse order with new parts.


__________________

Stan S.-Twin Cities 'South Metro'

1972 Malibu Convertible 2nd time around 

1999 SS Camaro LS1-6 speed

Forum influenced terms: 'Link Paste', 'Stanitized', & 'Revolving garage door...' 


Active Member

Status: Offline
Posts: 309
Date:
Permalink  
 

Wow, you can clearly see how the rotor held the overlapping weights from advancing.
I too like the black ACCEL cap. Looking really good Stan!
Following these build up threads is like reading a good book. I'm on the edge of my seat waiting for the dyno run. Good luck.

__________________

1964 Malibu Convert
"Nitrous is for guys who can't build motors"

www.worldracingleague.org 

www.facebook.com/wellsmafiaracing


2K+ Club

Status: Offline
Posts: 2761
Date:
Permalink  
 

That distributor looks like its been sitting on someones shelf in the garage for years and just stabbed into the engine without any sort of attention.

__________________

Chris - Ramsey, MN.

Dear Optimist, Pessimist, and Realist.

While you guys were busy arguing about the glass of water. I drank it!

Sincerly,

The opportunist.


3K+ Club

Status: Offline
Posts: 4764
Date:
Permalink  
 

Scheduled the dyno for next Friday!!!  emote.img?ID=15301

Stay tuned.

__________________

Stan S.-Twin Cities 'South Metro'

1972 Malibu Convertible 2nd time around 

1999 SS Camaro LS1-6 speed

Forum influenced terms: 'Link Paste', 'Stanitized', & 'Revolving garage door...' 


1K+ Club

Status: Offline
Posts: 1728
Date:
Permalink  
 

I think we need a count down to DYNO DAY!!!!!!!!!!!!!emote.img?ID=15282

__________________

Chris P
East Central, Mn

66 Chevelle 300 deluxe


Mega Poster

Status: Offline
Posts: 718
Date:
Permalink  
 

Good luck on the dyno Stan. I hope to be doing the same in a few weeks. It is a fun / fast thing to watch. Bring a camera with video.

__________________


3K+ Club

Status: Offline
Posts: 4764
Date:
Permalink  
 

67ss wrote:

I think we need a count down to DYNO DAY!!!!!!!!!!!!!emote.img?ID=15282


Trust me, the countdown has started in my head! 

So... 4 days and counting! nod.gif

I called and confirmed what hardware to bring and started putting things together tonight.  I'm going to take it in a day early so that the block and oil have a chance to come up to room temperature before the testing on Friday.  That will also give them a chance to spin up my disty before Fri.

I still need to pick up 5 gallons of 92 octane gas. 

The lift is in place and ready to pick the engine and put it in the pickup after work on Wed.

I'm going to have them do the initial startup and cam break in with a known carb and then we can try the one I rebuilt and see how far off I am.

This is starting to feel like Christmas!  Hopefully all goes well. 


-- Edited by SShink on Monday 14th of March 2011 08:23:34 PM

__________________

Stan S.-Twin Cities 'South Metro'

1972 Malibu Convertible 2nd time around 

1999 SS Camaro LS1-6 speed

Forum influenced terms: 'Link Paste', 'Stanitized', & 'Revolving garage door...' 


3K+ Club

Status: Offline
Posts: 4764
Date:
Permalink  
 

Tim H wrote:

Good luck on the dyno Stan. I hope to be doing the same in a few weeks. It is a fun / fast thing to watch. Bring a camera with video.


Camera with video.  Check

Rosary beads to bless the cam break in.  Check

Hammer for if I forget anything or did something stupid reassembling the engine.  Check  emote.img?ID=15267


__________________

Stan S.-Twin Cities 'South Metro'

1972 Malibu Convertible 2nd time around 

1999 SS Camaro LS1-6 speed

Forum influenced terms: 'Link Paste', 'Stanitized', & 'Revolving garage door...' 


3K+ Club

Status: Offline
Posts: 4764
Date:
Permalink  
 

Day 3 and counting!!!

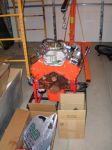
Loaded up the truck with the carb, air cleaner, disty, 5 gal. of 92 octane gas, misc. loose parts, etc. 

The lift is ready to go and all I have to do after getting home tomorrow after work is wheel the engine/dolly to the back of the truck, hoist it in, drive to Competition Engines and drop it off for Friday!

CAN      NOT     WAIT!!!  emote.img?ID=15301

Attachments
__________________

Stan S.-Twin Cities 'South Metro'

1972 Malibu Convertible 2nd time around 

1999 SS Camaro LS1-6 speed

Forum influenced terms: 'Link Paste', 'Stanitized', & 'Revolving garage door...' 


2K+ Club

Status: Offline
Posts: 2789
Date:
Permalink  
 

Just off the top:

plugs (gapped & ready/in)
wires

Are they going to provide some type of waterpump drive, or do you need to bring pulleys & belts?

__________________


John D. - St. Louis Park, MN.

1965 El Camino - LT-1, 4L60e, 4wh discs, SC&C susp.
2013 F-150 Platinum - Twin Turbo 3.5

2018 Factory Five MkIV Roadster build thread


3K+ Club

Status: Offline
Posts: 4764
Date:
Permalink  
 

John D wrote:

Just off the top:

plugs (gapped & ready/in)
wires

Are they going to provide some type of waterpump drive, or do you need to bring pulleys & belts?


Yep, gapped and put the plugs in last week.  Wires are in the box with the disty, cap, disty gasket, and rotor.

They said no pulleys required for the water pump or crank.  They have something they hook up to the water pump and they said to leave out the thermostat also.

Also no starter, flex plate, or motor mounts needed. 

We are going to use a 'proven' carb for the startup and cam break in and then swap on the carb that I rebuilt.  This way we we are starting with a 'good' carb in case I didn't adjust something correctly during the rebuild.

I decided to go with their test exhaust manifolds since they have a set that have the temp probes already in them.  I'm using manifolds in the car, so this will be a real world test with the stock cowl induction air cleaner too.

So many things to remember...


__________________

Stan S.-Twin Cities 'South Metro'

1972 Malibu Convertible 2nd time around 

1999 SS Camaro LS1-6 speed

Forum influenced terms: 'Link Paste', 'Stanitized', & 'Revolving garage door...' 


3K+ Club

Status: Offline
Posts: 4764
Date:
Permalink  
 

Day 2 and counting!

Loaded up and dropped off at the dyno shop to get up to room temp.

No updates tomorrow, then it's D-Day (Dyno Day)!!!  emote.img?ID=15282

Attachments
__________________

Stan S.-Twin Cities 'South Metro'

1972 Malibu Convertible 2nd time around 

1999 SS Camaro LS1-6 speed

Forum influenced terms: 'Link Paste', 'Stanitized', & 'Revolving garage door...' 


Active Member

Status: Offline
Posts: 195
Date:
Permalink  
 

Good luck trying to get to sleep now till friday!

__________________

Andy

Southern Suburbs


Mega Poster

Status: Offline
Posts: 718
Date:
Permalink  
 

Cool Stan I didn't know you had a rear engine truck

__________________


3K+ Club

Status: Offline
Posts: 4764
Date:
Permalink  
 

Tim H wrote:

Cool Stan I didn't know you had a rear engine truck


 Good idea Tim.  Dashboard should buy Officer Mike's 454, build it up all nice and pretty, and cruise around with it in the back of his Elky!  emote.img?ID=15282


__________________

Stan S.-Twin Cities 'South Metro'

1972 Malibu Convertible 2nd time around 

1999 SS Camaro LS1-6 speed

Forum influenced terms: 'Link Paste', 'Stanitized', & 'Revolving garage door...' 


3K+ Club

Status: Offline
Posts: 4764
Date:
Permalink  
 

A very GOOD day at the dyno!!! emote.img?ID=15276

Got to Competition Engines/Applied Dyno this morning and they already had it loaded up on the dyno and just about ready to run.  After getting it all connected, we gave it a try and no start.  Had fire in the hole, gas, but no start.

Bob the dyno guy figured out immediately that it wasn't on Top Dead Center when the disty was put in and corrected the issue (My balancer had a bazillion timing markes on it and I thought I had it at TDC when the heads/cam were installed, but apparently not...).  Next try it popped some flame through the carb.  Then the next try it started immediately and the cam break-in began. 

Bob took it to 2300 rpm and left it there and checked the cylinder temps and tweaked the timing and carb (we used one of the shop's baseline 750 cfm Holley's for the start up and break in).  Everything was right in line so we 'watched the paint dry' for 20 min. 

He then immediately proceeded to make a dyno pull from 3600-5000 rpm.  Kevin/Dashboard and Mike/Oscar Z were there to see me wince as the engine got up to 5000 rpm and the dyno run was finished.  All was well though and it pulled 371 ft. lbs. @ 3600 and 344 hp @ 4800.

Added more timing and the engine liked it.  A couple of degrees at a time and the final pull  of 9 total runs was the best one; 383 ft. lbs. @ 3800 and 349 hp @ 5400.

Two things holding the motor back:

1. The Performer 2.0 manifold-Comp Engines suggested running a Performer RPM and it would add approx. 25 hp

2. We used small port truck manifolds that really held it back from breathing.  Another 25 hp according to Dyno Bob.

So, if I add 50 hp from these 2 things, I'm at 400 hp which is where I wanted to be!  I can always change the intake manifold, but I will stay with the exhaust manifolds to get rid of the header headaches.

Another good thing was when we switched to the Edelbrock 750 cfm carb I rebuilt, the engine only lost a few ft. lbs. of torque and worked better in certain rpm ranges than the Holley.  I was just happy the carb worked the way it was supposed to!!! 

All in all, this was a great experience and I don't think I'd ever install another engine without dynoing it first to know exactly how it is running, make some changes to find the optimal performance, and of course the peace of mind for me is huge.  The money was WELL worth it now that I can hook up the trans, drop it and the engine in, and hopefully be able to hit the key and go and only have to watch for leaks.

I'm very pleased with how the engine turned out and it's a strong street motor without being too radical.  Has a nice lopey idle with very good response and reliability.

Bob from Applied Dyno and Randy from Comp Engines are great guys and explained everything and answered all questions without being annoyed.  They truly seemed to enjoy what they were doing and working with us shade tree mechanics.  I'd highly recommend talking to them and using their facility if you need a reference.

Here's a video during the cam break in:  http://www.youtube.com/watch?v=Pvwz9FZG7a8

Here's a video when Bob is adjusting the timing (sorry for the 60's batman like sideways frame shot but I thought I could fix it later like a picture...): http://www.youtube.com/watch?v=wt59gilQg4M

Now... got to started cleaning up the engine bay and painting it so that reassembly can begin before April is over!!!  emote.img?ID=15301

__________________

Stan S.-Twin Cities 'South Metro'

1972 Malibu Convertible 2nd time around 

1999 SS Camaro LS1-6 speed

Forum influenced terms: 'Link Paste', 'Stanitized', & 'Revolving garage door...' 


2K+ Club

Status: Offline
Posts: 2789
Date:
Permalink  
 

Way to Go!!
Surviving a dyno session with an engine you assembled yourself is about the same stress level as juggling a grenade... If you make one mistake, boom. All the second guessing of did I do this right, did I remember that, is this adjusted right, etc.

Also a big  on nailing the carb rebuild.

Now, I've got to ask... did it leak??

__________________


John D. - St. Louis Park, MN.

1965 El Camino - LT-1, 4L60e, 4wh discs, SC&C susp.
2013 F-150 Platinum - Twin Turbo 3.5

2018 Factory Five MkIV Roadster build thread


Treasurer

Status: Offline
Posts: 835
Date:
Permalink  
 

It was very cool. I had fun a learned a lot from the experts. Thanks for letting me tag along Stan. It was nice to see Kevin too. Now I want to dyno a motor of my own. Hopefully I will get the chance in a few months. I want to update the cam and timing chain in my small block and check the rest of the motor while I have it out. I plan to get my Chevelle back on the road this summer.

__________________

Michael S. - Cambridge
'71 Malibu


3K+ Club

Status: Offline
Posts: 4764
Date:
Permalink  
 

John D wrote:

Way to Go!! emote.img?ID=15282emote.img?ID=15282
Surviving a dyno session with an engine you assembled yourself is about the same stress level as juggling a grenade... If you make one mistake, boom. All the second guessing of did I do this right, did I remember that, is this adjusted right, etc.

Also a big emote.img?ID=15288 on nailing the carb rebuild.

Now, I've got to ask... did it leak?? emote.img?ID=15283


I had some good help putting this one together. 

The doctors of sealing passed the exam.  Not a drop of fluid anywhere!  The thermo housing started leaking in the beginning, but it was one I had never used before, so a hit on the belt sander to flatten the bottom, and all was fine again.

That carb was the first one I rebuilt myself.  It seemed intimidating, but keeping parts in sequence when taking it apart and reassembling in reverse order helped a lot.


__________________

Stan S.-Twin Cities 'South Metro'

1972 Malibu Convertible 2nd time around 

1999 SS Camaro LS1-6 speed

Forum influenced terms: 'Link Paste', 'Stanitized', & 'Revolving garage door...' 


Secretary

Status: Offline
Posts: 2988
Date:
Permalink  
 

excellent! Dyno time is exhilirating, even if it's not your engine. Glad it all came together for you like you planned.

__________________

Bryan-NW 'burbs
1972 Malibu
Vaguely stock appearing, and the opposite of restored.
1999 std bore 5.7, Vortec heads, Holley Stealth Ram, GM cam
700R4, Viking coilovers, 12 bolt 4.10 posi, and a whole bunch more


1K+ Club

Status: Offline
Posts: 1728
Date:
Permalink  
 

Any dyno session that all the pieces stay together is a good day. Wait till you get it back together and see how it feels running on all eight cylinders

__________________

Chris P
East Central, Mn

66 Chevelle 300 deluxe


3K+ Club

Status: Offline
Posts: 4764
Date:
Permalink  
 

Forgot to add... Randy rebuilt the top end of the disty since he doesn't like the Mr. Gasket weights as they are too light and touchy (either all on or all off) in his opinion.  So he rebuilt it and spun it up before we installed it.  He did all that for $20!

We also didn't use any vacuum advance on the disty the way he set it up.

The engine fired off every time almost before Bob could take his finger off the starter button.  The parts are very happy together! 


__________________

Stan S.-Twin Cities 'South Metro'

1972 Malibu Convertible 2nd time around 

1999 SS Camaro LS1-6 speed

Forum influenced terms: 'Link Paste', 'Stanitized', & 'Revolving garage door...' 


Active Member

Status: Offline
Posts: 446
Date:
Permalink  
 

Congrats Stan, glad to hear everything went well. When I put mine together, 1st pull the valves started floated at about 4800, scared the crap out of me. Great job on the carb, looks like your in the home stretch to exit the "Cars apart Club"..

__________________

Loren B. - Princeton, MN

1969 Chevelle SS Convertible, Bright Torch Red, 396, 200-4R, 12 bolt 3.73 Posi

1969 Chevrolet C20, Orange/White, 350, 4-spd, 4.11

1980 Camaro, RS, Impulse Blue, 350, 200-4R, 3.73 Posi

1967 Chevelle Malibu 2-DR Hardtop.  In process


3K+ Club

Status: Offline
Posts: 4764
Date:
Permalink  
 

67ss wrote:

Any dyno session that all the pieces stay together is a good day. Wait till you get it back together and see how it feels running on all eight cylinders


You're right Chris.  Last Fall under full throttle it ran strong even with only running on 7 cyl., way too rich, and no advance from the disty.  Gotta love big blocks!

I know you were anxious to see what mine did with this setup.  As I said earlier, a mostly stock 396/402 with this cam (like a Comp Cams 280H), a better intake, and headers should do 400+ torque/400 hp all day long and be very reliable. 


__________________

Stan S.-Twin Cities 'South Metro'

1972 Malibu Convertible 2nd time around 

1999 SS Camaro LS1-6 speed

Forum influenced terms: 'Link Paste', 'Stanitized', & 'Revolving garage door...' 


3K+ Club

Status: Offline
Posts: 4764
Date:
Permalink  
 

69SSConv wrote:

Congrats Stan, glad to hear everything went well. When I put mine together, 1st pull the valves started floated at about 4800, scared the crap out of me. Great job on the carb, looks like your in the home stretch to exit the "Cars apart Club"..


Thanks Loren.  Lot's of 'opportunities' for things to happen before it's all back in the car and debugged.  This was the first big hurdle though!

Forgot to add yet another thing... with the cold air cowl induction hood air cleaner, Dyno Bob thought that would add 10 hp so that puts me close to 360! 


__________________

Stan S.-Twin Cities 'South Metro'

1972 Malibu Convertible 2nd time around 

1999 SS Camaro LS1-6 speed

Forum influenced terms: 'Link Paste', 'Stanitized', & 'Revolving garage door...' 


Mega Poster

Status: Offline
Posts: 718
Date:
Permalink  
 

Congratulations Stan. I think that is way cool what you did and accomplished. It is good to see that you took on the project and made it what you wanted. Maybe just maybe you will keep this car then again....

__________________


Active Member

Status: Offline
Posts: 152
Date:
Permalink  
 

SWEEEEET!!!!

__________________

Craig S - Shakopee Mn


Active Member

Status: Offline
Posts: 460
Date:
Permalink  
 

Stan not sure if it would fit or work or even how much the cost would be. But would BBC Vette Exhaust manifold work on a Chevelle. You do not want to run headers? I think you build would benifit from a better exhaust setup. BBC like to breath you are not letting it breath in or out : )
Still very nice numbers. Nice build

__________________

Jim  -- Pine Island, MN


3K+ Club

Status: Offline
Posts: 4764
Date:
Permalink  
 

Bowtieman427 wrote:


Stan not sure if it would fit or work or even how much the cost would be. But would BBC Vette Exhaust manifold work on a Chevelle. You do not want to run headers? I think you build would benifit from a better exhaust setup. BBC like to breath you are not letting it breath in or out : )
Still very nice numbers. Nice build


Hey Jim,

I did some research on TC, and I don't think the Corvette ex. manifolds will fit.  Something about where they exit being an issue.  The ones I got from Frank in the club have a larger port opening than ones we used on the dyno, so that will help a little.  Thanks for suggesting them though.

I've used headers on all my cars until this one.  I'm tired of the extra heat they generate, clearance issues, gasket leaks, baked starters, and tinny sound resonance in the engine compartment, so I'm going to use stock manifolds.  I'm also going for a mostly stock look too with the whole car.

It's good to know that if I think I need more power, I can always put in headers and bump up the hp another 25 or so though.


__________________

Stan S.-Twin Cities 'South Metro'

1972 Malibu Convertible 2nd time around 

1999 SS Camaro LS1-6 speed

Forum influenced terms: 'Link Paste', 'Stanitized', & 'Revolving garage door...' 


2K+ Club

Status: Offline
Posts: 2686
Date:
Permalink  
 

Sounds like you are happy. What did you finaly end up for your initial timing? And what did you end up adding with the mechanical from the distributor? What are you going to set your vac cannister advance at for a limit? I think those numbers would help me at a starting point. Thanks.

__________________

Jim L

Lake City


3K+ Club

Status: Offline
Posts: 4764
Date:
Permalink  
 

jim larson wrote:

Sounds like you are happy. What did you finaly end up for your initial timing? And what did you end up adding with the mechanical from the distributor? What are you going to set your vac cannister advance at for a limit? I think those numbers would help me at a starting point. Thanks.


Jim, I'll try to answer the questions best as I can, but I'll need to add more tomorrow after I talk to the engine builder that rebuilt the disty and also with the dyno guy.

Here's what I can tell you:

-When the disty was rebuilt, I think(?) the initial mechanical advance is at 4-6 degrees (need to confirm)
-It was rebuilt not to use vacuum advance since the vacuum out of the cam I put in is on the lower side and may have caused it to 'dither' or bounce back and forth between advance and no advance at idle
-The TOTAL advance the motor was happy with was 42 degrees (the dyno guy checked this at 3500 rpm)
-I don't know what the advance was at idle (850 rpm) because my balancer had so many marks on it, we couldn't tell which one was BDC or ADC and we didn't want to pull it off, so I need to replace it with one that is marked properly and then I'll know (I'm going to call they dyno guy tomorrow to see if he remembers what it was before he dialed more in on his timing gun)

The lesson I learned when watching the dyno guy was mostly not to worry as much about the timing at idle (as long as it's running smoothly) and it's more about the TOTAL timing after it is all in.  In the past I couldn't check the total timing because my timing light didn't have the adjustment on it.  Will be buying one soon.

I'll update tomorrow night.


__________________

Stan S.-Twin Cities 'South Metro'

1972 Malibu Convertible 2nd time around 

1999 SS Camaro LS1-6 speed

Forum influenced terms: 'Link Paste', 'Stanitized', & 'Revolving garage door...' 


3K+ Club

Status: Offline
Posts: 4764
Date:
Permalink  
 

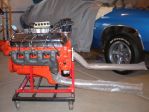
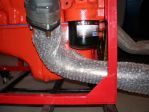
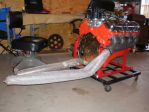
Got some more smaller engine details done today:

-Installed flex plate and torqued bolts with anti-seize
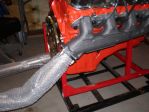
-Completely installed gasket/ex. manifold on passenger side (driver side hits the engine dolly, so it's just mocked in place for now
-Reinstalled fuel line
-Mocked up the down pipes from Pypes, and it looks like things are going to fit!  I love that there's lots of room around the filter!  The last set of headers I had, you had to drop the drivers side header to change the oil because you couldn't get the filter out!!! 

Will start the disassembly and cleanup of the engine bay in the evenings this week now that the temps are up, and the furnace hardly even runs to keep it at 65 degrees.  I didn't like warming it all up just to be out there an hour or so.


-- Edited by SShink on Sunday 20th of March 2011 05:07:18 PM

Attachments
__________________

Stan S.-Twin Cities 'South Metro'

1972 Malibu Convertible 2nd time around 

1999 SS Camaro LS1-6 speed

Forum influenced terms: 'Link Paste', 'Stanitized', & 'Revolving garage door...' 


Active Member

Status: Offline
Posts: 460
Date:
Permalink  
 

Is 42 degrees a little on the high side ? If it likes it why fight it. Just seems higher then normal to me.

__________________

Jim  -- Pine Island, MN


3K+ Club

Status: Offline
Posts: 4764
Date:
Permalink  
 

Bowtieman427 wrote:

Is 42 degrees a little on the high side ? If it likes it why fight it. Just seems higher then normal to me.


This where I let go and trust the experts.  We started at 38 total at break-in, went to 40 and it liked it, then to 42 and it liked it more, then to 44 and it fell off.  So, we backed it down to 42 degrees, verified it was happy again, and locked it down.

Dyno Bob was very good about explaining the process of finding the 'sweet spot' for optimum performance while staying on the safe side of the operation. 

All I can say is this thing starts without hardly looking at it, and it was the highest output for torque/hp, so that's where it is going to stay.  All the parts seem happy together with these settings.


__________________

Stan S.-Twin Cities 'South Metro'

1972 Malibu Convertible 2nd time around 

1999 SS Camaro LS1-6 speed

Forum influenced terms: 'Link Paste', 'Stanitized', & 'Revolving garage door...' 


1K+ Club

Status: Offline
Posts: 1728
Date:
Permalink  
 

The rule of thumb I have always heard on timing is that engines with lower compression and not real great cylinder quench will run more total timing. Higher compression or zero decked blocks with good quench will typically be lower total timing. Cylinder combustion chamber design will also play some part in this as well. Somebody chime in if I am off on this.

__________________

Chris P
East Central, Mn

66 Chevelle 300 deluxe


Mega Poster

Status: Offline
Posts: 718
Date:
Permalink  
 

Stan

A couple of questions for you.
1. Did you block off the heat crossover ports on the intake manifold so the carb does not get the heat across the base?
2. Are you going to permanently fix the exhaust manifold damper into the open position?


__________________


3K+ Club

Status: Offline
Posts: 4764
Date:
Permalink  
 

Tim H wrote:

Stan

A couple of questions for you.
1. Did you block off the heat crossover ports on the intake manifold so the carb does not get the heat across the base?
2. Are you going to permanently fix the exhaust manifold damper into the open position?


#1. I didn't block off the heat crossover ports on the intake manifold.  We did install an Edelbrock 1/4" thermal spacer so that we could use the shop carb for start-up/break in/baseline, and I will also use it as Edelbrock carbs tend to boil off fuel when sitting after running for awhile, which makes restarts difficult (I know this from experience).  The spacer solves this issue.  Dyno Bob also showed me that on the Performer 2-0 manifold, that with an Edelbrock carb placed directly on the top of the intake, the motor only 'sees' two 2 barrel carbs instead of one 4 barrel carb with the spacer.

#2. I'm using an open 1" exhaust spacer that sits in place of the butterfly exhaust valve.  I bought it at Corvette Specialties, but Ground Up sells them too.  You can kind of see it in the first pic showing the drivers side exhaust manifold.


__________________

Stan S.-Twin Cities 'South Metro'

1972 Malibu Convertible 2nd time around 

1999 SS Camaro LS1-6 speed

Forum influenced terms: 'Link Paste', 'Stanitized', & 'Revolving garage door...' 


Mega Poster

Status: Offline
Posts: 718
Date:
Permalink  
 

cool on the spacer. After seeing the exhaust manifolds it triggered my getting old memory. I thought I would ask. I should have asked before it was assembled. We usually block off the intake on the "good weather" cars to get rid of the heat on the bottom of the carb. The spacers are a good idea also can add HP.

Looks like you should beat the Cars Apart count down with time to spare.

__________________


3K+ Club

Status: Offline
Posts: 4764
Date:
Permalink  
 

Tim H wrote:

cool on the spacer. After seeing the exhaust manifolds it triggered my getting old memory. I thought I would ask. I should have asked before it was assembled. We usually block off the intake on the "good weather" cars to get rid of the heat on the bottom of the carb. The spacers are a good idea also can add HP.

Looks like you should beat the Cars Apart count down with time to spare.


Tim, another heat 'trick' the dyno guy told me about was to not use a thermostat and use a restrictor instead which evens out the temperature in the engine and radiator instead of the swings that happen as the thermostat opens and closes.

He said the only time I will notice it is in cooler temps that the heater air may not be quite as hot.  Otherwise, it's a good idea for normal spring/summer driving.

Here's a link to them at Summit:

http://www.summitracing.com/parts/MIL-16420/


__________________

Stan S.-Twin Cities 'South Metro'

1972 Malibu Convertible 2nd time around 

1999 SS Camaro LS1-6 speed

Forum influenced terms: 'Link Paste', 'Stanitized', & 'Revolving garage door...' 


2K+ Club

Status: Offline
Posts: 2686
Date:
Permalink  
 

I suppose the idea is the water stays in the radiator longer, so it cools down more before it enters the engine. I think there is a lot more to this cooling process that just he size of the radiator.

__________________

Jim L

Lake City


3K+ Club

Status: Offline
Posts: 4764
Date:
Permalink  
 

jim larson wrote:

I suppose the idea is the water stays in the radiator longer, so it cools down more before it enters the engine. I think there is a lot more to this cooling process that just he size of the radiator.


Jim, that's part of the theory.  The other part is that the coolant going through the engine is more even in temp instead of cycling up and down with the thermostat.


__________________

Stan S.-Twin Cities 'South Metro'

1972 Malibu Convertible 2nd time around 

1999 SS Camaro LS1-6 speed

Forum influenced terms: 'Link Paste', 'Stanitized', & 'Revolving garage door...' 


3K+ Club

Status: Offline
Posts: 4764
Date:
Permalink  
 

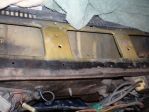
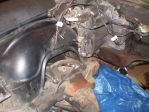
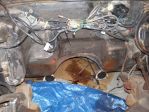
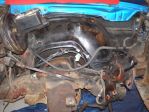
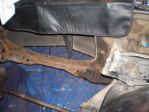
Started removing things from the inner fenders to prep for paint and found proof of the Mojave Gold color that this Chevelle was originally.  See pic.

I'm not doing a full on resto, so this will be a basic clean up and rattle can job to make it look nice for a driver.  I attached some 'before' pics for posterity.

Attachments
__________________

Stan S.-Twin Cities 'South Metro'

1972 Malibu Convertible 2nd time around 

1999 SS Camaro LS1-6 speed

Forum influenced terms: 'Link Paste', 'Stanitized', & 'Revolving garage door...' 


Active Member

Status: Offline
Posts: 195
Date:
Permalink  
 

SShink wrote:

 Tim, another heat 'trick' the dyno guy told me about was to not use a thermostat and use a restrictor instead which evens out the temperature in the engine and radiator instead of the swings that happen as the thermostat opens and closes.

He said the only time I will notice it is in cooler temps that the heater air may not be quite as hot.  Otherwise, it's a good idea for normal spring/summer driving.

Here's a link to them at Summit:

http://www.summitracing.com/parts/MIL-16420/


I only had a restrictor (no stat) on the big block that was in my car before the current engine.  Always ran great and temps never got too high.

__________________

Andy

Southern Suburbs

«First  <  1 2 3 4 5  >  Last»  | Page of 5  sorted by
 
Quick Reply

Please log in to post quick replies.

Chatbox
Please log in to join the chat!