Discussion Forum - Northstar Chevelle Club

Members Login
Username 
 
Password 
    Remember Me  
Post Info TOPIC: Photo of rear main bearing; how does it look?


2K+ Club

Status: Offline
Posts: 2734
Date:
Photo of rear main bearing; how does it look?
Permalink  


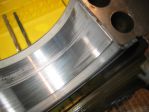
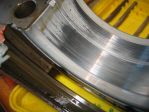
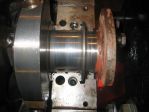
Mitch suggested I post a few photo for opinions?  Thanks.

Attachments
__________________

Jim L

Lake City


3K+ Club

Status: Offline
Posts: 4731
Date:
Permalink  
 

Looks like normal wear to me.  It looks just like the 396 that I worked on a couple of years ago.  Still has some of the wear indicator/protective coating left on the edges.  I'd put the new seal in and button it back up IMO.

__________________

Stan S.-Twin Cities 'South Metro'

1972 Malibu Convertible 2nd time around 

2001 Mustang GT Convertible 

Forum influenced terms: 'Link Paste', 'Stanitized', & 'Revolving garage door...' 


2K+ Club

Status: Offline
Posts: 2745
Date:
Permalink  
 

I agree. It looks like there is still factory protective coating there (the milky, frosty area) so it looks good to me.

__________________

Chris - Ramsey, MN.

Dear Optimist, Pessimist, and Realist.

While you guys were busy arguing about the glass of water. I drank it!

Sincerly,

The opportunist.


2K+ Club

Status: Offline
Posts: 2791
Date:
Permalink  
 

Button it up! If the cap bearing looks that good, the block 1/2 should be better. (The cap 1/2 takes the pounding). The only thing we can't see from the pics is the thrust surface - the area where that "disc" of metal presses against.

When you button it up, be sure to "align" the cap/thrust surfaces. Get the cap in place and in its registers. Torque to about 10-15 lbs. Using a big-azz prybar between the main webs and crank counterweight, pry the crankshaft rearward. Then pry it forward. Maintaining moderate forward pressure on the crankshaft, twist in about another 30 lbs. of torque on the main cap. Release the pressure and final torque the rear main cap.

What you've done is align the two thrust surfaces of the bearing to that "disc" of metal on the end of the crank. By just buttoning the cap down, the cap thrust surface could be fore or aft of the block bearing's thrust surface. All of the load would be borne by the rearmost bearing 1/2.

Don't forget a tiny dab of sillycone on the mating surfaces of the seal. You don't need a huge goober - just a dot (most will squeeze out when final torqued). Wipe the exposed ends of the rubber with some acetone or laquer thinner to get all the oil off of them, or it won't stick.

__________________


John D. - St. Louis Park, MN.

1965 El Camino - LT-1, 4L60e, 4wh discs, SC&C susp.
2013 F-150 Platinum - Twin Turbo 3.5

2018 Factory Five MkIV Roadster build thread


President

Status: Offline
Posts: 7321
Date:
Permalink  
 

Bearings don' t have many miles on them and will be fine to re-use. I see the builder clocked the seal right with the block....no a leak waiting to happen.

Wouldn't hurt to have some assembly lube on hand for the build. If you want to wait till you have all the parts ready, we could assemble it all in one day and pre-prime it with a primer tool I have. You would have instant oil pressure at start up.

__________________

Mitch D.   River Falls, WI

Lifetime member of the "Cars apart Club"

1966 Chevelle SS 396 M20

1970 Chevelle SS 396 M20

1967 Camaro SS/RS 350 M20


2K+ Club

Status: Offline
Posts: 2734
Date:
Permalink  
 

Thanks everyone.

John, now I know what a friend meant when he said I might not get the crank bearing back in the right place.

Mitch, I will get some pre assembly lube. Now all I have to do is get the correct head gaskets. I was thinking about the fel-pro 1037; but I see on the napa site, that they may need to be modified for pre 71 blocks. What does that mean?? Also thought about the 17046, 502SD, and the 8180PT2. All the sites have a disclaimer about the photos and photos of the same gasket are different on different sites. Some talk about irregular bore shapes other show kind of a circular shape.

Guess I don't know which to order.

__________________

Jim L

Lake City

Page 1 of 1  sorted by
 
Quick Reply

Please log in to post quick replies.

Chatbox
Please log in to join the chat!