Discussion Forum - Northstar Chevelle Club

Members Login
Username 
 
Password 
    Remember Me  
Post Info TOPIC: Cooling fan project.


Mega Poster

Status: Offline
Posts: 706
Date:
Cooling fan project.
Permalink  


Two steps forward, one step back, pause, regroup and move ahead.  Seems like I have been doing that alot lately. 

I got the inclination that the high stall converter and using only a external tranny cooler was not going to be enough.  Well I never had an automatic in the car, so never needed a tranny cooler built in the radiator.  So I get the bug for one and looked around.  The Alumintech ones were exceptionally nice but the price reflected that...I am too much utilitarian, so I bought a cheaper one.  The radiator fits fine and everything bolted in place.  In short, the serpentine setup with large clutch fan and original location of upper hose  -  not so good of interaction if I would try and start the car.  The fan is larger in dia then the original fans used on 64.  Time for plan 'B'. Either find a smaller fan or go electric cooling fan.  Guess which way I went?

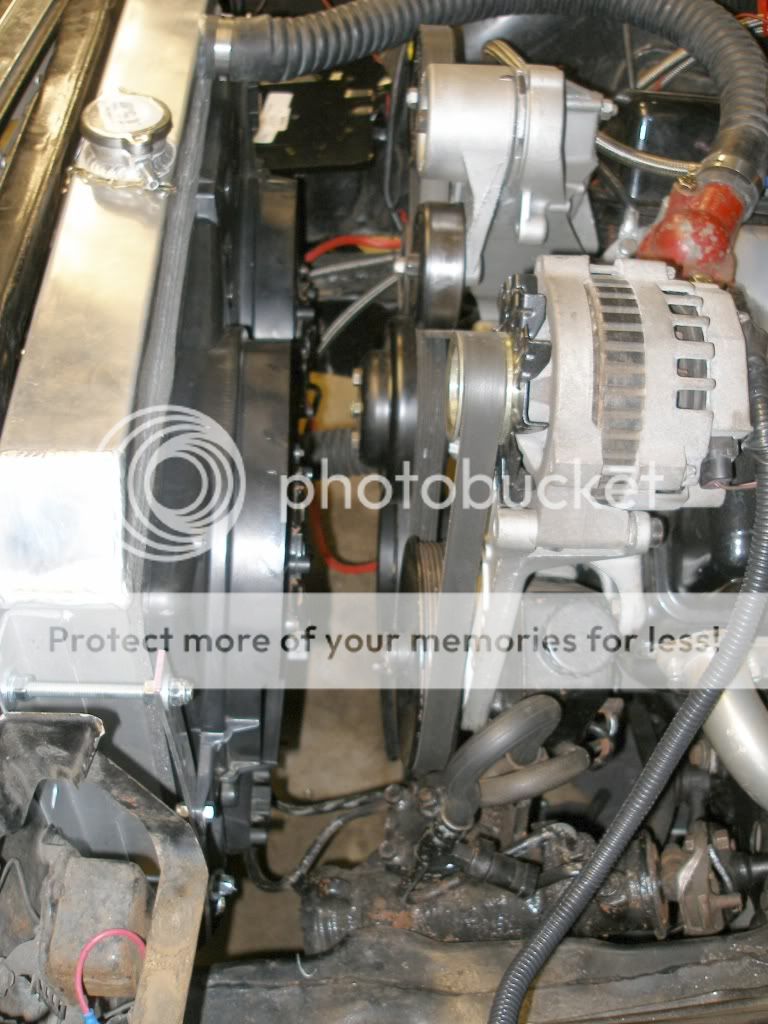
So I pulled out my Taurus fan I got awhile back.  It fits but I need to mount it off to the side because of the water pump and depth of fan.  I am not very pleased with the clearance, but it works and is fugly. 

After some research on Team Chevelle for best way to wire up the fan, I find a post about using a fan setup from a 2000 contour for early Chevelles. The dimensions look better for the radiator I got and a quick check at the U-pull website shows some cars in stock.  Well it's a good excuse as any to go in my book. biggrin

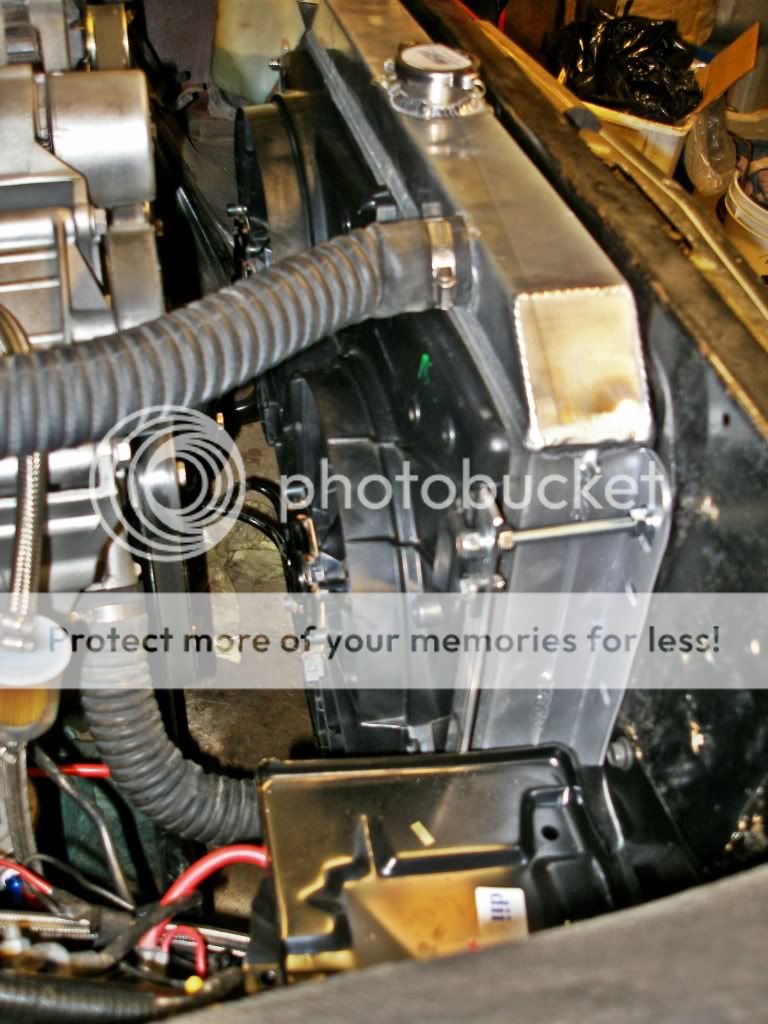
The fan shroud measure 24 x 16 x 3.5" deep at max at the motors. Cover my radiator perfectly. It is about 27" to the center of the mounting tabs on the shroud, which happens fits my 64 front support distance almost exactly - double bonus. 

So I picked up one from a 98' along with all the wiring and relays and fuses (and half the engine fuse box) for a whopping $31. 

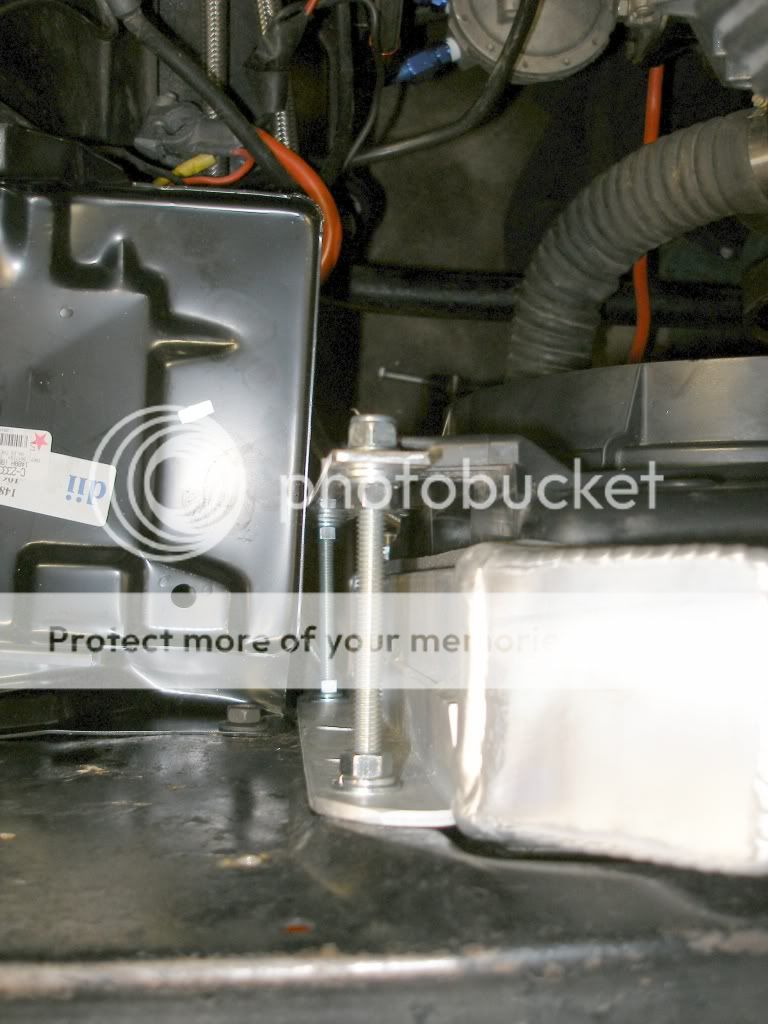
It was very little work to make it fit.  I just added (4) 5" of 5/16" threaded rod to the stock mounting locations on the front support and then some aluminum strips between the rods to mount the cooling fan to. I then added some foam weather striping on the perimeter of shroud and a few trial fits and was done.

This fits much better than the Taurus fan as it is shallower and the motors are on either side of the water pump pulley. 

Excuse the mess, I am reworking the engine compartment.


-- Edited by Enganeer on Sunday 11th of July 2010 10:20:15 PM

__________________

John E - Rogers, MN

Instructions? All I need is the exploded view.
70 El Camino soon to be ls1/t56
64 Malibu SS


Secretary

Status: Offline
Posts: 2988
Date:
Permalink  
 

Nice! I have heard about that swap, but never saw pics.

I used an electric fan from a Chevy Venture van and a painless wiring kit. My radiator is from a 87 Caprice, which has an aluminum core and plastic side tanks. No overheating issues even at Car Craft.

__________________

Bryan-NW 'burbs
1972 Malibu
Vaguely stock appearing, and the opposite of restored.
1999 std bore 5.7, Vortec heads, Holley Stealth Ram, GM cam
700R4, Viking coilovers, 12 bolt 4.10 posi, and a whole bunch more


2K+ Club

Status: Offline
Posts: 2789
Date:
Permalink  
 

Looks like I'm gonna be scrounging off a Contour in my near future....!

(too bad your alum radiator doesn't have the "dual, front/rear" mounting flanges like the stockers have. Would've been a slam-dunk without using the all-thread!)

__________________


John D. - St. Louis Park, MN.

1965 El Camino - LT-1, 4L60e, 4wh discs, SC&C susp.
2013 F-150 Platinum - Twin Turbo 3.5

2018 Factory Five MkIV Roadster build thread


2K+ Club

Status: Offline
Posts: 2761
Date:
Permalink  
 

John. Where did you locate the temp sensor? Im debating on where to locate mine using the adjustable temp spal setup since I bought it at Car Craft 2005.

__________________

Chris - Ramsey, MN.

Dear Optimist, Pessimist, and Realist.

While you guys were busy arguing about the glass of water. I drank it!

Sincerly,

The opportunist.


Mega Poster

Status: Offline
Posts: 706
Date:
Permalink  
 

I bought a pair of adjustable thermo switches at Autozone for $18 each.

They don't mount in the cooling fins but along the face of the radiator. I mounted them on the radiator per directions, one for the low power cooling, one for high speed cooling.

The low speed setting run both fans at low speed and pulls pretty good air in, the high speed setting ran just one fan and sucked in the foam weather stripping I had on the side of the shroud...just a little air flow pull.

I need to double check my wiring, I think the high speed should run both fans.

__________________

John E - Rogers, MN

Instructions? All I need is the exploded view.
70 El Camino soon to be ls1/t56
64 Malibu SS


2K+ Club

Status: Offline
Posts: 2789
Date:
Permalink  
 

Well I went to the U-Pullit today and snagged a set of Contour fans.

This is amazing - it is almost like they were designed for the car! The mounting flanges & offset are exactly the same as the stock '64/'65 radiator, and the whole assembly just tucks right inside the perimeter "rim" of the radiator.

I'm going to retain my stock "Harrison" 4-row radiator. It has flanges on both the grille & engine sides. Literally all I'll have to do is drill 4 new holes in the "engine side" flanges, and bolt the thing in place.

I've already made a conversion harness - splicing the Ford electrical connectors (for the fans) onto the GM/LT-1 harness. This will just click right into the engine harness like factory.

This conversion/swap is a no-brainer. If you're contemplating electric fans for a '64/'65 this is the only way to go!

__________________


John D. - St. Louis Park, MN.

1965 El Camino - LT-1, 4L60e, 4wh discs, SC&C susp.
2013 F-150 Platinum - Twin Turbo 3.5

2018 Factory Five MkIV Roadster build thread

Page 1 of 1  sorted by
 
Quick Reply

Please log in to post quick replies.

Chatbox
Please log in to join the chat!