Discussion Forum - Northstar Chevelle Club

Members Login
Username 
 
Password 
    Remember Me  
Post Info TOPIC: Current shop project
AK


Active Member

Status: Offline
Posts: 137
Date:
RE: Current shop project
Permalink  


I like it.

Engine / engine bay looks great


__________________

Andrew K

Minneapolis

1971 Chevelle M22 468


President

Status: Offline
Posts: 7257
Date:
Permalink  
 

Yesterday, while I was sitting around the fairgrounds, I struck a deal to buy a left, NOS rs fender for the car and I need to go get it in the next couple weeks


in New York State...clonk

Hey, it's closer than central Florida, where I was less than 2 weeks ago.


__________________

Mitch D.   River Falls, WI

Lifetime member of the "Cars apart Club"

Some Assembly Required

1966 Chevelle SS 396 M20

1970 Chevelle SS 396 M20

1967 Camaro SS 350 rs


1K+ Club

Status: Offline
Posts: 1169
Date:
Permalink  
 

Any excuse for a "road" trip is a good one.
Just brought a suburban I don't need back from Tucson.

Vickie, my Son and Daughter and I put 100,000 miles in four years the 2001 Chev Dynaflyte class B just chasing cars and parts.
Great times, great memories, 42 states and one Canadian province.

Go Mitch Go!!

Karl

__________________

More ambition than brains,

If you have more than 5 of anything, best to stop counting!


President

Status: Offline
Posts: 7257
Date:
Permalink  
 

Buffalo, NY and back in 42 hours. Brought home the NOS fender, a clean, used hood latch to sacrifice it's main spring, roof rail seals and a few emblems and misc fasteners I was missing.

Rebuilt the rs latch, blasted, painted and installed. The hood will now stay closed for transport.


__________________

Mitch D.   River Falls, WI

Lifetime member of the "Cars apart Club"

Some Assembly Required

1966 Chevelle SS 396 M20

1970 Chevelle SS 396 M20

1967 Camaro SS 350 rs


Active Member

Status: Offline
Posts: 460
Date:
Permalink  
 

Real progress! I like the color. And you Chevelle in the background looks great.

__________________

Larry L.

Coon Rapids


President

Status: Offline
Posts: 7257
Date:
Permalink  
 

Thanks Larry,
I have NO IDEA why some of the pics are huge again. Same camera, same settings, same bat day and same bat time... Makes no sense to me...headscratch


__________________

Mitch D.   River Falls, WI

Lifetime member of the "Cars apart Club"

Some Assembly Required

1966 Chevelle SS 396 M20

1970 Chevelle SS 396 M20

1967 Camaro SS 350 rs


President

Status: Offline
Posts: 7257
Date:
Permalink  
 

Here we are, 16 months later and I have a heated shop again. I brought the Camaro in a couple weeks ago and cut off the left quarter skin for replacement.

DSC06992.JPG?width=450&height=278&fit=bo


After removing the weld flanged areas and rusted/dented sections of outer wheel house.

DSC07014.JPG?width=450&height=278&fit=bo

I'll make this very brief, but it took several days to get the skin cut down and fitting right, but here it is.

DSC07006.JPG?width=450&height=278&fit=bo


DSC07049.JPG?width=450&height=278&fit=bo


DSC07051.JPG?width=450&height=278&fit=bo

The bottom flange to the outer rocker was WAY off and I had to keep moving it up with a hammer and dolly to get this good.

I'll refine it better before install, but the body line in the pic above HAD to line up to look good.

DSC07052.JPG?width=450&height=278&fit=bo

Once I had it fitted, I wire wheeled what I could of the surface rust on all the inner structure and then sprayed it all with rust converter and then undercoating,

to seal the rust from ever growing.

DSC07055.JPG?width=450&height=278&fit=bo

DSC07057.JPG?width=450&height=278&fit=bo

DSC07063.JPG?width=450&height=278&fit=bo

DSC07064.JPG?width=450&height=278&fit=bo

DSC07066.JPG?width=450&height=278&fit=bo


-- Edited by Lost in the 60s on Thursday 31st of December 2020 01:34:06 PM

__________________

Mitch D.   River Falls, WI

Lifetime member of the "Cars apart Club"

Some Assembly Required

1966 Chevelle SS 396 M20

1970 Chevelle SS 396 M20

1967 Camaro SS 350 rs


1K+ Club

Status: Offline
Posts: 1299
Date:
Permalink  
 

Good progress!

__________________

Bruce L. - Lakeville MN

1971 Malibu Convert


Active Member

Status: Offline
Posts: 460
Date:
Permalink  
 

Doesn't freshly installed metal look great? Nice progress.

__________________

Larry L.

Coon Rapids


President

Status: Offline
Posts: 7257
Date:
Permalink  
 

Yesterday, I restored the original trunk drop to re-use. They are galvanized and is in very nice condition, aside from some rust on the inside. I wire wheeled that and then welded all the spot weld drill depressions/holes shut and ground them smooth. I had cut thru the drop near the tailpanel with the plasma, getting the old trunk pan removed, so welded that shut too.  After that I sprayed the rusty area with undercoating and when that was dry, I welded the drop on the new trunk pan.

DSC07069.JPG?width=450&height=278&fit=bo

DSC07070.JPG?width=450&height=278&fit=bo

DSC07071.JPG?width=450&height=278&fit=bo

DSC07074.JPG?width=450&height=278&fit=bo

DSC07075.JPG?width=450&height=278&fit=bo

DSC07078.JPG?width=450&height=278&fit=bo

DSC07081.JPG?width=450&height=278&fit=bo

DSC07083.JPG?width=450&height=278&fit=bo


__________________

Mitch D.   River Falls, WI

Lifetime member of the "Cars apart Club"

Some Assembly Required

1966 Chevelle SS 396 M20

1970 Chevelle SS 396 M20

1967 Camaro SS 350 rs


2K+ Club

Status: Offline
Posts: 2680
Date:
Permalink  
 

Nice progress, here’s hoping it’s on the road in 2021.  Good start for the new year.


__________________

Jim L

Lake City


President

Status: Offline
Posts: 7257
Date:
Permalink  
 

Took 2 more steps to getting the q-p on today. I welded the brace back in the forward compartment and then cold galvanized the weld and the trunk drop. Also moved the flange at the rocker a little more. It wasn't quite straight, so I HAD to make it better. I'm going to remove another 1/16th off the top of the panel so it sits flatter inside the original. THEN, I'm going to make it part of the car.

DSC07111.JPG?width=450&height=278&fit=bo

DSC07112.JPG?width=450&height=278&fit=bo

DSC07114.JPG?width=450&height=278&fit=bo

DSC07116.JPG?width=450&height=278&fit=bo

DSC07115.JPG?width=450&height=278&fit=bo


__________________

Mitch D.   River Falls, WI

Lifetime member of the "Cars apart Club"

Some Assembly Required

1966 Chevelle SS 396 M20

1970 Chevelle SS 396 M20

1967 Camaro SS 350 rs


President

Status: Offline
Posts: 7257
Date:
Permalink  
 

Well, THIS is frustrating. As with the Nomad thread, I wrote an update with 8 pics and when I hit post, all that shows up is the first paragraph and the last 1 or 2 pics. Everything else in between just disappears.

I see I let this thread slip away last year. I did get the left skin and trunk drop on.

DSC07135.JPG?width=1920&height=1080&fit=


__________________

Mitch D.   River Falls, WI

Lifetime member of the "Cars apart Club"

Some Assembly Required

1966 Chevelle SS 396 M20

1970 Chevelle SS 396 M20

1967 Camaro SS 350 rs


President

Status: Offline
Posts: 7257
Date:
Permalink  
 

Then, I cut off the entire right quarter panel. It had been partially skinned, VERY badly, way in the past. The replacement skin was brazed over the old one in places.

DSC07443.JPG?width=1920&height=1080&fit=

DSC07444.JPG?width=1920&height=1080&fit=

DSC07505.JPG?width=1920&height=1080&fit=


__________________

Mitch D.   River Falls, WI

Lifetime member of the "Cars apart Club"

Some Assembly Required

1966 Chevelle SS 396 M20

1970 Chevelle SS 396 M20

1967 Camaro SS 350 rs


President

Status: Offline
Posts: 7257
Date:
Permalink  
 

I had an AMD quarter, but wasn't happy with the lazy body lines or gaps, so....I drove to Dandridge TN for an NOS panel...doh

MUCH better fit and gaps with this.

DSC07641.JPG?width=1920&height=1080&fit=

DSC07525.JPG?width=1920&height=1080&fit=


__________________

Mitch D.   River Falls, WI

Lifetime member of the "Cars apart Club"

Some Assembly Required

1966 Chevelle SS 396 M20

1970 Chevelle SS 396 M20

1967 Camaro SS 350 rs


1K+ Club

Status: Offline
Posts: 1169
Date:
Permalink  
 

Happy for you on the NOS part.nana
The collision repair industry used to do some pretty interesting things in the past.
Particularly compared to current standards.
I cannot remember ever going up to factory seam at roof or butting up to factory seam at upper deck panel and rarely tucking under drip rail.
Took too longdunno

I shudder when I remember some "choices" that were made and considered acceptable. doh

Going to be an exceptional Camaro!
Still my favorite year of the earlies!

Karl


__________________

More ambition than brains,

If you have more than 5 of anything, best to stop counting!


1K+ Club

Status: Offline
Posts: 1299
Date:
Permalink  
 

Glad to see you are also doing some "Homework"!

__________________

Bruce L. - Lakeville MN

1971 Malibu Convert


President

Status: Offline
Posts: 7257
Date:
Permalink  
 

Well, the forum did it again. I had a write up with 6 pics that looked fine on preview and when I hit POST, half of what was in the preview disappeared. I'll try again, with less pics, and more breaks between them.

I have an AMD tail panel that I was having a few fitment issues with matching the NOS q-panel.

DSC07860.JPG?width=1920&height=1080&fit=

DSC07866.JPG?width=1920&height=1080&fit=

This corner wasn't matching the curvature of the q-p, but in fairness, it appeared the q-p had been dropped and damaged in this area and would need more work to get better.

DSC07872.JPG?width=1920&height=1080&fit=


__________________

Mitch D.   River Falls, WI

Lifetime member of the "Cars apart Club"

Some Assembly Required

1966 Chevelle SS 396 M20

1970 Chevelle SS 396 M20

1967 Camaro SS 350 rs


President

Status: Offline
Posts: 7257
Date:
Permalink  
 

I had been keeping watch for an affordable NOS tail panel for some time, but never came across one until about 4 weeks ago. I got pics of it and negotiated a price and last week, drove to Tulsa, OK and brought it home.

DSC08643.JPG?width=1920&height=1080&fit=

DSC08644.JPG?width=1920&height=1080&fit=

DSC08645.JPG?width=1920&height=1080&fit=


__________________

Mitch D.   River Falls, WI

Lifetime member of the "Cars apart Club"

Some Assembly Required

1966 Chevelle SS 396 M20

1970 Chevelle SS 396 M20

1967 Camaro SS 350 rs


President

Status: Offline
Posts: 7257
Date:
Permalink  
 

It does fit the q-panel better, all around, but still had a contour issue in the upper corner. I worked it with small hammer and dolly and got it to pull in very close and tight. Quite pleased with that, but the AMD may fit just as well now. The one thing I don't care for with the NOS panel is, it does NOT have the cut outs below the bumper for the rs reverse lights and the AMD does. So, do I just use the AMD and re-market the NOS, or cut into the NOS and hope I don't screw it up...confused 
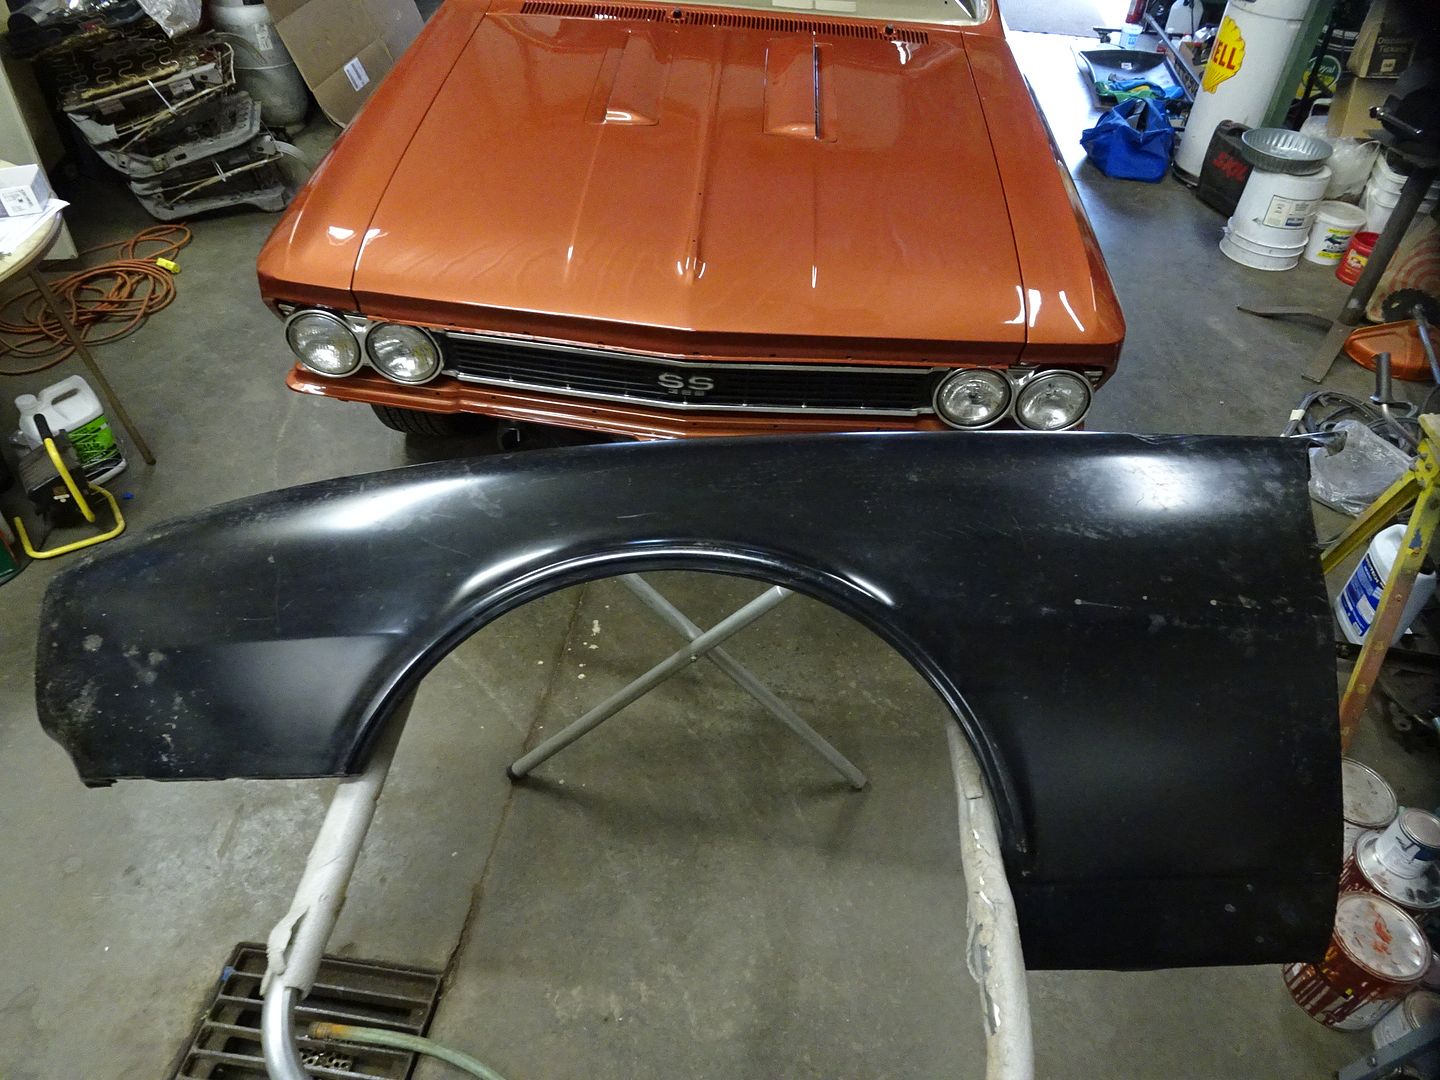
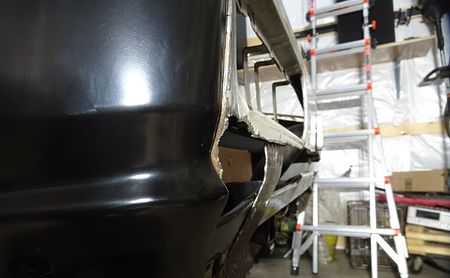
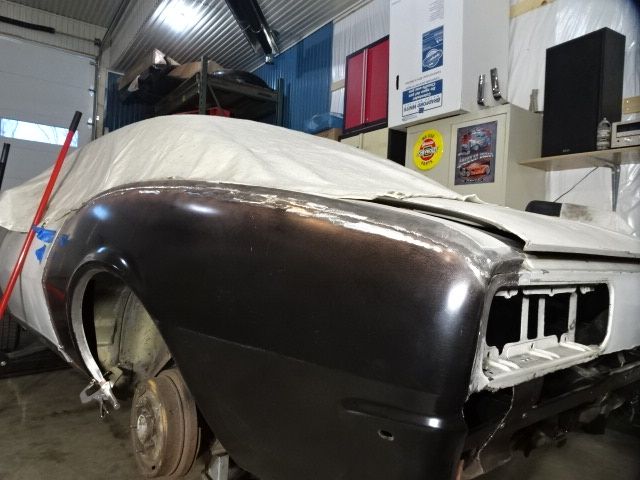
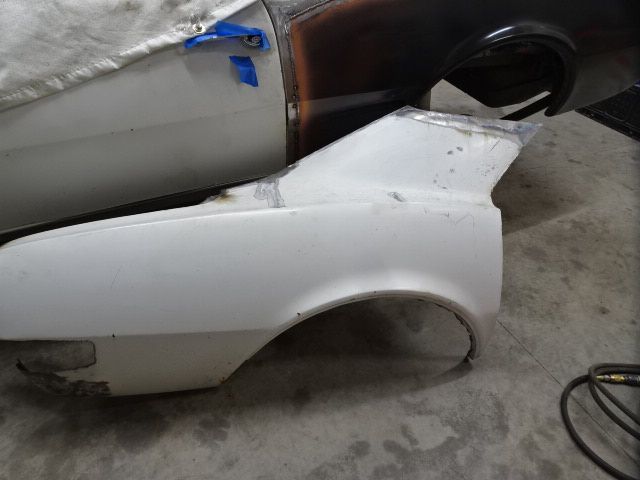
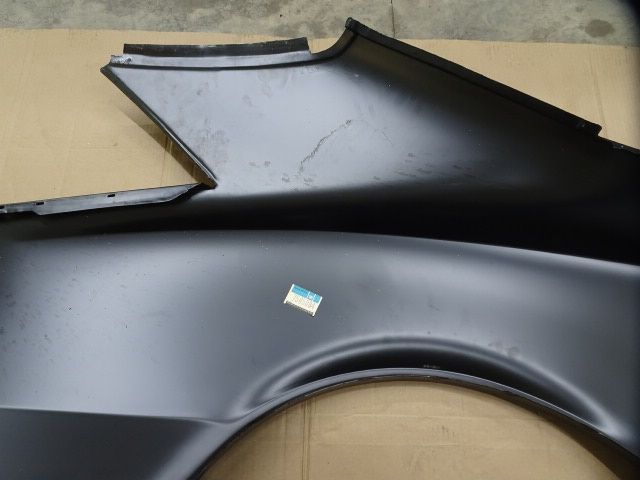
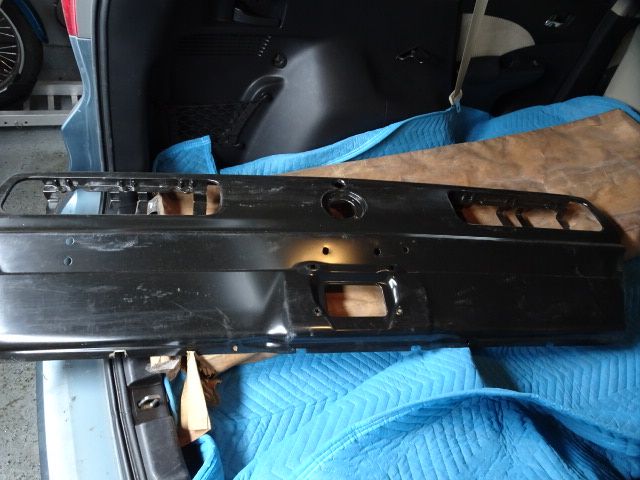
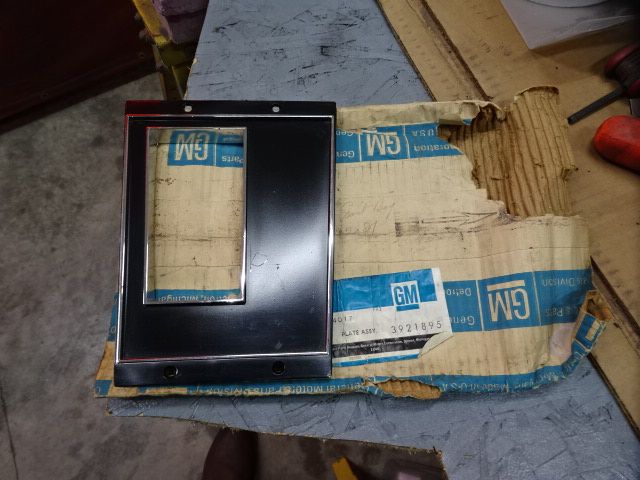
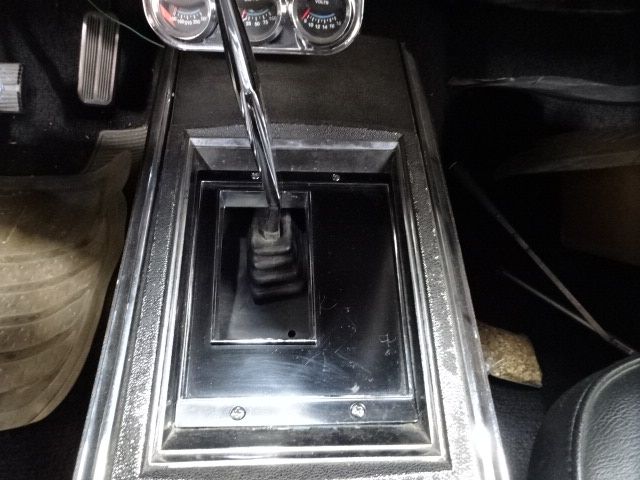
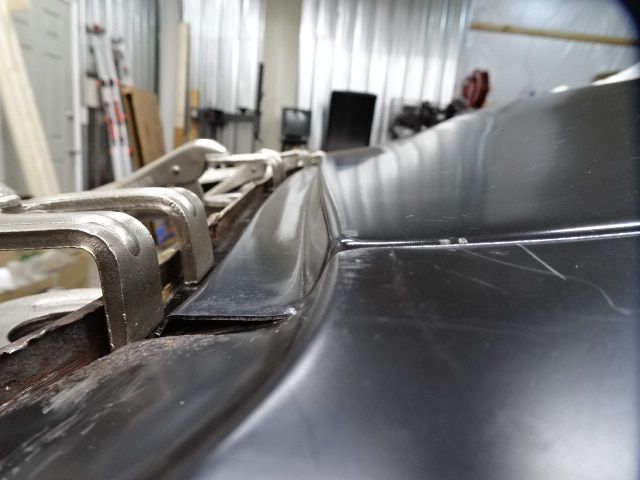
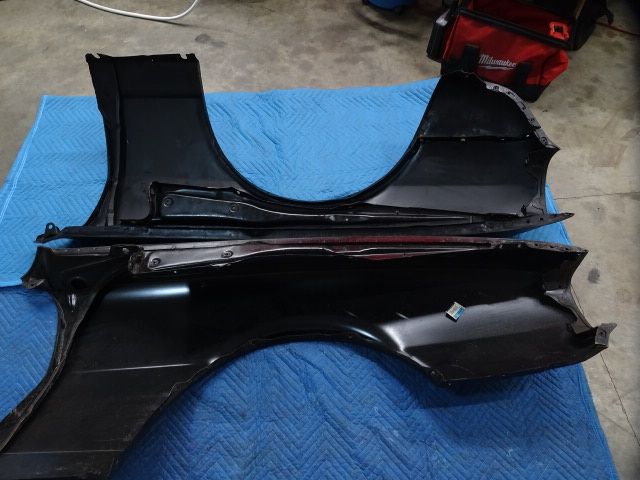
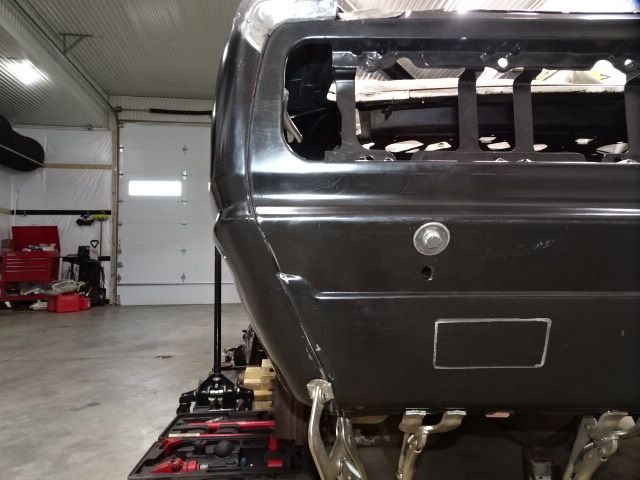
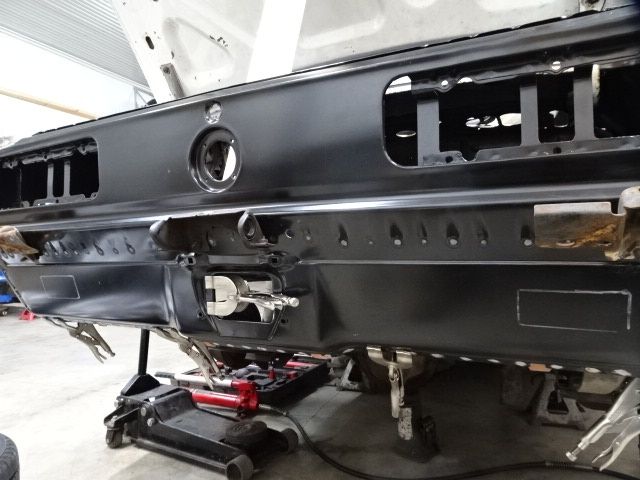
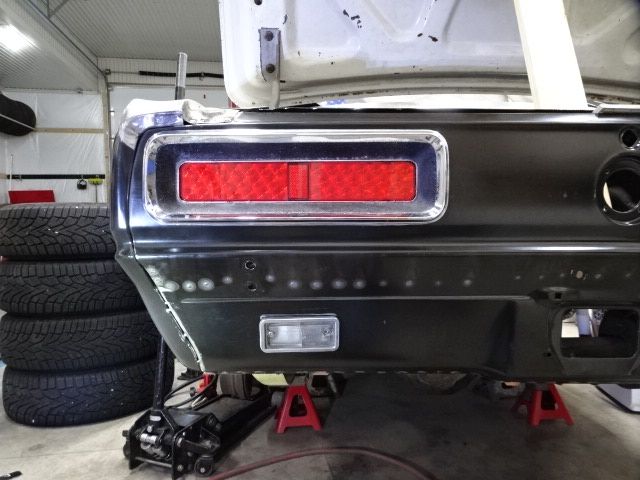
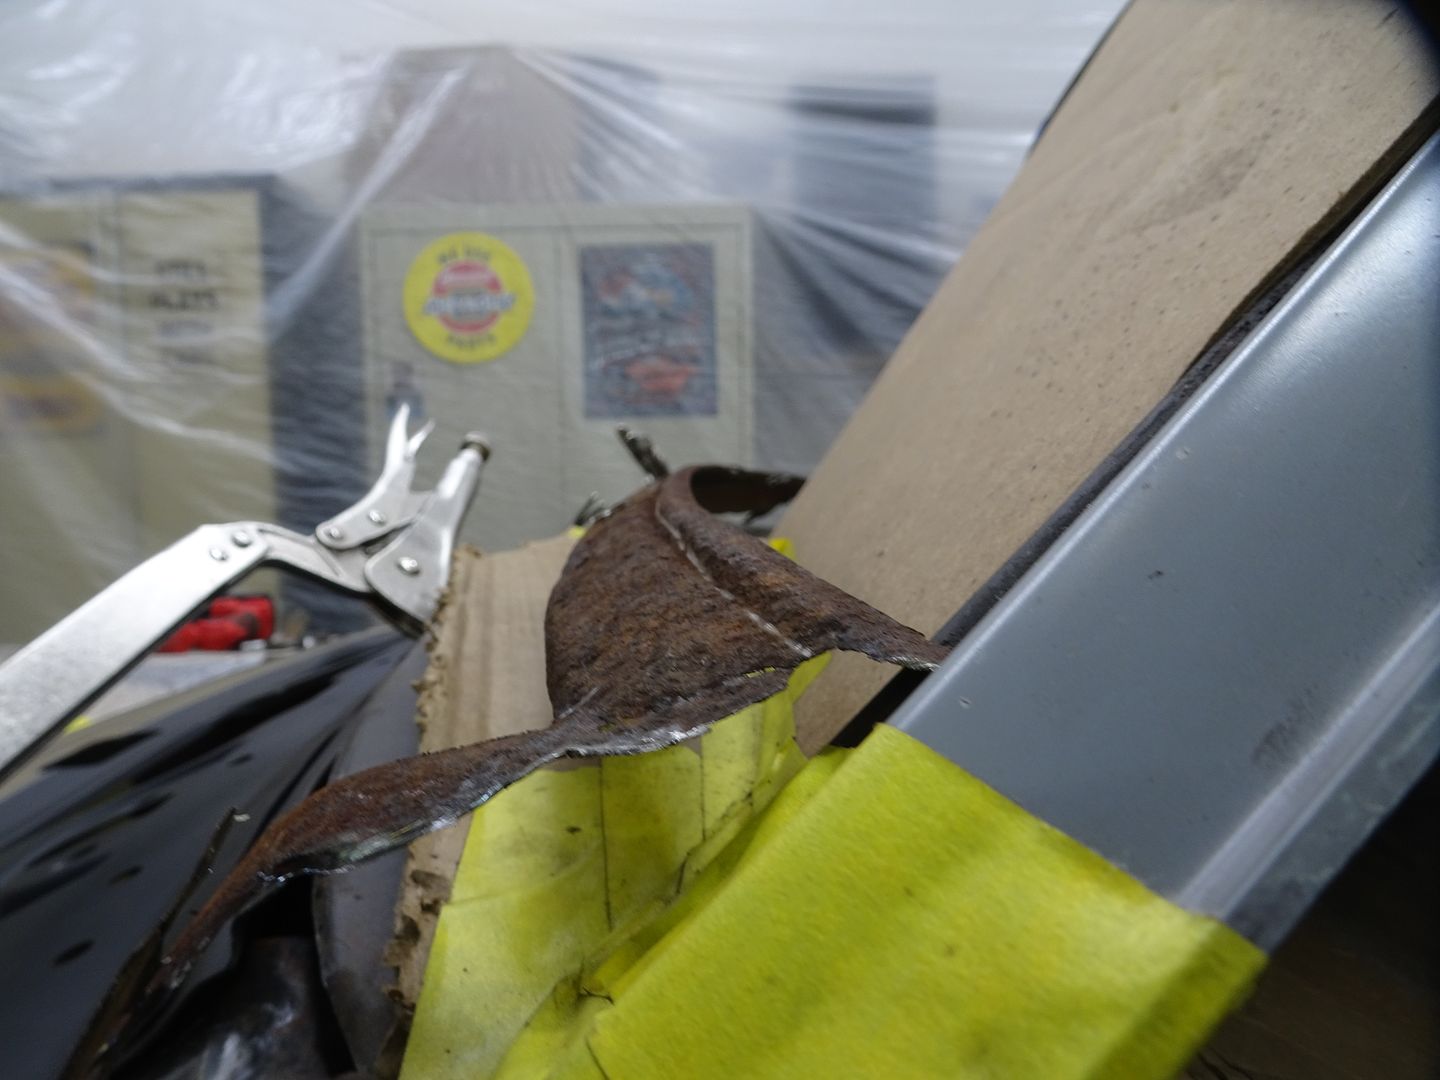
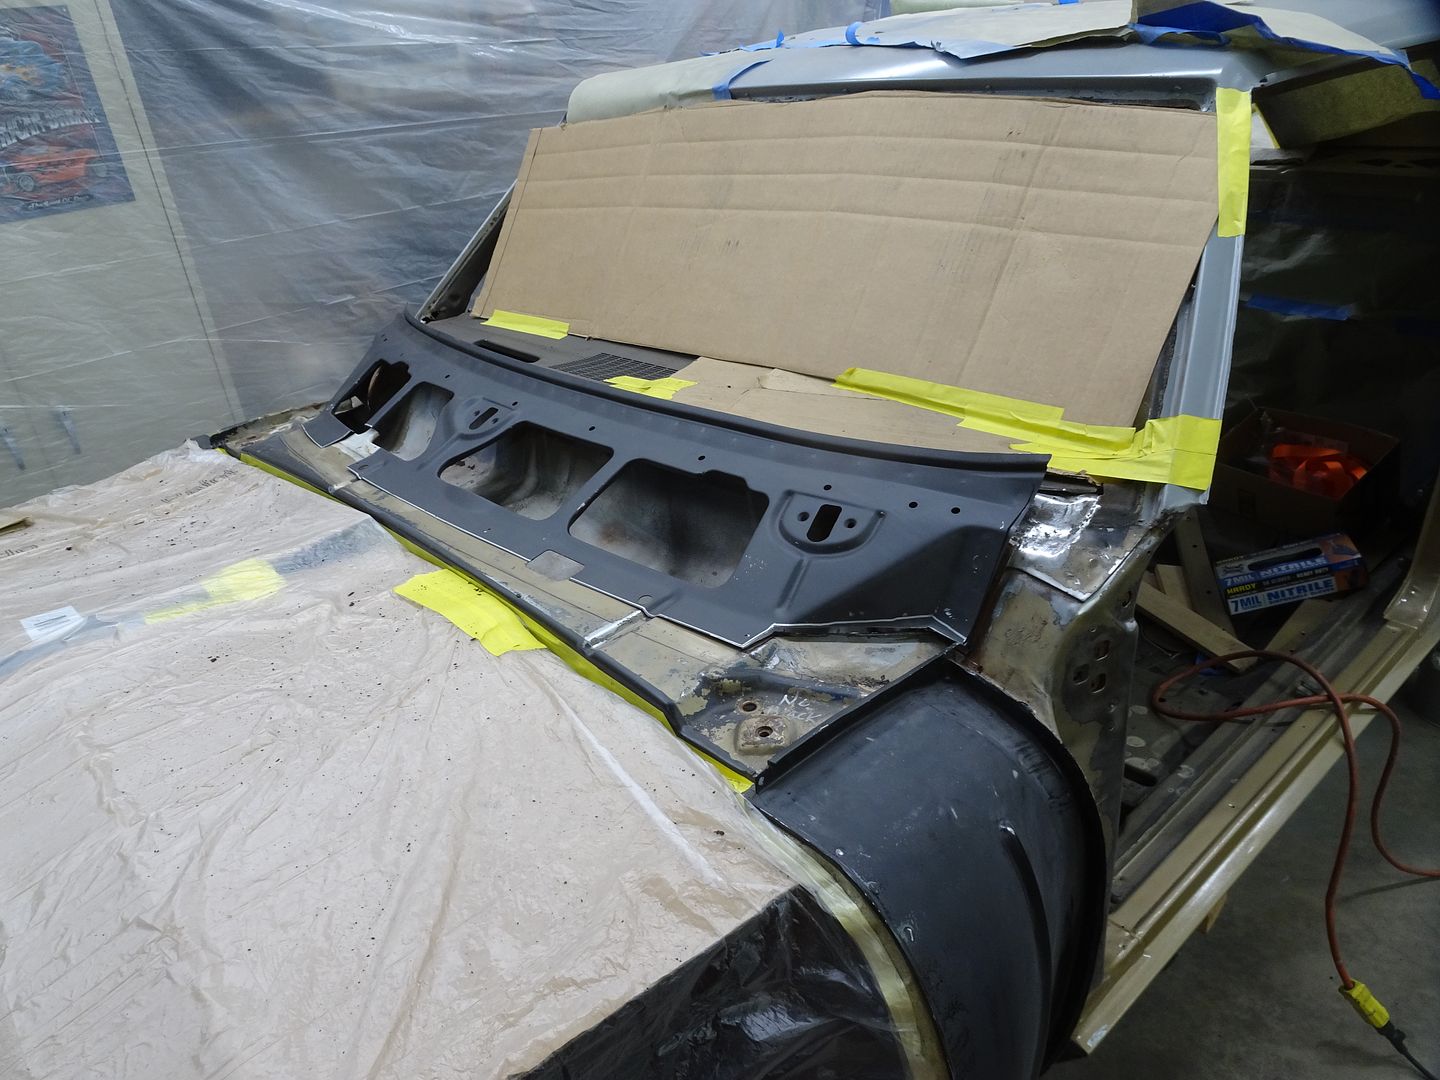
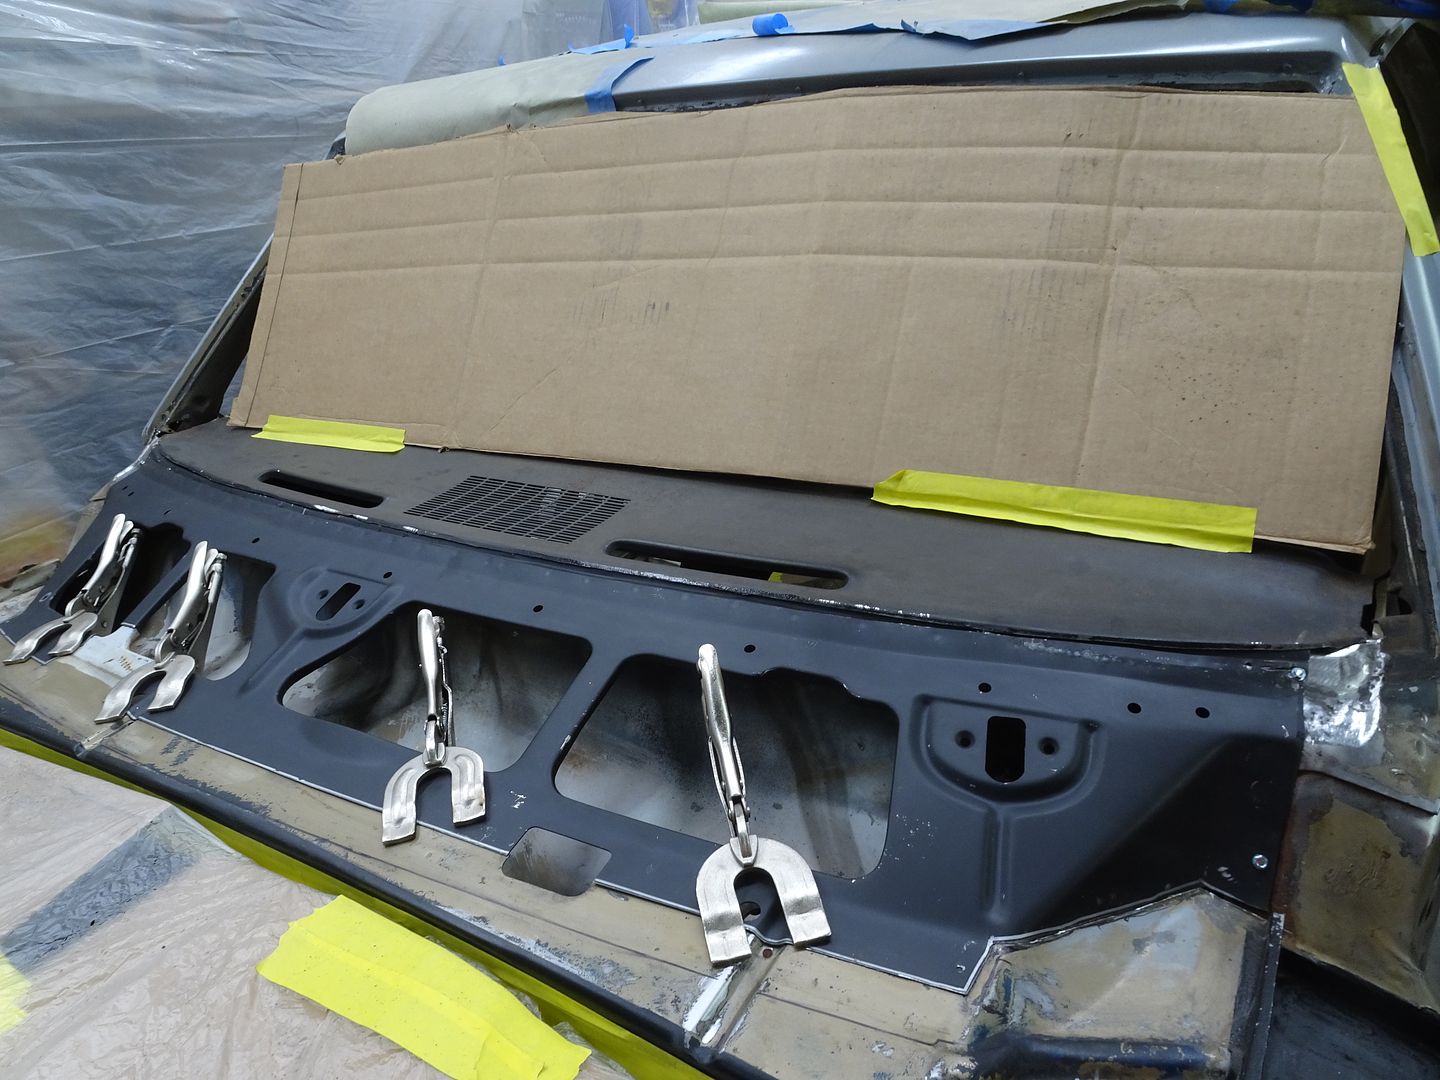
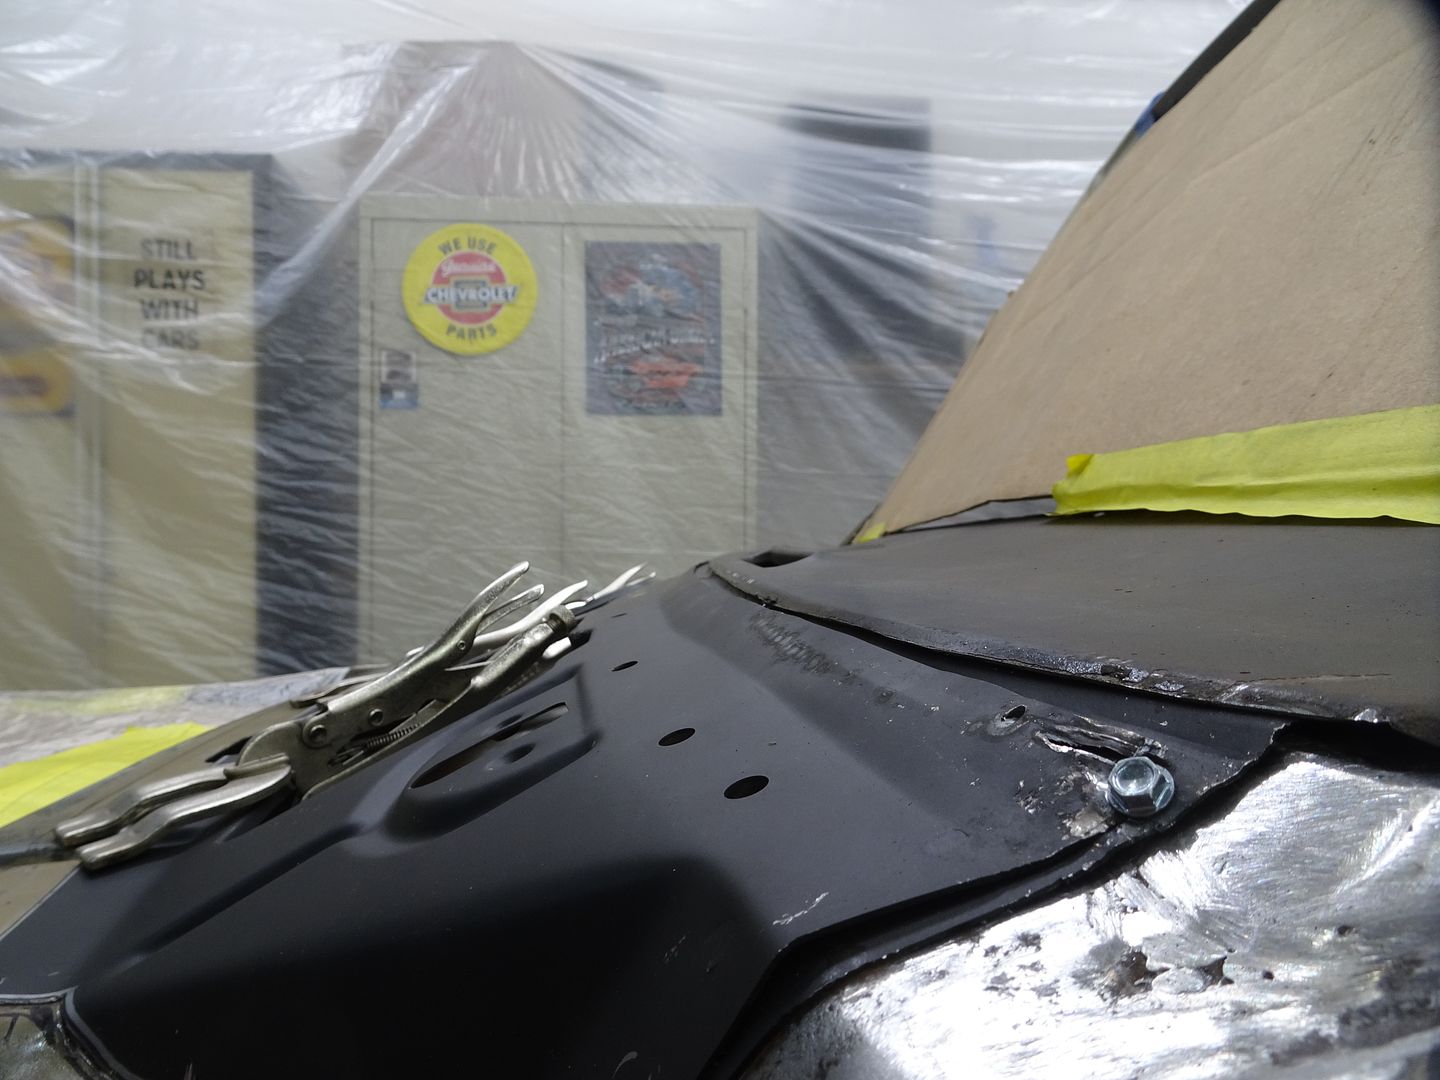
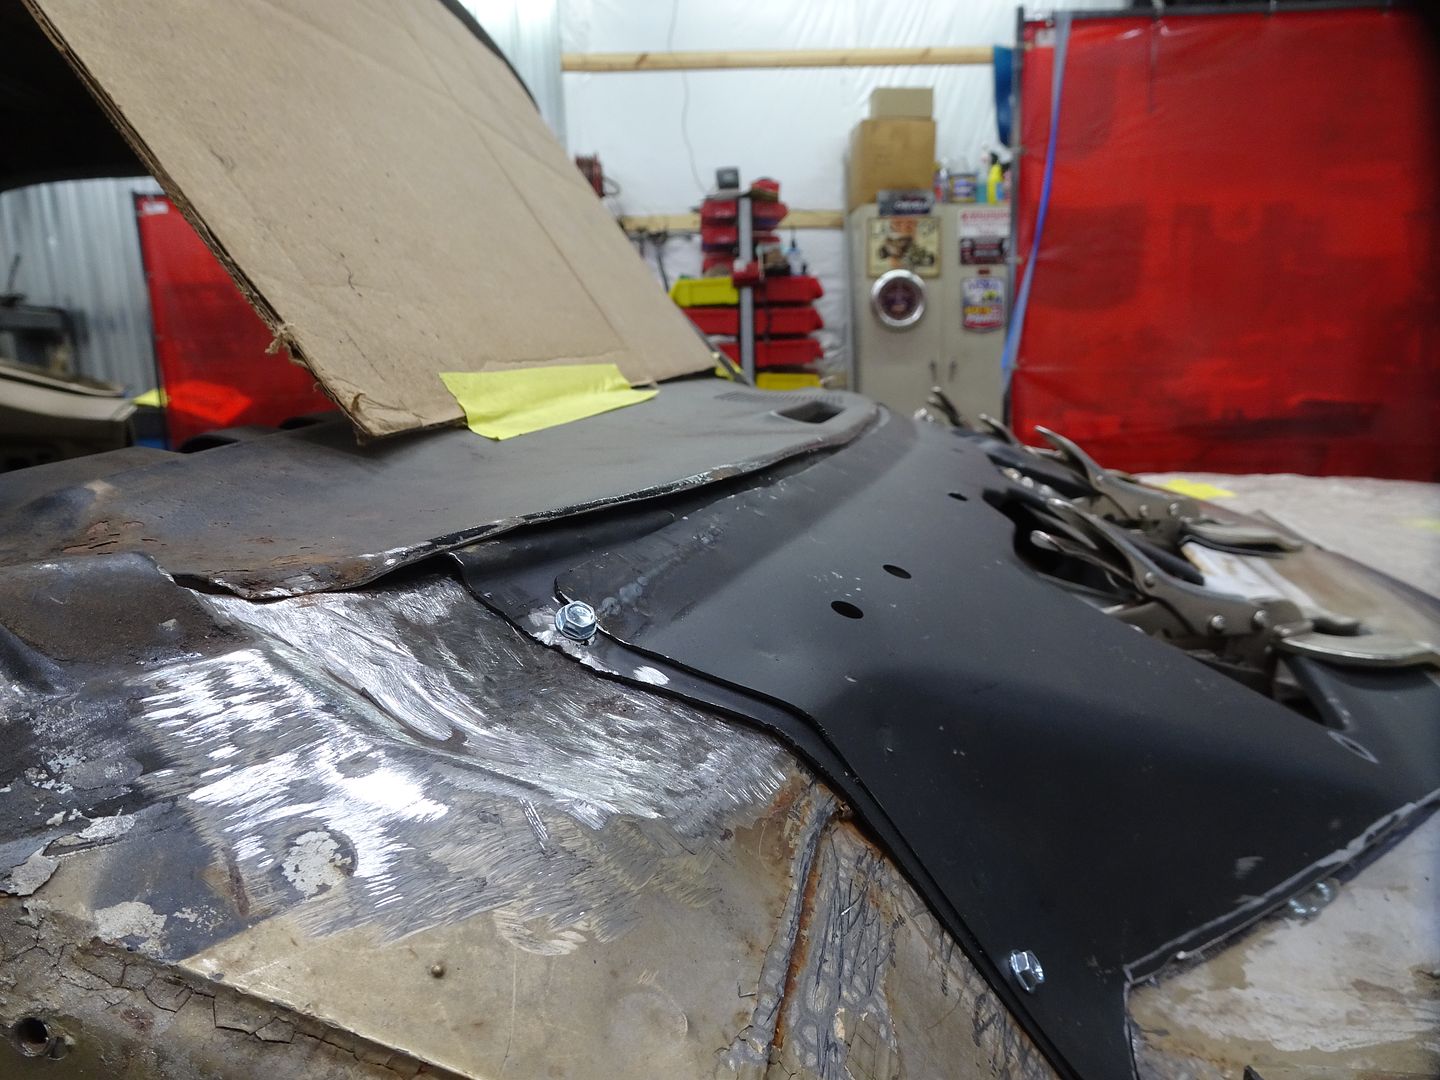
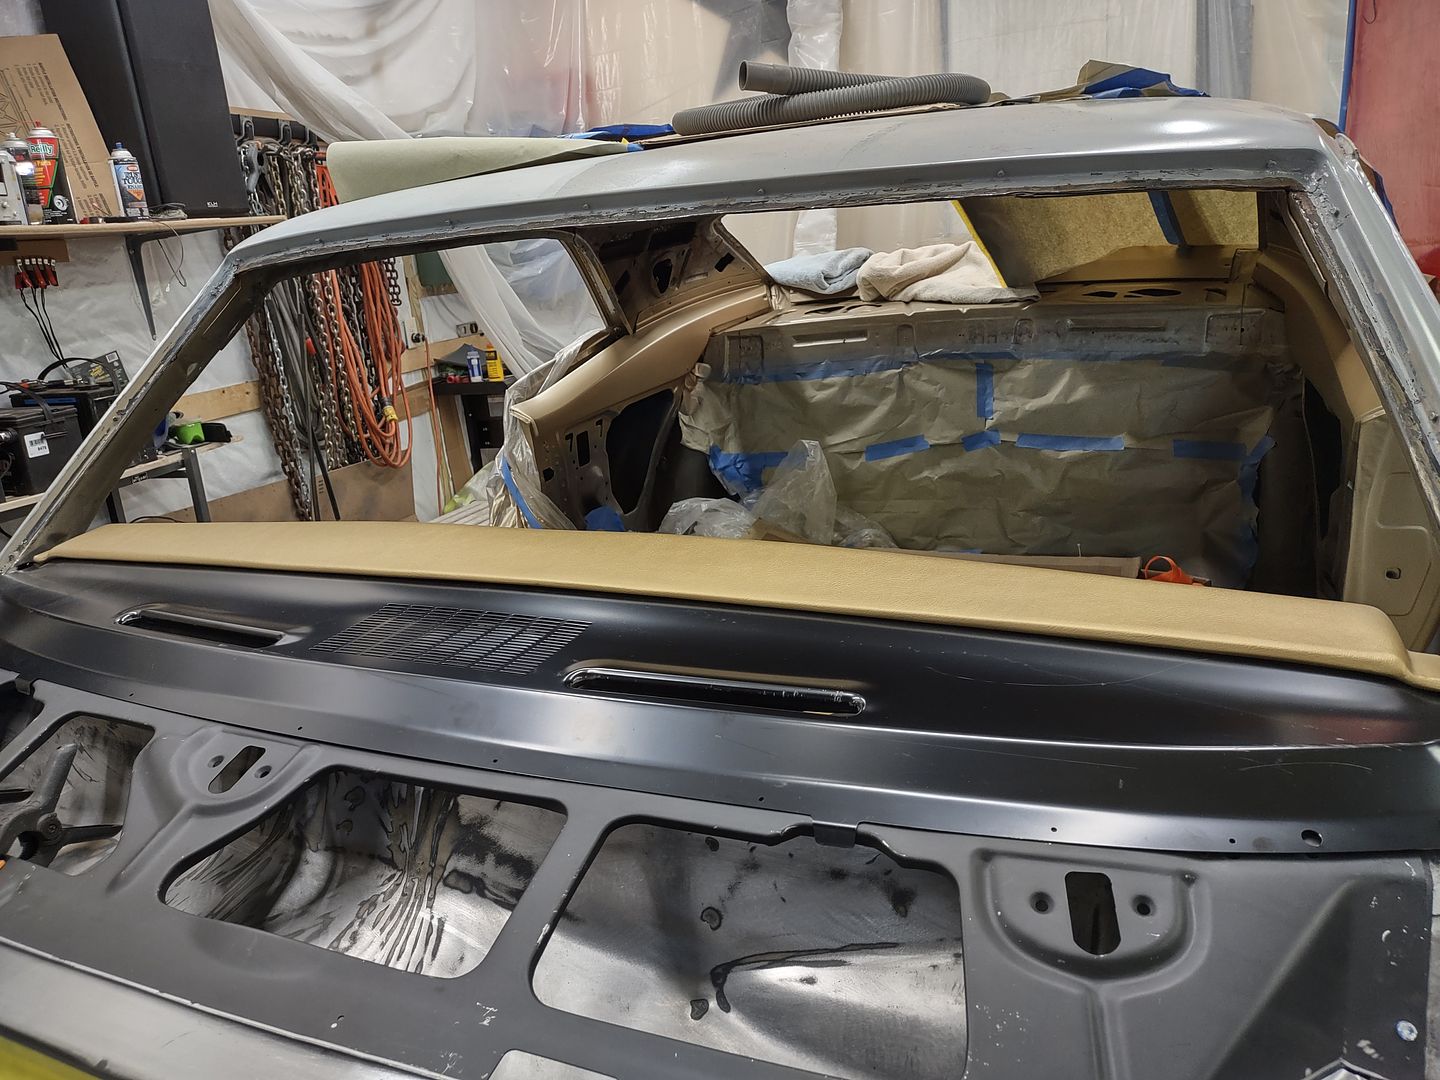
I really prefer the fit and appearance of the NOS, but may mock up the AMD again to compare.
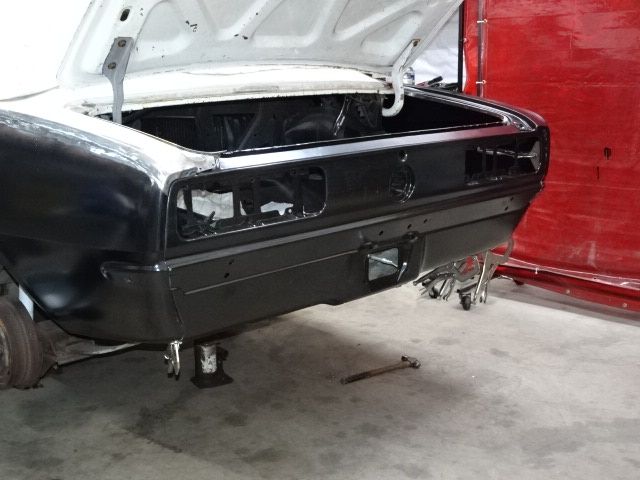
DSC08651.JPG?width=1920&height=1080&fit=

DSC08652.JPG?width=1920&height=1080&fit=


__________________

Mitch D.   River Falls, WI

Lifetime member of the "Cars apart Club"

Some Assembly Required

1966 Chevelle SS 396 M20

1970 Chevelle SS 396 M20

1967 Camaro SS 350 rs


1K+ Club

Status: Offline
Posts: 1169
Date:
Permalink  
 

Always been partial to OEM whenever it makes sense.

Still, do what YOU think is best.

Once again, "your car, your money"


Please keep the updates coming.

tiphat Karl


__________________

More ambition than brains,

If you have more than 5 of anything, best to stop counting!


1K+ Club

Status: Offline
Posts: 1299
Date:
Permalink  
 

Just be sure before you overcommitrolleyes

(And BTW, it is sure good that car has someone who loves it like you do too!)


-- Edited by BLyke on Saturday 22nd of January 2022 02:35:23 PM

__________________

Bruce L. - Lakeville MN

1971 Malibu Convert


President

Status: Offline
Posts: 7257
Date:
Permalink  
 

Last summer, I came across an NOS console plate for the 4 speed I installed to replace the powerglide.thumbsup

DSC07263.JPG?width=1920&height=1080&fit=

DSC07266.JPG?width=1920&height=1080&fit=

This last November, I went to MCACN and met another guy from the Supercar forum and bought a set of 4 Rally wheels with vintage polyglass tires in excellent condition for it. I had to throw one on the front for a visual. I also brought back an NOS front bumper, but don't have any pics of that. Getting excited to have this on the road and driving this summer. Now I just need to find the get-up-and-go to get it together in the next 5 months.

DSC08431.JPG


-- Edited by Lost in the 60s on Saturday 22nd of January 2022 03:22:39 PM

__________________

Mitch D.   River Falls, WI

Lifetime member of the "Cars apart Club"

Some Assembly Required

1966 Chevelle SS 396 M20

1970 Chevelle SS 396 M20

1967 Camaro SS 350 rs


President

Status: Offline
Posts: 7257
Date:
Permalink  
 

With winter blowing in the past few days, I started digging out the Camaro to get back on it. I see I left out some of the progress from last spring.

I had to replace the extension panel between the rear window and trunk. This is an AMD piece too and most of it fit OK. The trunk seal gutter was not good and I had to slice it to get it to lay down flat. The right side was the worst, but the left needed help too.

DSC09263

DSC09264

DSC09273

The panel was plug welded in the window channel, but panel bonded on the sides and in the seal channel. I then tried my hand at attempting to replicate the brazing at the side seams. It has been 55 yrs since I brazed and it looks like it too. I'll need to touch this up when I get back to it.

DSC09307

DSC09319

DSC09317

I, also, drove to the far side of Michigan in July for a right side NOS RS fender. I now have both sides and hope to get them on before next year too.

DSC09439

It will be a while yet, before the work really starts, I hope. I got a hernia on the last day of August and had double surgery on Sept 15th, so I'm way behind on getting ready for winter and hope the weather will warm up for a few weeks so I can get caught up.


__________________

Mitch D.   River Falls, WI

Lifetime member of the "Cars apart Club"

Some Assembly Required

1966 Chevelle SS 396 M20

1970 Chevelle SS 396 M20

1967 Camaro SS 350 rs


President

Status: Offline
Posts: 7257
Date:
Permalink  
 

Well, I'm as ready for winter as I'll ever be, so started back on the final fitting of the NOS tail panel. I had it close last Spring, but it still needed some tweaking along the vertical seams at the q-p's. I got that done today and started prepping it for install. LOTS of holes drilled and punched for plug welding, as the spot welder is just too big to get in the tight confines of most of this panel. I'll get to use it along the bottom flange.


DSC09631_kh4Vor1e3kza4JXbgNFdDQ

DSC09633

I just noticed I had my new pulse battery charger in this pic. It is the little rectangular piece with all the cables coming out of it, mounted under the shelf. I learned of these on another forum and had to get one to see if it actually did what the manufacturer claimed and others backed up with experience. It is crazy that this tiny box will de-sulfate old batteries, bring them back from the dead and maintain them at a full charge. Not just 1, but TWELVE batteries at the same time !!! I have 7 on there now. 1 was stone dead and I was concerned it was junk. It took 5 days for the indicator light to go from red to amber and another 4 days to go to green. I left it on for another 5 days and then tested it with my load tester. I can't tell that the battery was ever stone dead. Just incredible.

Anyway, here is the right side gap and body alignment.

DSC09634

Plug weld holes in the brace behind the panel

DSC09639

Panel clamped in place and marked for EDP removal at the holes for welding. This is the last step before attaching it to the car for good

DSC09640


__________________

Mitch D.   River Falls, WI

Lifetime member of the "Cars apart Club"

Some Assembly Required

1966 Chevelle SS 396 M20

1970 Chevelle SS 396 M20

1967 Camaro SS 350 rs


President

Status: Offline
Posts: 7257
Date:
Permalink  
 

Today was THE day. I still spent another 2 HOURS prepping and tweaking the fit to be just a wee bit closer...dang OCD. Anyway, the panel is now part of the car. Still a lot of welding left on the inner structure and I need to spot weld along the bottom flange, but it is on there and, actually, looks quite good.

DSC09642

DSC09651

DSC09652

DSC09656

DSC09655

DSC09657

Nice, even gap of the trunk lid to panel. I can't stand the huge gap all these cars have here. I may be one of "those" people who welds an 1/8" rod across the entire lip of the lid to close this up some.

DSC09659


__________________

Mitch D.   River Falls, WI

Lifetime member of the "Cars apart Club"

Some Assembly Required

1966 Chevelle SS 396 M20

1970 Chevelle SS 396 M20

1967 Camaro SS 350 rs


President

Status: Offline
Posts: 7257
Date:
Permalink  
 

After I got home from MCACN, I did a bunch of additional measuring for the reverse lamp holes, moved the left one 3/8th inch down and then "screwed up my courage", as the Brits say, and drilled the corner holes...hyper

DSC09726

I then cut the hole with my cut off disc, leaving it a little small for fine tuning with the 2" disc sander.

DSC09728

After a little trimming, I was relieved to have the fixture drop right in the prepunched holes in the AMD support panel behind it..whew

DSC09729

DSC09731

Then I had to install the tail light, to see if it looked centered.

DSC09732

Then I moved to the right side. I had to move the holes in the support panel as it wanted to locate the lamp too far to the right to keep it centered with the tail light lens. Once I had that one in, I HAD to mock up all the parts to see what it looked like. I haven't seen the car this assembled in over 4 YEARS !! The gas cap is also an NOS part I bought last summer.

DSC09735

Not much left of the original metal on the back half anymore. AMD, 1 piece trunk floor, left inner wheel house and outer lip section, right side trunk drop, support panel behind the tail panel, left quarter skin and rear window extension panel. The right quarter and tail panel are NOS pieces.

DSC09736

DSC09738


__________________

Mitch D.   River Falls, WI

Lifetime member of the "Cars apart Club"

Some Assembly Required

1966 Chevelle SS 396 M20

1970 Chevelle SS 396 M20

1967 Camaro SS 350 rs


Founding Member

Status: Offline
Posts: 2742
Date:
Permalink  
 

Looking great!

__________________

Derek Kiefer - Mantorville, MN

69 Malibu Pro-Touring stroker LS1-383/T56 - 69 SS396-325/3spd project


1K+ Club

Status: Offline
Posts: 1299
Date:
Permalink  
 

Nice work Mitch!

__________________

Bruce L. - Lakeville MN

1971 Malibu Convert


2K+ Club

Status: Offline
Posts: 2437
Date:
Permalink  
 

Good to see you back burning metal again Mitch. Always a spot in my heart for first gen Camaros.

__________________

Kevin

Northwestern Ohio


Active Member

Status: Offline
Posts: 460
Date:
Permalink  
 

Just amazing precision work. I am envious for your energy.

__________________

Larry L.

Coon Rapids


President

Status: Offline
Posts: 378
Date:
Permalink  
 

Looking good Mitch!

__________________

Hankster

Columbus, MN

'71 Chevelle SS frame-off, restro-mod, 402/375hp, Tremec TKO 600 5-speed, 3:90 12-bolt posi

'60 VW Beetle currently in the CAC


President

Status: Offline
Posts: 7257
Date:
Permalink  
 

Wow, almost 2 years ago, exactly, I was "ready" for bodywork and primer. It has taken a LONG time to get that stage done and it still isn't but it's a lot closer. HUGE thanks to Karl for doing a lot of filler work to get the dings out of all my repairs.


DSC00040.JPG

DSC09856.JPG

DSC00139.JPG

DSC00140.JPG

DSC00141.JPG


The doors were another matter. Not rusty, but like the rest of the car, appear to have been in a demo derby. I had the doors and trunk lid chemically cleaned to bare metal and EDP dipped to coat them inside and out. This is the right door. HUGE dent hiding under a LOT of filler, that I never knew was there. I metal worked a lot of it out and then Karl worked his magic to make it disappear again.

DSC00031.jpg


The left door had a deep crease most of the length above the body line, that I worked out quite well and only needed a skim coat to blend. I don't see where I have a pic of that. I was quite disgusted with the doors and didn't take many pics. Well, the pics of the doors in primer are on my phone and I have great difficulty moving them to the computer to send to Photobucket, so I can post them here. I'll work on that another day... LOL

I did prep the trunk and spray that with primer/sealer to be ready for spackle and I DO have pics of that.

DSC00575.JPG

DSC00576.JPG

DSC00578.JPG

DSC00577.JPG


__________________

Mitch D.   River Falls, WI

Lifetime member of the "Cars apart Club"

Some Assembly Required

1966 Chevelle SS 396 M20

1970 Chevelle SS 396 M20

1967 Camaro SS 350 rs


1K+ Club

Status: Offline
Posts: 1299
Date:
Permalink  
 

Looking good, seems the tag teaming effort is really doing well!


__________________

Bruce L. - Lakeville MN

1971 Malibu Convert


Active Member

Status: Offline
Posts: 471
Date:
Permalink  
 

Looks great Mitch! Paint in the spring???


__________________

Chris S.

Oak Grove

'68 Malibu (His)

'68 442 (Hers)


President

Status: Offline
Posts: 7257
Date:
Permalink  
 

Chris S wrote:

Looks great Mitch! Paint in the spring???


 We are looking at that as a possibility. I have the 2 NOS front fenders that shouldn't need much work and another original hood that is better than the one on there now. It does have a bump in the front that I will need to work out better, but having it ready to shoot in 5 months could be doable.


__________________

Mitch D.   River Falls, WI

Lifetime member of the "Cars apart Club"

Some Assembly Required

1966 Chevelle SS 396 M20

1970 Chevelle SS 396 M20

1967 Camaro SS 350 rs


Forum Administrator

Status: Offline
Posts: 128
Date:
Permalink  
 

Way behind on updates...again. I epoxy primed the doors, trunk lid and trunk opening and then a couple days later, I bought a gallon of BASF single stage paint in the original Granada Gold and jammed the doors, trunk lid and the trunk opening.

I then bought a gallon of BASF Diamont base coat in color and painted the rear window opening and interior panel and upper door sills.


__________________


Forum Administrator

Status: Offline
Posts: 128
Date:
Permalink  
 

Interesting, I changed the event count down and now I'm the webmaster ???

I was waiting on a quart of flattener to mix with clear coat to get the 60% gloss on those parts, so decided to remove the front clip, as I have NOS fenders for the car. As you can see in the pic, under the left corner of the windshield, there is a rust hole I had forgotten about from when I did the cowl repairs in 2019. I had to remove the windshield and found a much bigger issue hiding under the urethane glass sealer. I have seen some amazing stuff done by bondo artists, but I couldn't believe what I was seeing. There was NO indication of an issue with this dash panel until I pulled the glass out. The rust had been covered and hidden by the sealer!

I ordered a complete upper and lower cowl assembly and was waiting for that to arrive, so I cut off what was left of the dash top flange. After removing the dash top layer, I marked and cut out the cowl top.

The lower cowl flange was complete trash too, so that got cut off also.

Once the new part arrived, I clamped the cut off upper to it and cut it to match, along with the lower.

I still needed to trim more of the lower off, but the replacement actually fit and lined up very well.

There were still a few hours involved with getting this to fit to my satisfaction, but I'm happy with the result.


__________________


Forum Administrator

Status: Offline
Posts: 128
Date:
Permalink  
 

And about that time, we left for FL. I hauled the Harley down in a small, enclosed trailer, so made a stop in Richmond KY on the way home for a few parts. The new dash panel looks like it is going to be a very nice replacement part. I also got a new dash pad in gold, wheel opening moldings and a number of small items to go with this stuff.

And that is where I'm at today. Now to get to work and get all this welded in and painted.


__________________


1K+ Club

Status: Offline
Posts: 1169
Date:
Permalink  
 

I realize how upset you were when the dash issue came to light.

I would, however, add that now when you reassemble car and interior, the inside will be all done for practical purposes.

WAAAY better than Gold interior, Black dash, especially now knowing what was underneath.

I really believe it worked out for the best.

Now when you lay in to the 70 Chevelle you will have fewer loose ends on other cars.

Fortunately, your Bride is very understanding.

LUCKY YOU!

Karl


__________________

More ambition than brains,

If you have more than 5 of anything, best to stop counting!


President

Status: Offline
Posts: 7257
Date:
Permalink  
 

Yes, I am very fortunate to have fallen into the situation with my wife.
I had not pursued the Chevelle parts since she was, originally, riding home again too, but after we found a suitable return flight for her, that opened the door to go to SC and then up thru KY for the Camaro parts. I saved about $100 in oversize shipping on the Camaro parts too, so well worthwhile picking them up in person.

__________________

Mitch D.   River Falls, WI

Lifetime member of the "Cars apart Club"

Some Assembly Required

1966 Chevelle SS 396 M20

1970 Chevelle SS 396 M20

1967 Camaro SS 350 rs

«First  <  1 2 3 | Page of 3  sorted by
 
Quick Reply

Please log in to post quick replies.

Chatbox
Please log in to join the chat!