Thickness .125 It is stamped, so not perfectly flat and has a slight burr on the one side. By tape, it's 1/8"
jim larson said
Jan 28, 2018
Thanks again, I just order two of those exact size washers from fastened last night. Guess what I fount in the garage today. Three of those exact washer as in your picture, even down to the dented area. I wonder what that was for?
jim larson said
Jan 28, 2018
jim larson wrote:
Thanks again, I just order two of those exact size washers from fastened last night. Guess what I fount in the garage today. Three of those exact washer as in your picture, even down to the dented area. I wonder what that was for?
By the way, do you remember if all of the body mount bolts had flanged heads, I am thinking the radiator support ones were not flanged and maybe the one on each side of the drivers and pass seat, which are shorter by 1/2", was not flanged.
Lost in the 60s said
Jan 28, 2018
The only body mount bolts I've removed are the 2 in the initial pics, at the rear bumper. Chris already removed/loosened the others and I haven't looked at them.
jim larson said
Jan 29, 2018
Boy a lot of rust on those two, it looks like they have flanged heads. In looking at the 66 AIM, it looks like the #3 upper assembly mount metal insert had a recessed area so that that special nut assembly in the body will fit down into the recessed area. The lower cushion also is a little different than all the other 6 mounting position. And the bolt is shorter than the others so it doesn't poke up though the floor.
All the repo cushions I've seen and the ones I have possess the metal insert with a recess. I think the other 6 mounts originally did not have this recess and fit flat against the body, so as not to pull the body into the recess like position #3.. Do you think this is a big issue? If you noticed on the two bushing you removed, the metal insert was probably flat across the top.
Lost in the 60s said
Feb 12, 2018
Back from warm weather and back on the Chevelle. I cut and fitted the floor support and will get that tacked in today. Maybe get some of the floor skin figured out too, but the inside door handle on my HHR broke off yesterday and I'm moving the one from the rear to the front so I don't have to run the window down to open my door from the outside...
Lost in the 60s said
Feb 12, 2018
A little more grinding after lunch and it was ready to weld in.
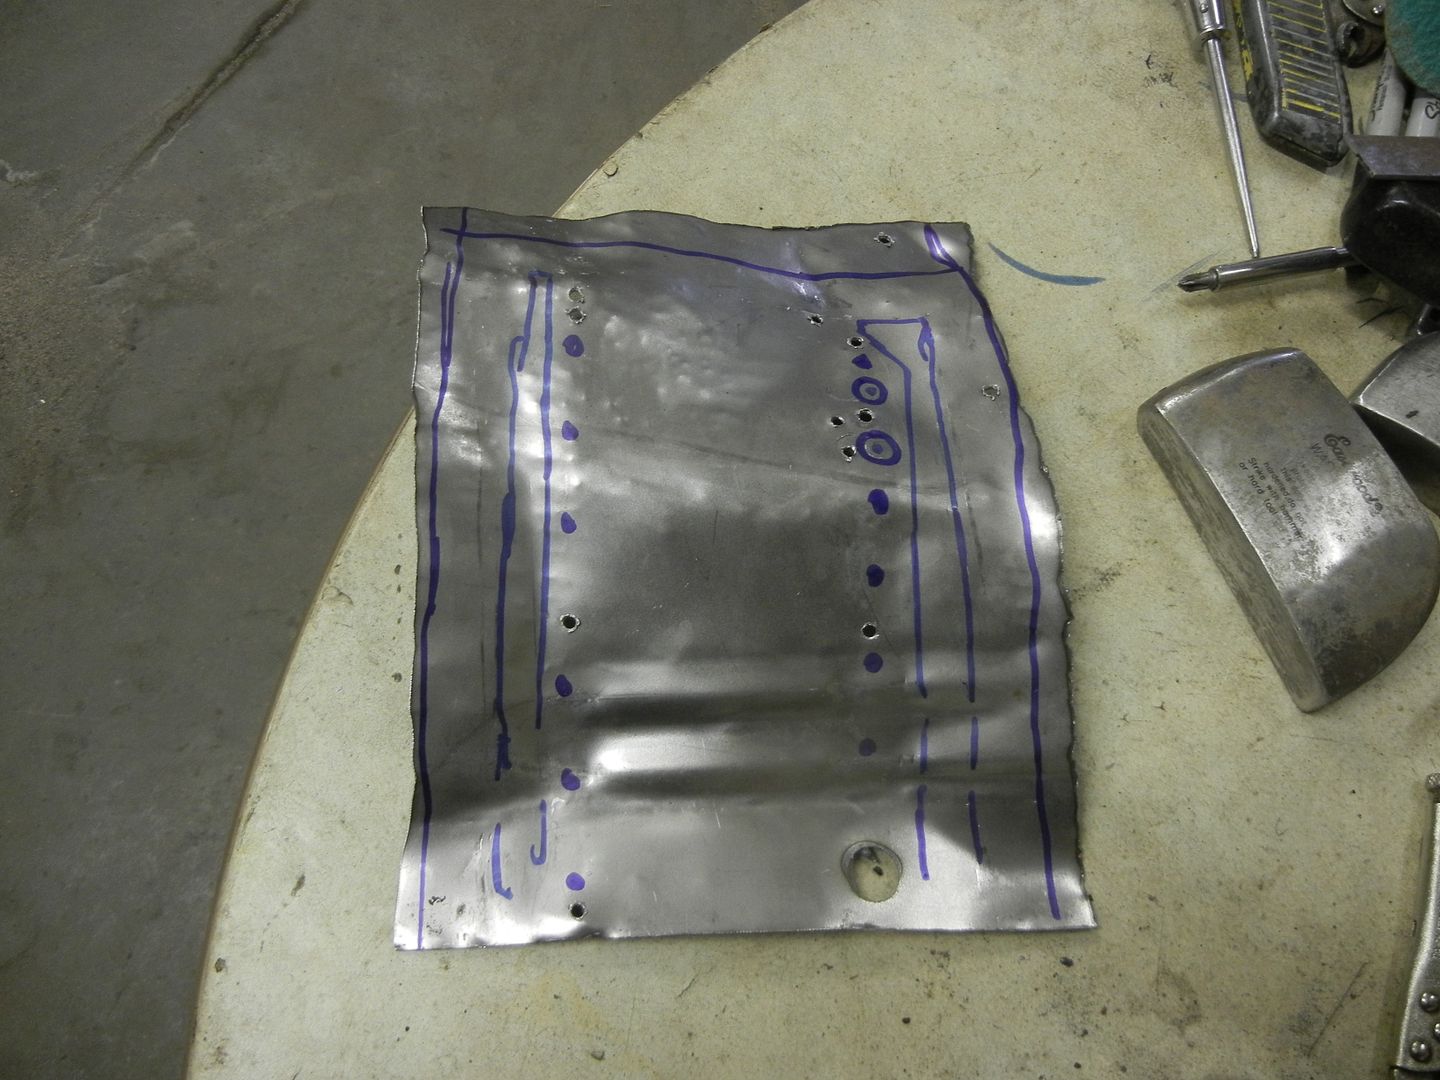
Took an old pan from a '65 B body and cut out a patch to form to the floor. Good thing we aren't trying to make it look original...
After "hammer forming" it to something close, I drill screwed it down and marked the support flange from below. Then blew 30 holes in it to weld to the support. It will also get perimeter welded for strength.
Lost in the 60s said
Feb 19, 2018
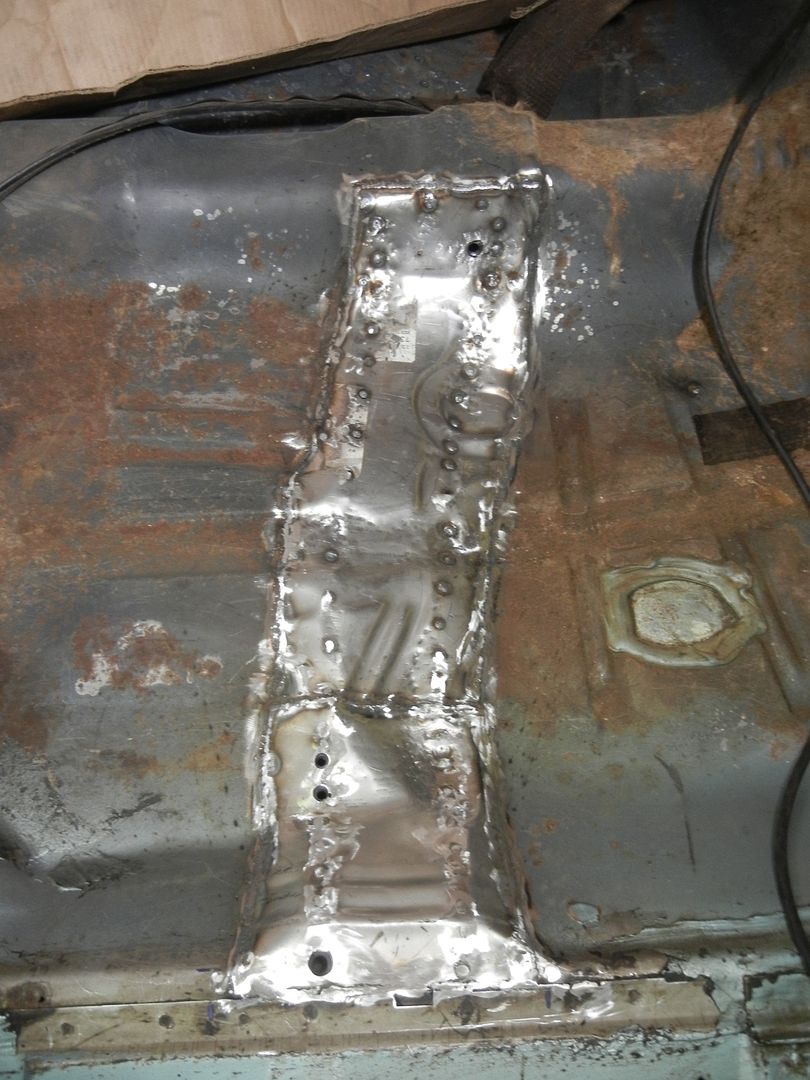
I finished up forming and welding the first pan piece in.
Then cut another piece of old floor pan to "form" as a patch.
After forming and screwing down to mark where to cut holes for welding to the support brace.
All welded in..
Minimal seam sealer underneath and it will look OK.
Lost in the 60s said
Feb 20, 2018
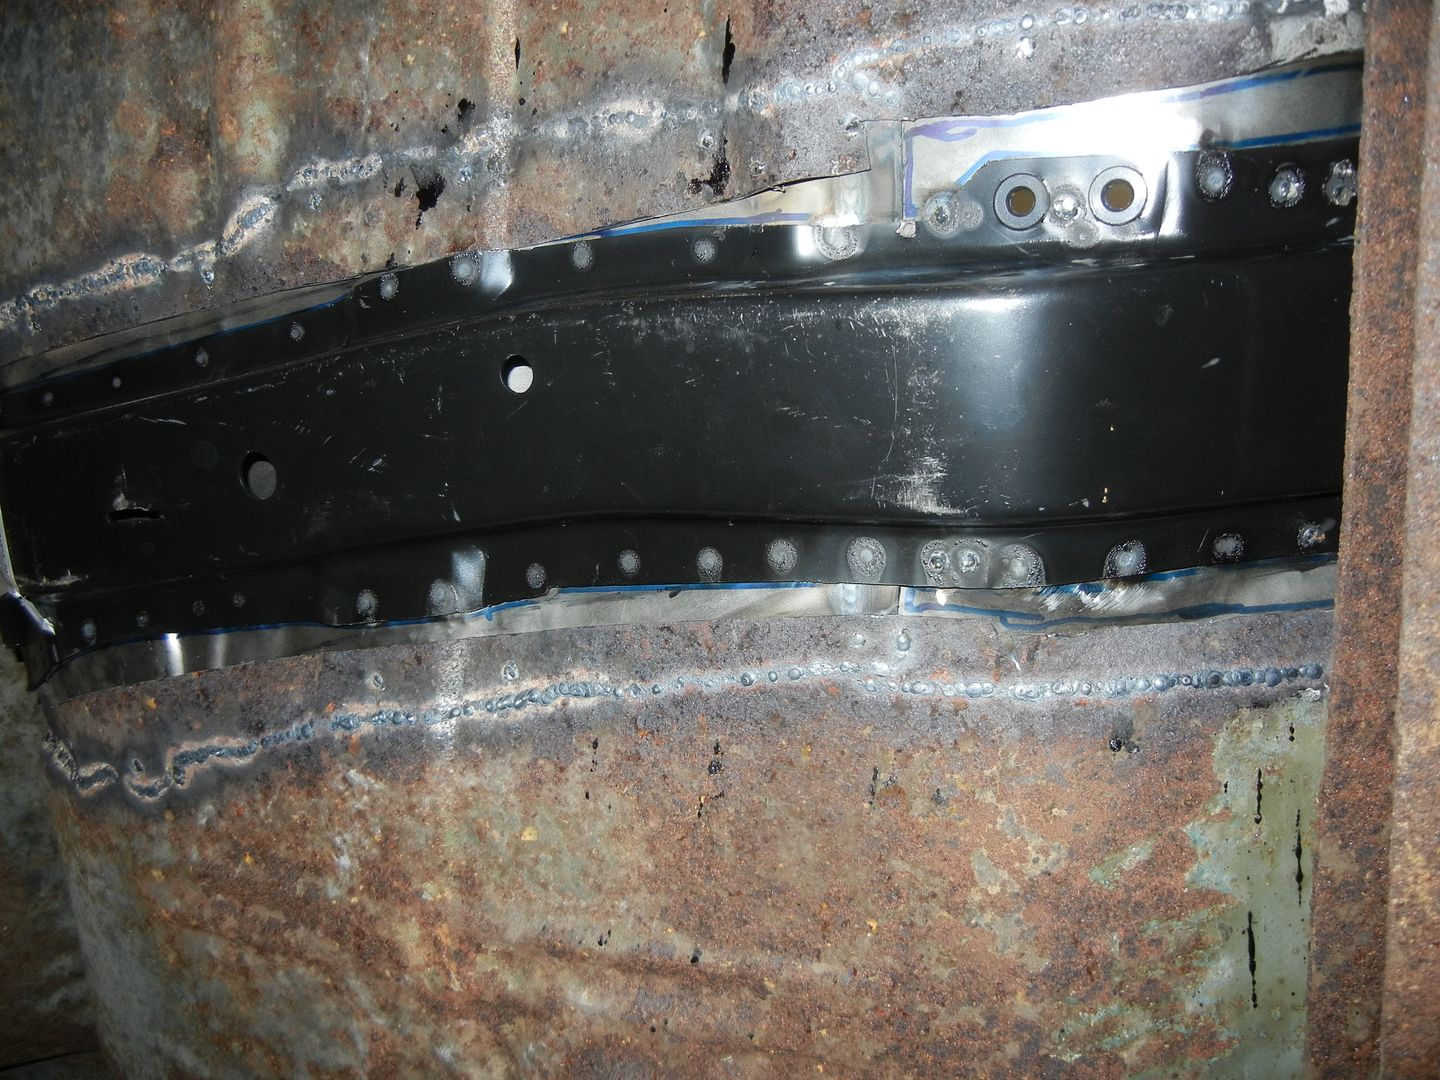
Closing in on the small stuff I passed over during the big sections. The replacement inner wheel houses always leave a square hole where they meet the outer house right at the front. I cut a cardboard template, made a patch, punched a bunch of holes and welded it in. The screws are holding the wheel house to the floor that will be replaced sometime in the future. I didn't want to weld all that in solid and then pretty much destroy the weld flange later to remove it for the new floor.
At the back of the inner/outer seam, the outer was rusted away so I cut that out and did the same procedure to form a patch.
I used drill screws to pull all the pieces tight and welded it in.
As it looks from in the trunk and the cardboard template for a small extension of the trunk floor to reach the drop flange.
All done. You can see the hole in the quarter panel and there is a matching hole in the trunk drop too, so, again, no welding of new panels to parts that need to come out later, unless Chris decides he wants that. He can easily pull the screws and weld the holes shut.
Lost in the 60s said
Feb 20, 2018
There was 1 last rust hole I found in the right outer wheel house. I made a quick patch and welded it on. Seems I either didn't take an "after" pic, or it didn't turn out...
Welded the jack locator in and the inside of the trunk is done.
Moved on to the last item on the list.
Well, that's kind of ugly, but not as bad as the other side was.
Better with all the loose rust knocked off and vacuumed out.
Test fit another piece of left over floor pan, but it is too narrow.
Luckily, I have the left over pan from the other side to butcher.
jim larson said
Feb 21, 2018
Looking good, will it be on the road with Chris this summer? I actually have a hole in my floor just above that body mount on the passenger side. Someone used a bolt that was too long. That mount uses a 2 1/4" bolt and the rest of the mounts use a 2 5/8" bolt. The bolt is actually the same bolt use on the radiator core support mounts.
Chris R said
Feb 21, 2018
My 66 is also rusted out in that spot too, both sides.
Lost in the 60s said
Feb 23, 2018
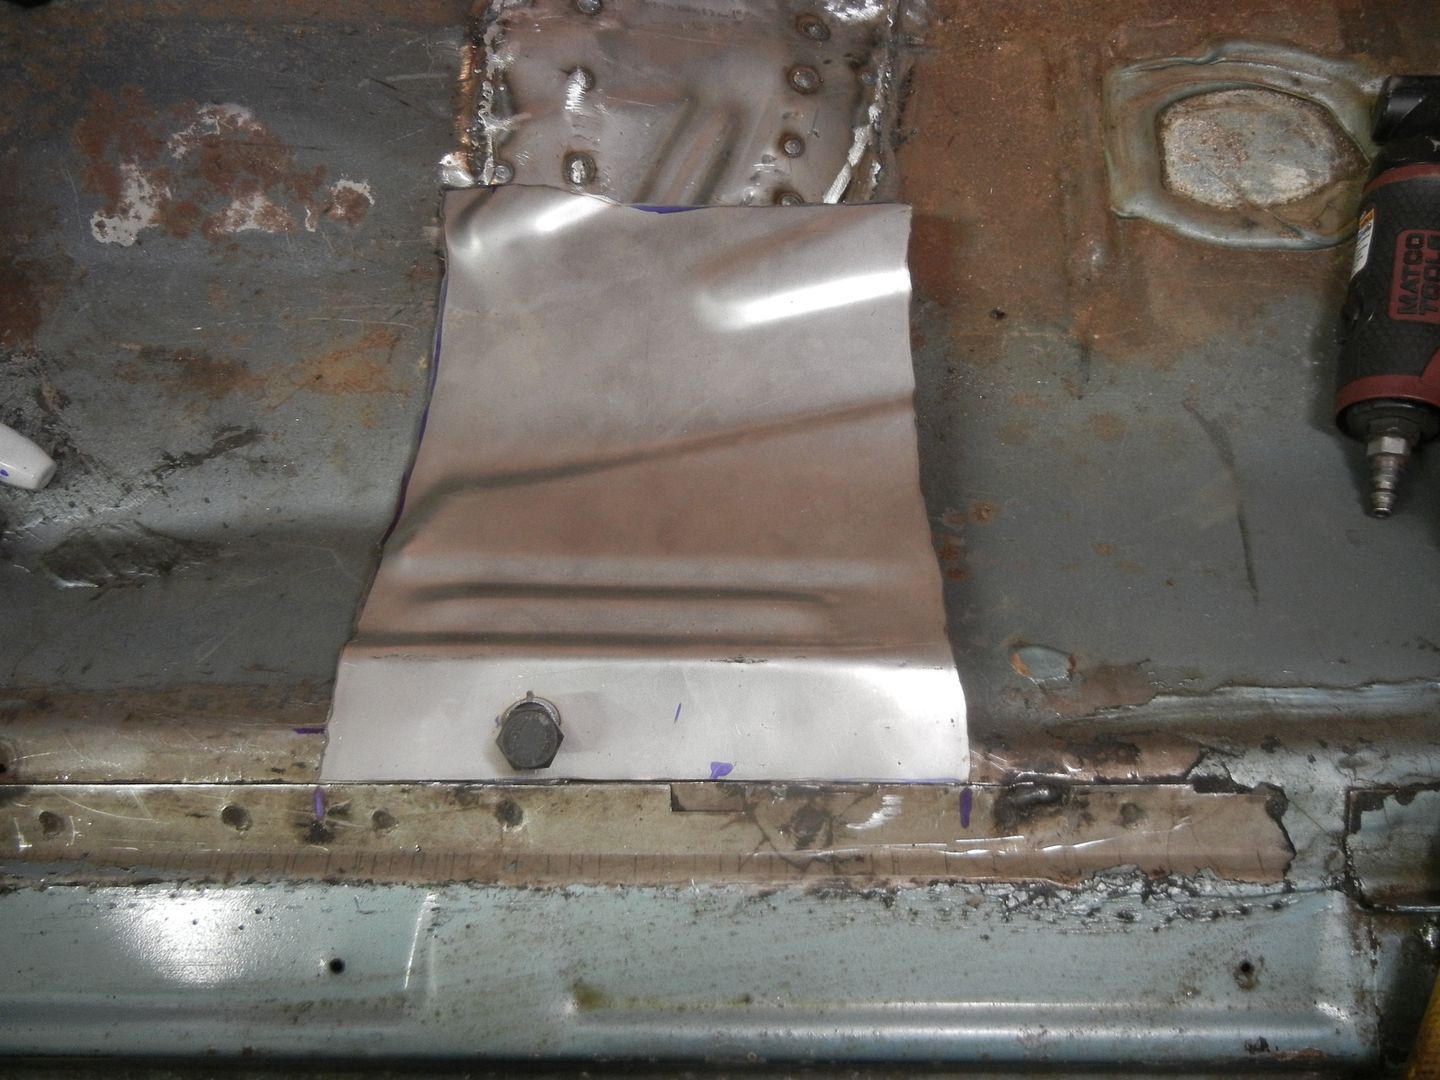
Where I left off last time, was cutting a suitable piece for the last patch from a scrap floor pan. Today, I did that and screwed it down to mark for cutting to shape and drilling plug weld holes. I also tapped around the body bolt to mark where the patch was touching that. I used a ball peen, socket and maul to form nice divot to prevent bolt interference.
Ready to start welding. I am going to make the patch flush at the seat mount so the pedestal doesn't have a step in the base.
I ended up with too much material at the crown on both sides, so cut a relief to flatten them out better.
And that's all there is to that. About 10 minutes with the 2" angle disc to clean it up some and I should be done with the patching.
Lost in the 60s said
Feb 23, 2018
Last big item was to replace all the body mount bushings. Chris had already done the hard work of getting the old bolts out, so that eliminated many hours of tedious work. The left rocker is badly rotted and I didn't think it would hold the weight to lift the body, so I used a large piece of 4x6 under the 2 center floor supports. I removed all the body bolts except the right front and over the rear axle. I loosened them most of the way. Nothing to it, lifted the body about 1 1/2" and the bushings were easy to get out, well after prying them loose from the rust..
I started with the left front, because I thought I might need to weld a patch washer on the frame to hold the new bushing. What a surprise to find the hole, just fine. After the extensive rust out in that corner, I didn't expect this.
This is the mount under the front seat area. I call this the "locator" mount, as it is the only one with a sleeve that mates into the bushing washer. All the rest of the bushings are flat on top. The other unique aspect of this bushing is that the hole in the frame is smaller than all the rest and the bushing shoulder is too. I have yet to find a set of repop bushings that include the correct size rubber for this hole. I end up trimming the shoulder down with a single edge razor blade to fit.
The next mount location rearward didn't have a mount in it and I didn't want to try to clean the threads with a tap. I had 2 plugs from a '67 GTO that I slid in the frame hole to support the floor for now.
After that, it was just replace the rest of the left bushings and set the body back down. The left front did have an extra washer and it needed to go back with the new bushing too.
The right side was the same as the left and all the bushings are now replaced. The only thing left is to run the bumper fasteners thru the blast cabinet and put the bumper back on.
jim larson said
Feb 24, 2018
Looks like you did the same thing as I did with the bushing by the front seats. I also did have a bushing in front of the rear wheels, a new bolt just screwed up in there for me, so I added a bushing there. My kit for the radiator core didn’t have two correct washers, so I found some to add. What do you think was the purpose of that extra washer?
-- Edited by jim larson on Saturday 24th of February 2018 08:59:22 AM
Lost in the 60s said
Feb 24, 2018
Chris's car has the nut for the blank mount too, but was rather rusty and since he plans to replace the entire pan, at some time, I didn't feel it was worth the time to chase the threads. With the bushing plug in there, it's the same support as a bushing. He has the 2 addition bushings in his kit for when the new pan comes along. The extra washer at the left front is for the body not being level enough after the jig build. Very common on these older cars. Rather than pull the body down to the bushing and twist everything else out of whack, they used washer shims and moved on. I have a stack of special shims I took out of one side of the core support on my old GTO too. The factory didn't waste time trying to correct mis-matched components, they just used shims and bent parts to fit. The line doesn't stop and the next car is already coming into that station, so it's go, go go.
The mis-matched structural components around the right rear window on my car are a good example. Someone didn't get a piece in the jig correctly, but it got welded in anyway and all the following components were then bent into their respective jigs to somehow get the final skin and window opening to look decent. The back seat brace and wheel house bracketry were all misshapen on that side as a result of the first piece being out of place, but everything did, sort of fit, function and look good on the outside, so down the line it went.
I worked at the St Paul Ford plant for 10 months in '72/73 and it was an amazing process to watch. All the sub-assembly stations building up components that get thrown in the car and bolted down in 20 seconds. A body, or frame would pass thru many stations on the line and would pass thru each "station" in about 2-3 minutes. 1 person on each side of the car would throw as many parts on as the time study dictated and then the next pair took over for their job....over and over and over, for 8-10 hours a day, putting the same parts on each vehicle. There's a reason I only lasted 1 model run. The pay and benefits were great, but I'm not wired for that kind of repetitive boredom.
SShink said
Feb 24, 2018
You're spot on Mitch. I've been involved in manufacturing for over 30 years, and it's all about the hourly production rates, no matter where I've been.
Do you think you lucked out with all the body mount bolts not being frozen or breaking loose the cage nuts? That's my worst fear when doing anything in the body mount area. I think Tim had to get out the heat wrench on all but maybe 2 on the vert when we tore it apart.
Lost in the 60s said
Feb 24, 2018
Chris did all the grunt work with the bolts, all I had to do was zip out the new bolts..
Lost in the 60s said
Feb 26, 2018
For the most part, I have wrapped up the work on Chris's car.
Pretty good pile of rusty metal and half of a 5 gallon pail of rust and dirt that fell off during the work.
Now, the reason I can't say it's done, is because I had a piece of cardboard inside the car catch on fire and burn his nice, original, headliner, left sail panel, rear window trim, and left headliner pinchweld.........
I bought a new headliner and sail panel material and am going to attempt to replace the material on the panel today. The headliner will need a group effort or professional install. I've read a number of articles and watched some vids on this and would like to be able to install them, as I have several I need done on my own cars. Getting a tech session and having more hands and a LOT of spring clips, seems to be the way to do this. Might be something to look at down the road. My Chevelle should be out of paint sometime by June and we could practice on that before attempting Chris's.
jim larson said
Feb 26, 2018
Nice original defroster, not to many of those around. I along with the help of a friend installed my headliner, you will do a good job, Its kind of forgiving because you can just heat the contact cement with a hair dryer and reposition. Looks to be a lot easier than the small sail panels on an early 66, I think your car has the large sails just like the 67.
-- Edited by jim larson on Monday 26th of February 2018 03:55:24 PM
-- Edited by jim larson on Monday 26th of February 2018 03:56:08 PM
Nice original defroster, not to many of those around. I along with the help of a friend installed my headliner, you will do a good job, Its kind of forgiving because you can just heat the contact cement with a hair dryer and reposition. Looks to be a lot easier than the small sail panels on an early 66, I think your car has the large sails just like the 67.
Looks like YOU DA MAN, Jim. I can see you supervising a tech session on this subject here. Oh, and bring all those spring clips with...
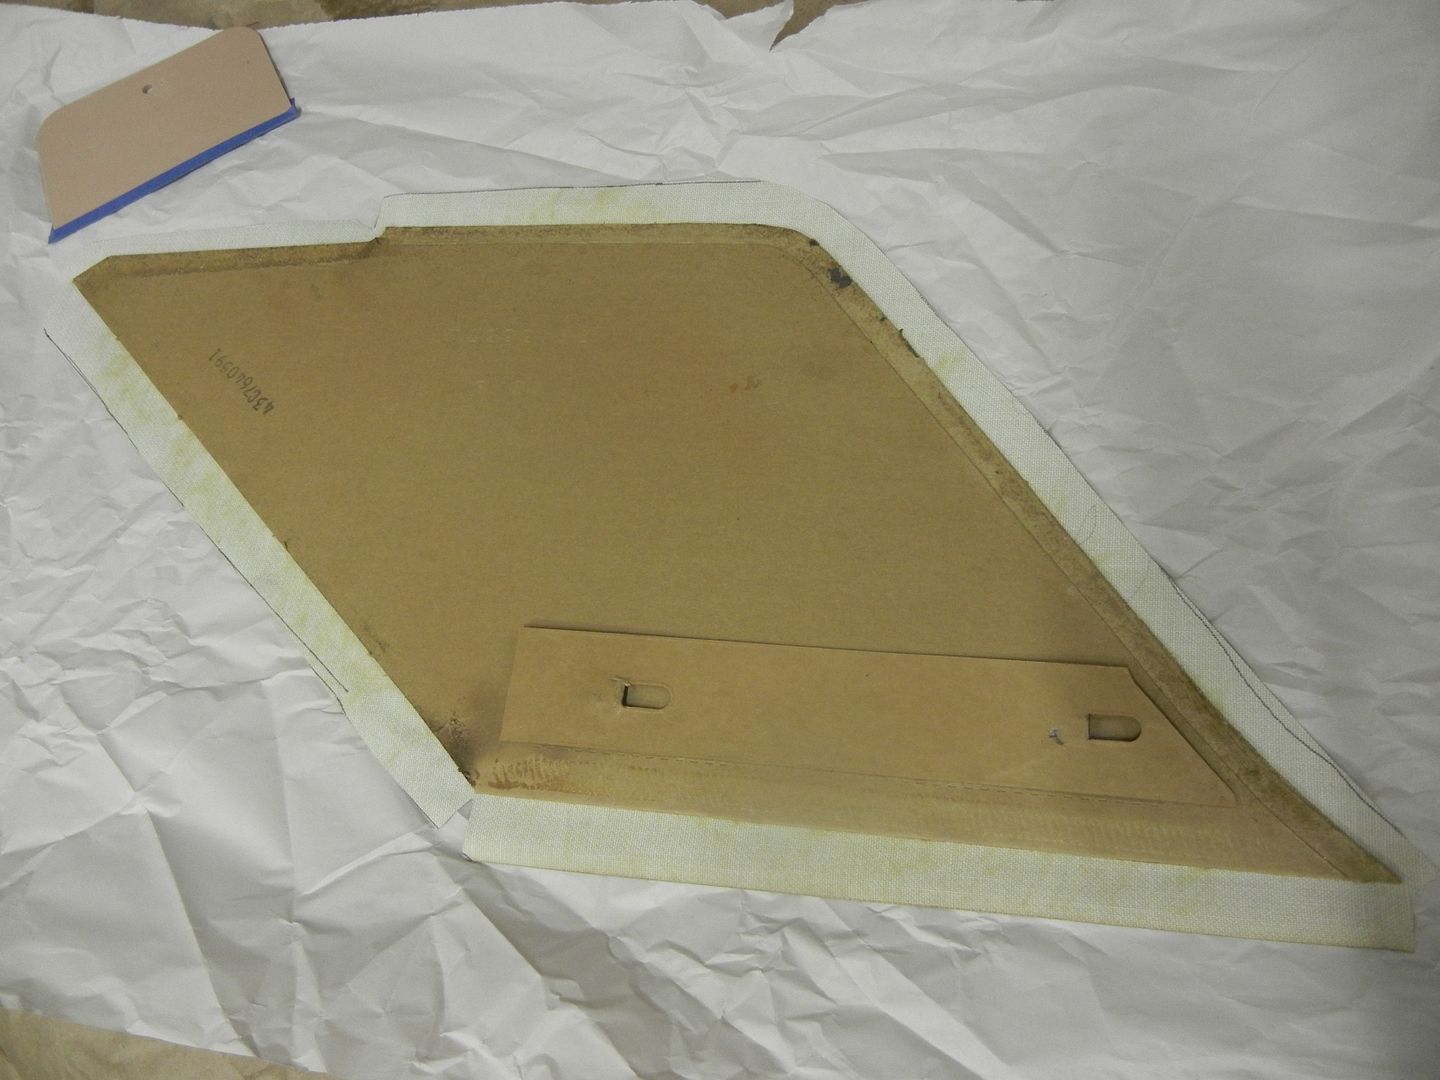
I heated the vinyl on the sail panel board and slowly separated it as best I could with the broad knife. Not much peeling of the cardboard and it is in excellent condition. Then I traced around it on the new fabric, leaving plenty of fold over and cut it out. Once I had it cut, I mimicked the reliefs of the original and layed the board on it. Looks like it will work, but I decided to let it rest overnight to remove the fold wrinkles .
jim larson said
Feb 27, 2018
I would be willing to come up sometime and help with a headliner install, if it comes to that. Looks like your have a good plan for the sail panel. I couldn't tell if the upper area above the sail panel just blackened or scorched. I let someone use most of my clips and never got them back, only have about six left.
Lost in the 60s said
Feb 27, 2018
jim larson wrote:
I would be willing to come up sometime and help with a headliner install, if it comes to that. Looks like your have a good plan for the sail panel. I couldn't tell if the upper area above the sail panel just blackened or scorched. I let someone use most of my clips and never got them back, only have about six left.
The headliner above the sail panel burned right thru....I have a new headliner here. It appears the sail panel fabric has some sort of iron on backing for the cement to bond to, rather than soak into the fabric. I'll have to consult with the master quilt maker here and see if her backing would work for this.
Guess I'll stop by a Staples or Office Depot sometime soon and buy a bunch of those clips.
The Chevelle went back to it's rightful owner this morning, so now it's up to Chris to get the mods he wants to do done in the next couple months so he can drive it again...
67ss said
Feb 27, 2018
I can't say thanks enough to Mitch for all the work he did to patch it back together. I could not have gotten it done that quickly. Looking forward to the next steps to getting it back on the road for spring. I will start posting back in the thread I started for rear end and trans upgrades.
jim larson said
Feb 27, 2018
I wonder if the sail panel material has to be that way (iron on backing) so as not to show through if it is glued on? who did you buy the sail panel material through?
-- Edited by jim larson on Tuesday 27th of February 2018 01:38:34 PM
Bobs_Place said
Mar 1, 2018
I did my headliner, it took me much longer the the U-tube vids said it wood take.
If at all possible, remove the rear window, front too but not as necessary.
Don't mix up the rods, also mark the hole that they were in when you remove the HL
I would be glad to help also and bring clips.
Lost in the 60s said
Mar 5, 2018
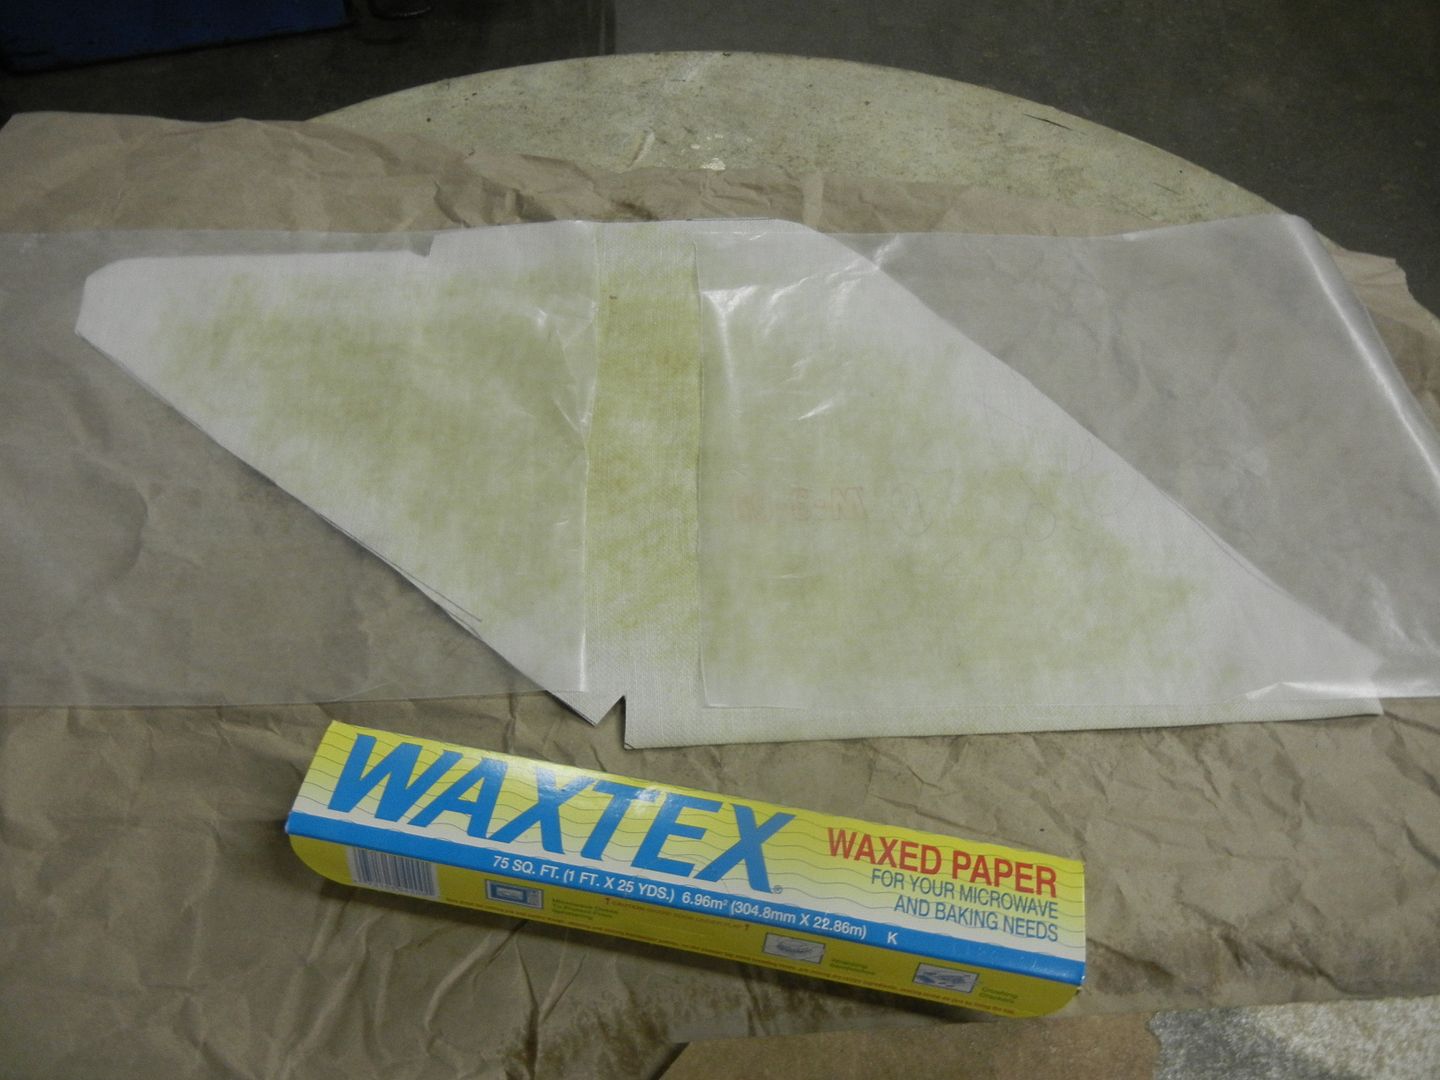
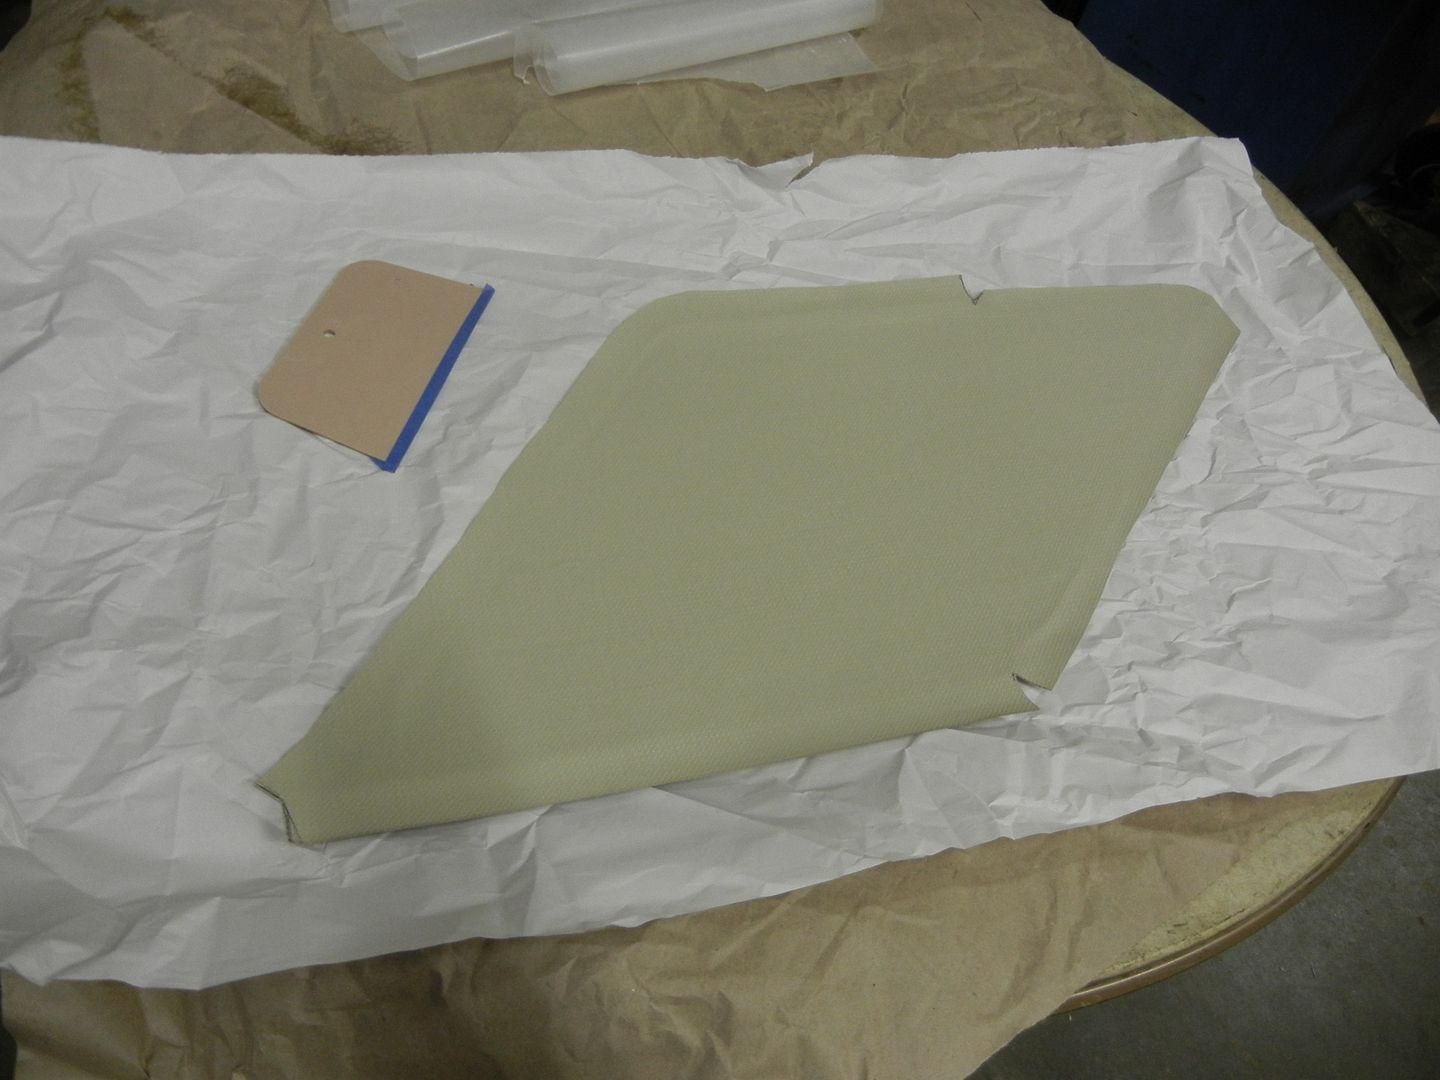
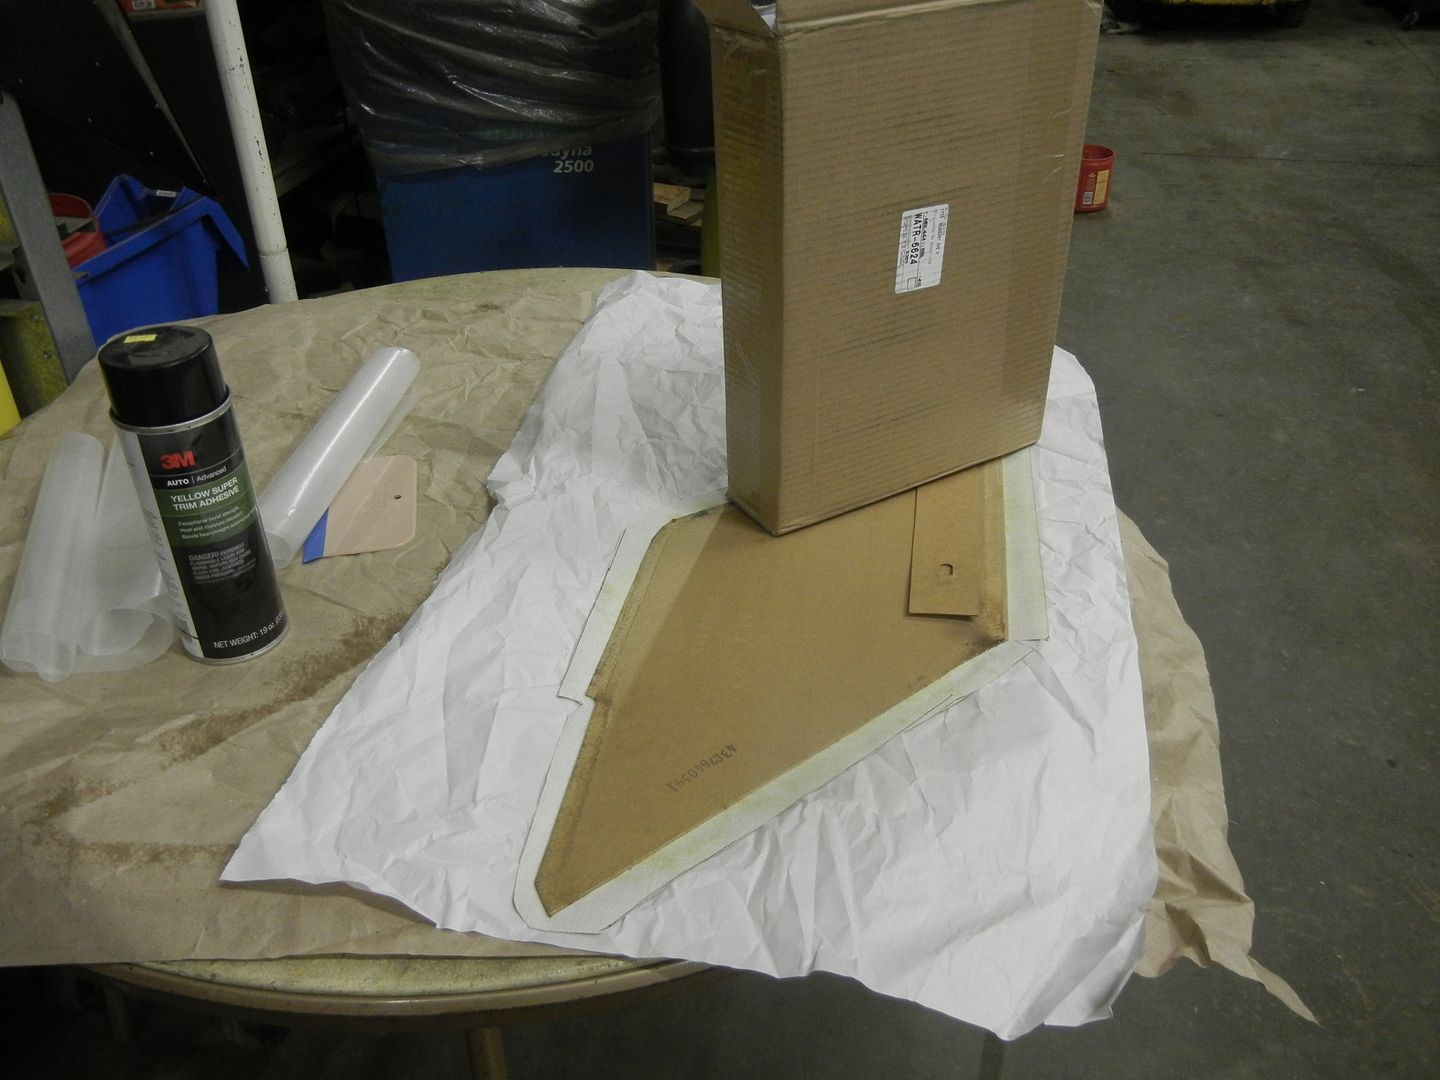
I worked on recovering the sail panel today. I sprayed both parts with 3M glue and let sit for 15 minutes. Then I used wax paper to leave just a 2" gap for initial contact without trying to hold the fabric away as I smoothed it out. I was able to place the cardboard accurately with the fabric down, but then turned it over and pulled 1 piece of paper out at a time and held the fabric up as I squeegeed it down. It worked great, but I was gun shy with the glue on the edges of the fabric and I had to re-spray them and put weight on to get them to adhere. Everything looks good at this point and I am letting it dry overnight before folding the sides over to be glued down.
And just for you, Jim...
OD 1.750
ID .55
Thickness .125 It is stamped, so not perfectly flat and has a slight burr on the one side. By tape, it's 1/8"
Thanks again, I just order two of those exact size washers from fastened last night. Guess what I fount in the garage today. Three of those exact washer as in your picture, even down to the dented area. I wonder what that was for?
By the way, do you remember if all of the body mount bolts had flanged heads, I am thinking the radiator support ones were not flanged and maybe the one on each side of the drivers and pass seat, which are shorter by 1/2", was not flanged.
Boy a lot of rust on those two, it looks like they have flanged heads. In looking at the 66 AIM, it looks like the #3 upper assembly mount metal insert had a recessed area so that that special nut assembly in the body will fit down into the recessed area. The lower cushion also is a little different than all the other 6 mounting position. And the bolt is shorter than the others so it doesn't poke up though the floor.
All the repo cushions I've seen and the ones I have possess the metal insert with a recess. I think the other 6 mounts originally did not have this recess and fit flat against the body, so as not to pull the body into the recess like position #3.. Do you think this is a big issue? If you noticed on the two bushing you removed, the metal insert was probably flat across the top.
Back from warm weather and back on the Chevelle. I cut and fitted the floor support and will get that tacked in today. Maybe get some of the floor skin figured out too, but the inside door handle on my HHR broke off yesterday and I'm moving the one from the rear to the front so I don't have to run the window down to open my door from the outside...
A little more grinding after lunch and it was ready to weld in.
Took an old pan from a '65 B body and cut out a patch to form to the floor. Good thing we aren't trying to make it look original...
After "hammer forming" it to something close, I drill screwed it down and marked the support flange from below. Then blew 30 holes in it to weld to the support. It will also get perimeter welded for strength.
I finished up forming and welding the first pan piece in.


Then cut another piece of old floor pan to "form" as a patch.
After forming and screwing down to mark where to cut holes for welding to the support brace.
All welded in..
Minimal seam sealer underneath and it will look OK.
Closing in on the small stuff I passed over during the big sections. The replacement inner wheel houses always leave a square hole where they meet the outer house right at the front. I cut a cardboard template, made a patch, punched a bunch of holes and welded it in. The screws are holding the wheel house to the floor that will be replaced sometime in the future. I didn't want to weld all that in solid and then pretty much destroy the weld flange later to remove it for the new floor.
At the back of the inner/outer seam, the outer was rusted away so I cut that out and did the same procedure to form a patch.
I used drill screws to pull all the pieces tight and welded it in.
As it looks from in the trunk and the cardboard template for a small extension of the trunk floor to reach the drop flange.
All done. You can see the hole in the quarter panel and there is a matching hole in the trunk drop too, so, again, no welding of new panels to parts that need to come out later, unless Chris decides he wants that. He can easily pull the screws and weld the holes shut.
There was 1 last rust hole I found in the right outer wheel house. I made a quick patch and welded it on. Seems I either didn't take an "after" pic, or it didn't turn out...
Welded the jack locator in and the inside of the trunk is done.
Moved on to the last item on the list.
Well, that's kind of ugly, but not as bad as the other side was.
Better with all the loose rust knocked off and vacuumed out.
Test fit another piece of left over floor pan, but it is too narrow.
Luckily, I have the left over pan from the other side to butcher.
Looking good, will it be on the road with Chris this summer? I actually have a hole in my floor just above that body mount on the passenger side. Someone used a bolt that was too long. That mount uses a 2 1/4" bolt and the rest of the mounts use a 2 5/8" bolt. The bolt is actually the same bolt use on the radiator core support mounts.
My 66 is also rusted out in that spot too, both sides.
Where I left off last time, was cutting a suitable piece for the last patch from a scrap floor pan. Today, I did that and screwed it down to mark for cutting to shape and drilling plug weld holes. I also tapped around the body bolt to mark where the patch was touching that. I used a ball peen, socket and maul to form nice divot to prevent bolt interference.
Ready to start welding. I am going to make the patch flush at the seat mount so the pedestal doesn't have a step in the base.
I ended up with too much material at the crown on both sides, so cut a relief to flatten them out better.
And that's all there is to that. About 10 minutes with the 2" angle disc to clean it up some and I should be done with the patching.
Last big item was to replace all the body mount bushings. Chris had already done the hard work of getting the old bolts out, so that eliminated many hours of tedious work. The left rocker is badly rotted and I didn't think it would hold the weight to lift the body, so I used a large piece of 4x6 under the 2 center floor supports. I removed all the body bolts except the right front and over the rear axle. I loosened them most of the way. Nothing to it, lifted the body about 1 1/2" and the bushings were easy to get out, well after prying them loose from the rust..
I started with the left front, because I thought I might need to weld a patch washer on the frame to hold the new bushing. What a surprise to find the hole, just fine. After the extensive rust out in that corner, I didn't expect this.
This is the mount under the front seat area. I call this the "locator" mount, as it is the only one with a sleeve that mates into the bushing washer. All the rest of the bushings are flat on top. The other unique aspect of this bushing is that the hole in the frame is smaller than all the rest and the bushing shoulder is too. I have yet to find a set of repop bushings that include the correct size rubber for this hole. I end up trimming the shoulder down with a single edge razor blade to fit.
The next mount location rearward didn't have a mount in it and I didn't want to try to clean the threads with a tap. I had 2 plugs from a '67 GTO that I slid in the frame hole to support the floor for now.
After that, it was just replace the rest of the left bushings and set the body back down. The left front did have an extra washer and it needed to go back with the new bushing too.
The right side was the same as the left and all the bushings are now replaced. The only thing left is to run the bumper fasteners thru the blast cabinet and put the bumper back on.
Looks like you did the same thing as I did with the bushing by the front seats. I also did have a bushing in front of the rear wheels, a new bolt just screwed up in there for me, so I added a bushing there. My kit for the radiator core didn’t have two correct washers, so I found some to add. What do you think was the purpose of that extra washer?
-- Edited by jim larson on Saturday 24th of February 2018 08:59:22 AM
Chris's car has the nut for the blank mount too, but was rather rusty and since he plans to replace the entire pan, at some time, I didn't feel it was worth the time to chase the threads. With the bushing plug in there, it's the same support as a bushing. He has the 2 addition bushings in his kit for when the new pan comes along.
The extra washer at the left front is for the body not being level enough after the jig build. Very common on these older cars. Rather than pull the body down to the bushing and twist everything else out of whack, they used washer shims and moved on. I have a stack of special shims I took out of one side of the core support on my old GTO too. The factory didn't waste time trying to correct mis-matched components, they just used shims and bent parts to fit. The line doesn't stop and the next car is already coming into that station, so it's go, go go.
The mis-matched structural components around the right rear window on my car are a good example. Someone didn't get a piece in the jig correctly, but it got welded in anyway and all the following components were then bent into their respective jigs to somehow get the final skin and window opening to look decent. The back seat brace and wheel house bracketry were all misshapen on that side as a result of the first piece being out of place, but everything did, sort of fit, function and look good on the outside, so down the line it went.
I worked at the St Paul Ford plant for 10 months in '72/73 and it was an amazing process to watch. All the sub-assembly stations building up components that get thrown in the car and bolted down in 20 seconds. A body, or frame would pass thru many stations on the line and would pass thru each "station" in about 2-3 minutes. 1 person on each side of the car would throw as many parts on as the time study dictated and then the next pair took over for their job....over and over and over, for 8-10 hours a day, putting the same parts on each vehicle. There's a reason I only lasted 1 model run. The pay and benefits were great, but I'm not wired for that kind of repetitive boredom.
You're spot on Mitch. I've been involved in manufacturing for over 30 years, and it's all about the hourly production rates, no matter where I've been.
Do you think you lucked out with all the body mount bolts not being frozen or breaking loose the cage nuts? That's my worst fear when doing anything in the body mount area. I think Tim had to get out the heat wrench on all but maybe 2 on the vert when we tore it apart.
Chris did all the grunt work with the bolts, all I had to do was zip out the new bolts..
For the most part, I have wrapped up the work on Chris's car.
Pretty good pile of rusty metal and half of a 5 gallon pail of rust and dirt that fell off during the work.
Now, the reason I can't say it's done, is because I had a piece of cardboard inside the car catch on fire and burn his nice, original, headliner, left sail panel, rear window trim, and left headliner pinchweld... ...
... ...
...
I bought a new headliner and sail panel material and am going to attempt to replace the material on the panel today. The headliner will need a group effort or professional install. I've read a number of articles and watched some vids on this and would like to be able to install them, as I have several I need done on my own cars. Getting a tech session and having more hands and a LOT of spring clips, seems to be the way to do this. Might be something to look at down the road. My Chevelle should be out of paint sometime by June and we could practice on that before attempting Chris's.
Nice original defroster, not to many of those around. I along with the help of a friend installed my headliner, you will do a good job, Its kind of forgiving because you can just heat the contact cement with a hair dryer and reposition. Looks to be a lot easier than the small sail panels on an early 66, I think your car has the large sails just like the 67.
-- Edited by jim larson on Monday 26th of February 2018 03:55:24 PM
-- Edited by jim larson on Monday 26th of February 2018 03:56:08 PM
Looks like YOU DA MAN, Jim. I can see you supervising a tech session on this subject here. Oh, and bring all those spring clips with...
I heated the vinyl on the sail panel board and slowly separated it as best I could with the broad knife. Not much peeling of the cardboard and it is in excellent condition. Then I traced around it on the new fabric, leaving plenty of fold over and cut it out. Once I had it cut, I mimicked the reliefs of the original and layed the board on it. Looks like it will work, but I decided to let it rest overnight to remove the fold wrinkles .
I would be willing to come up sometime and help with a headliner install, if it comes to that. Looks like your have a good plan for the sail panel. I couldn't tell if the upper area above the sail panel just blackened or scorched. I let someone use most of my clips and never got them back, only have about six left.
The headliner above the sail panel burned right thru....I have a new headliner here. It appears the sail panel fabric has some sort of iron on backing for the cement to bond to, rather than soak into the fabric. I'll have to consult with the master quilt maker here and see if her backing would work for this.
Guess I'll stop by a Staples or Office Depot sometime soon and buy a bunch of those clips.
The Chevelle went back to it's rightful owner this morning, so now it's up to Chris to get the mods he wants to do done in the next couple months so he can drive it again...
I can't say thanks enough to Mitch for all the work he did to patch it back together. I could not have gotten it done that quickly. Looking forward to the next steps to getting it back on the road for spring. I will start posting back in the thread I started for rear end and trans upgrades.
I wonder if the sail panel material has to be that way (iron on backing) so as not to show through if it is glued on? who did you buy the sail panel material through?
-- Edited by jim larson on Tuesday 27th of February 2018 01:38:34 PM
I did my headliner, it took me much longer the the U-tube vids said it wood take.
If at all possible, remove the rear window, front too but not as necessary.
Don't mix up the rods, also mark the hole that they were in when you remove the HL
I would be glad to help also and bring clips.
I worked on recovering the sail panel today. I sprayed both parts with 3M glue and let sit for 15 minutes. Then I used wax paper to leave just a 2" gap for initial contact without trying to hold the fabric away as I smoothed it out. I was able to place the cardboard accurately with the fabric down, but then turned it over and pulled 1 piece of paper out at a time and held the fabric up as I squeegeed it down. It worked great, but I was gun shy with the glue on the edges of the fabric and I had to re-spray them and put weight on to get them to adhere. Everything looks good at this point and I am letting it dry overnight before folding the sides over to be glued down.