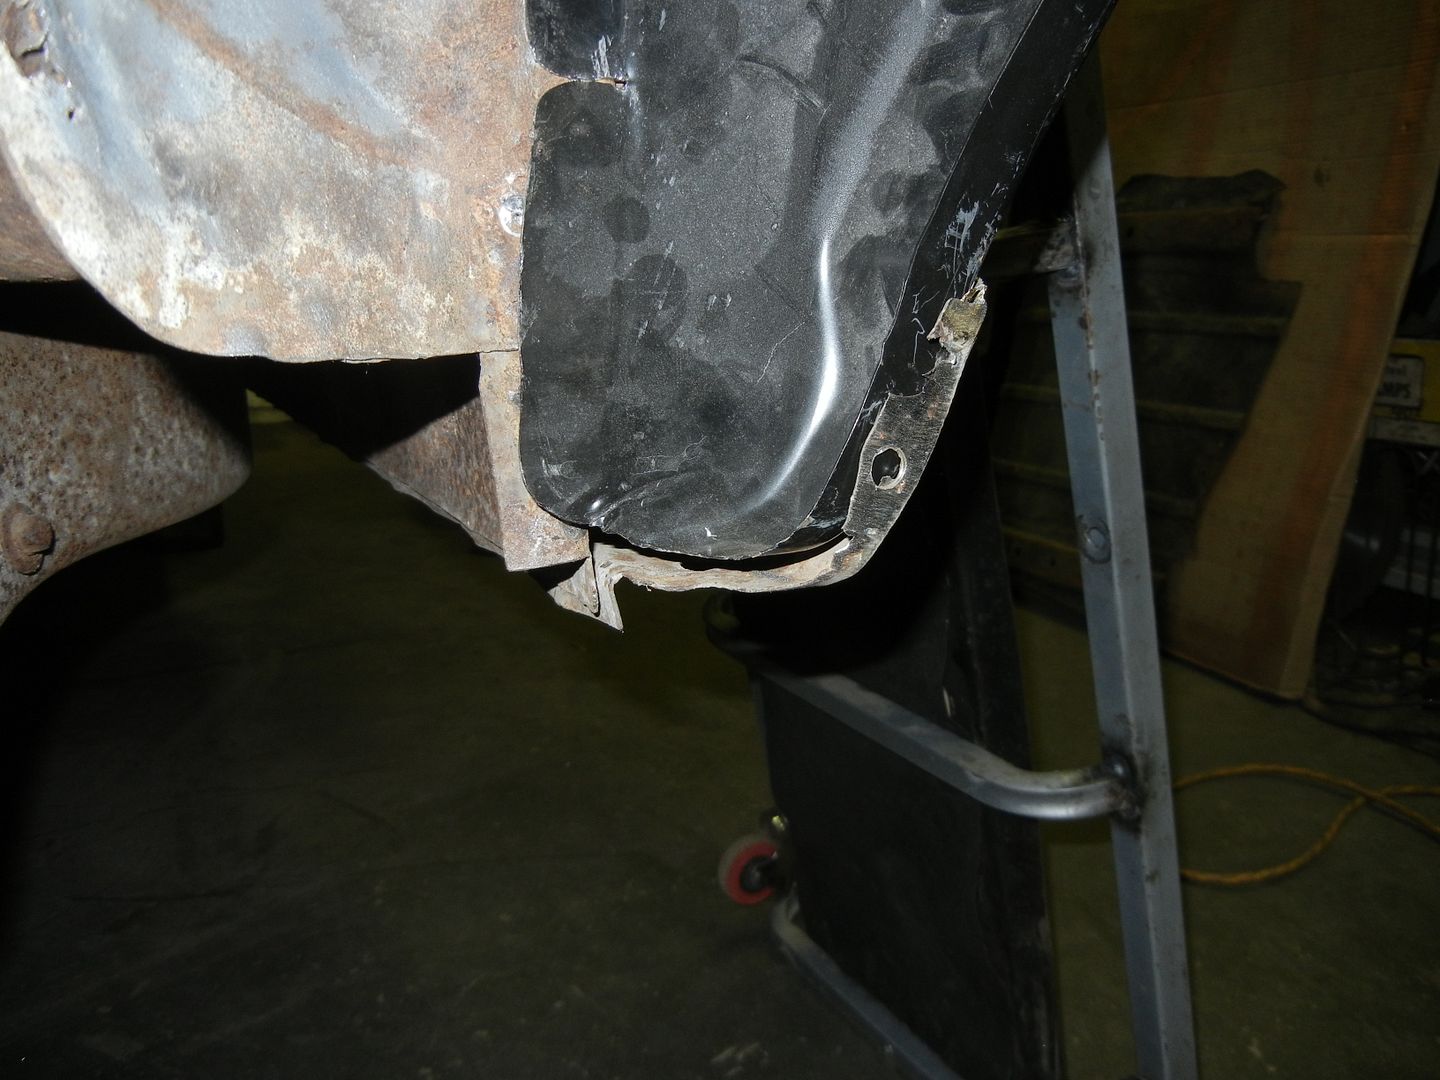
I saw a few pin holes and started pushing with a screw driver. Debating whether to replace the whole tail panel or patch this. The rest looks good...
I removed the lower trim piece to dig at the bondo...
Bondo and parts that fell out. There was a fuel injector in there too...
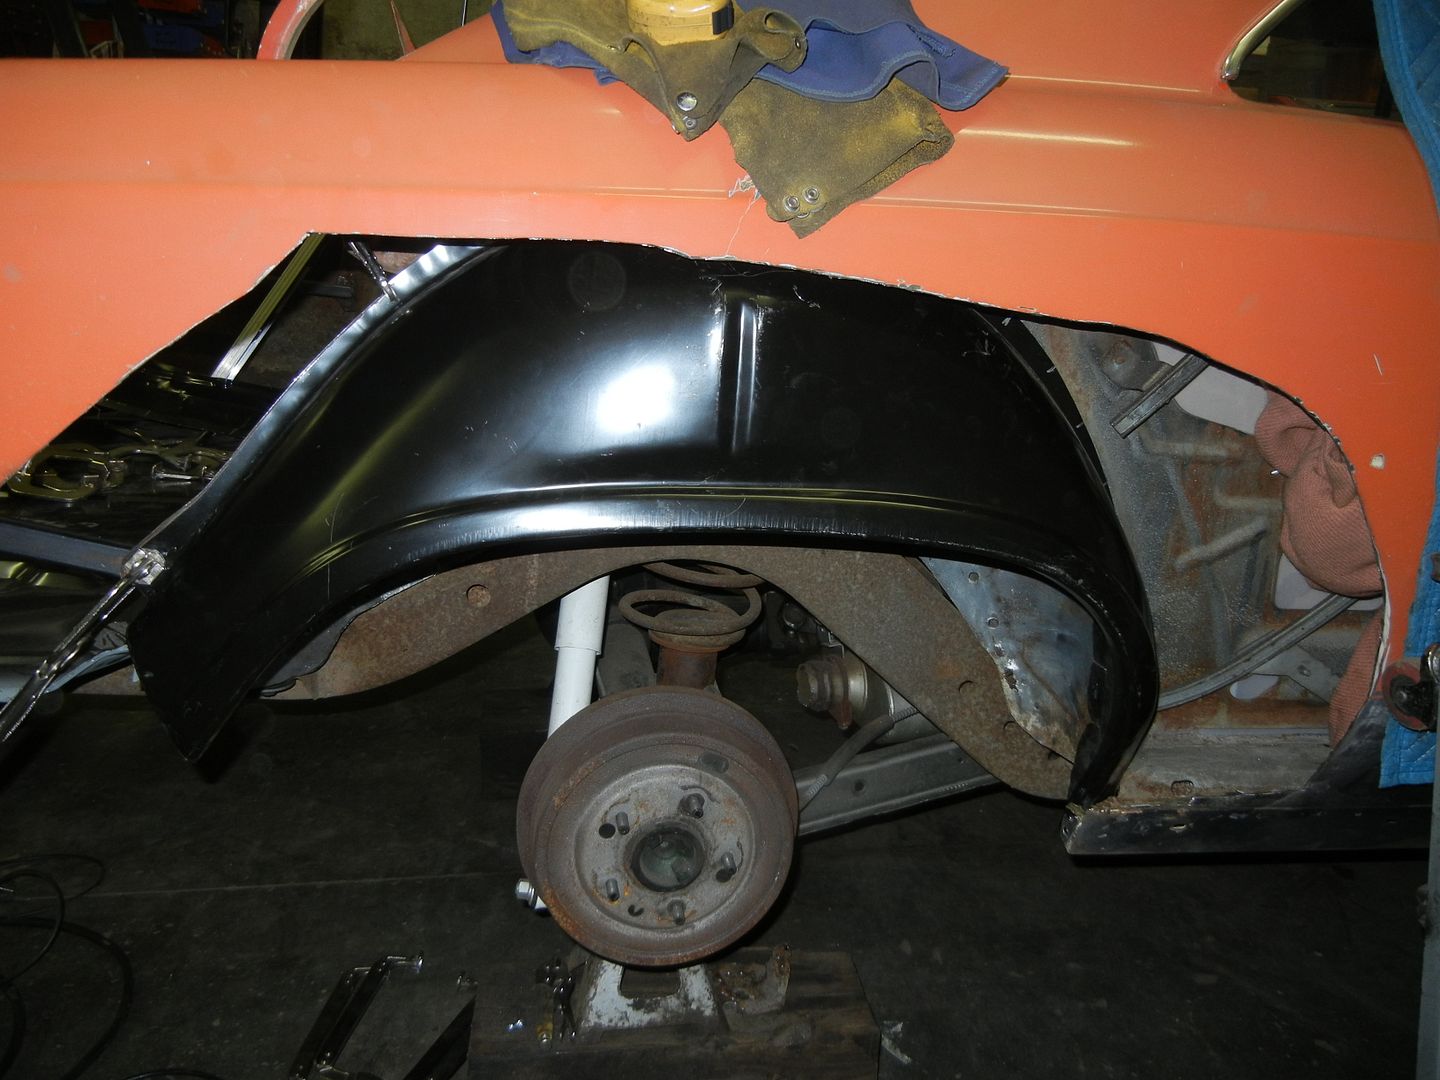
I'll be skinning it from the door back and replacing the outer half of the wheel house too.
jim larson said
Nov 4, 2014
You will be busy this winter. Wish I had you skills.
Lost in the 60s said
Nov 4, 2014
Kind of leaning towards the one piece trunk floor and new tail panel. It's a lot more money but a much cleaner install than stitching the 7 piece kit together that I have.
Maybe I could talk Derek into bringing the floor back from Chicago....
Derek69SS said
Nov 4, 2014
Lost in the 60s wrote:
Maybe I could talk Derek into bringing the floor back from Chicago....
I don't think we'll have any room... we may be hauling back a '68 L72/M21 all date correct for my brother's original L72 Biscayne.
Lost in the 60s said
Nov 4, 2014
Derek69SS wrote:
Lost in the 60s wrote:
Maybe I could talk Derek into bringing the floor back from Chicago....
I don't think we'll have any room... we may be hauling back a '68 L72/M21 all date correct for my brother's original L72 Biscayne.
The floor could sit on top of it and provide weather cover...
If the engine deal falls thru, I'm willing to contribute to the gas fund...
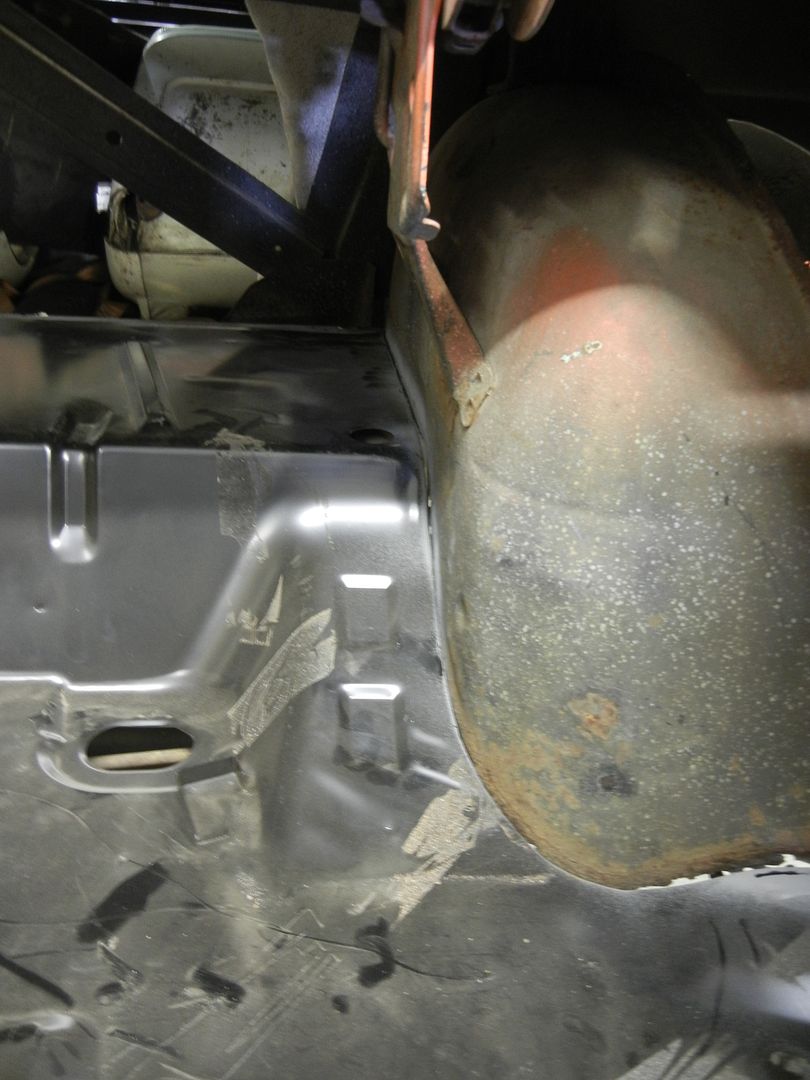
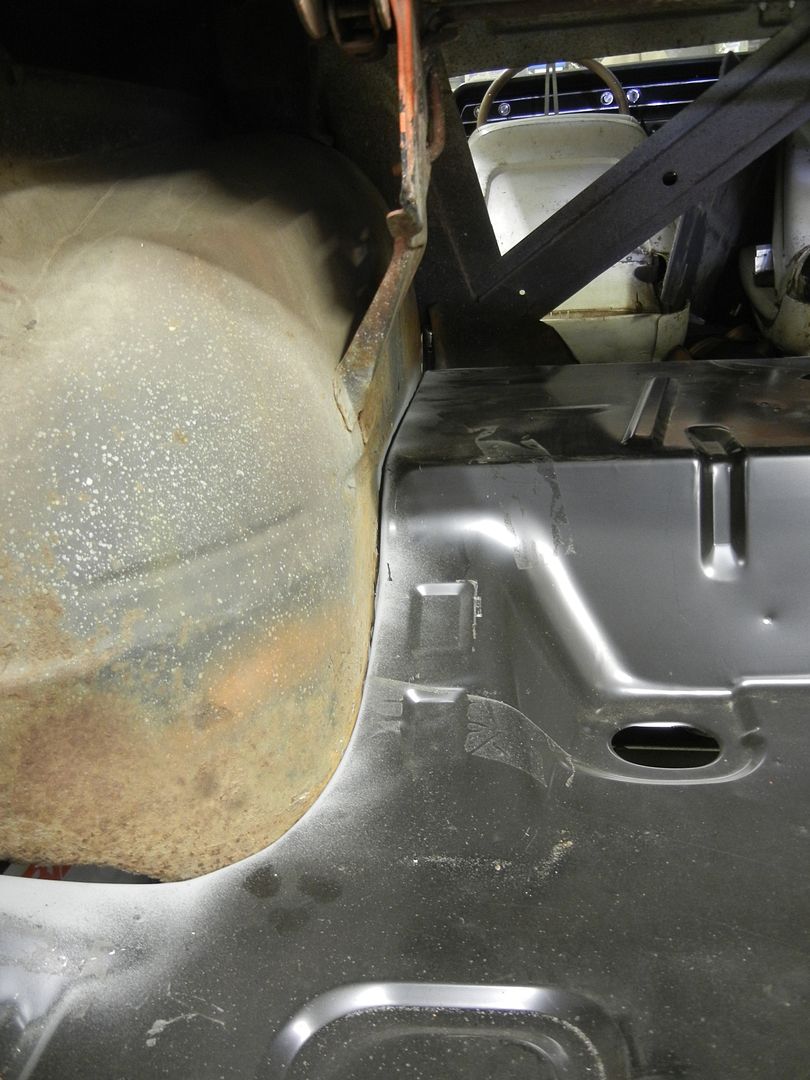
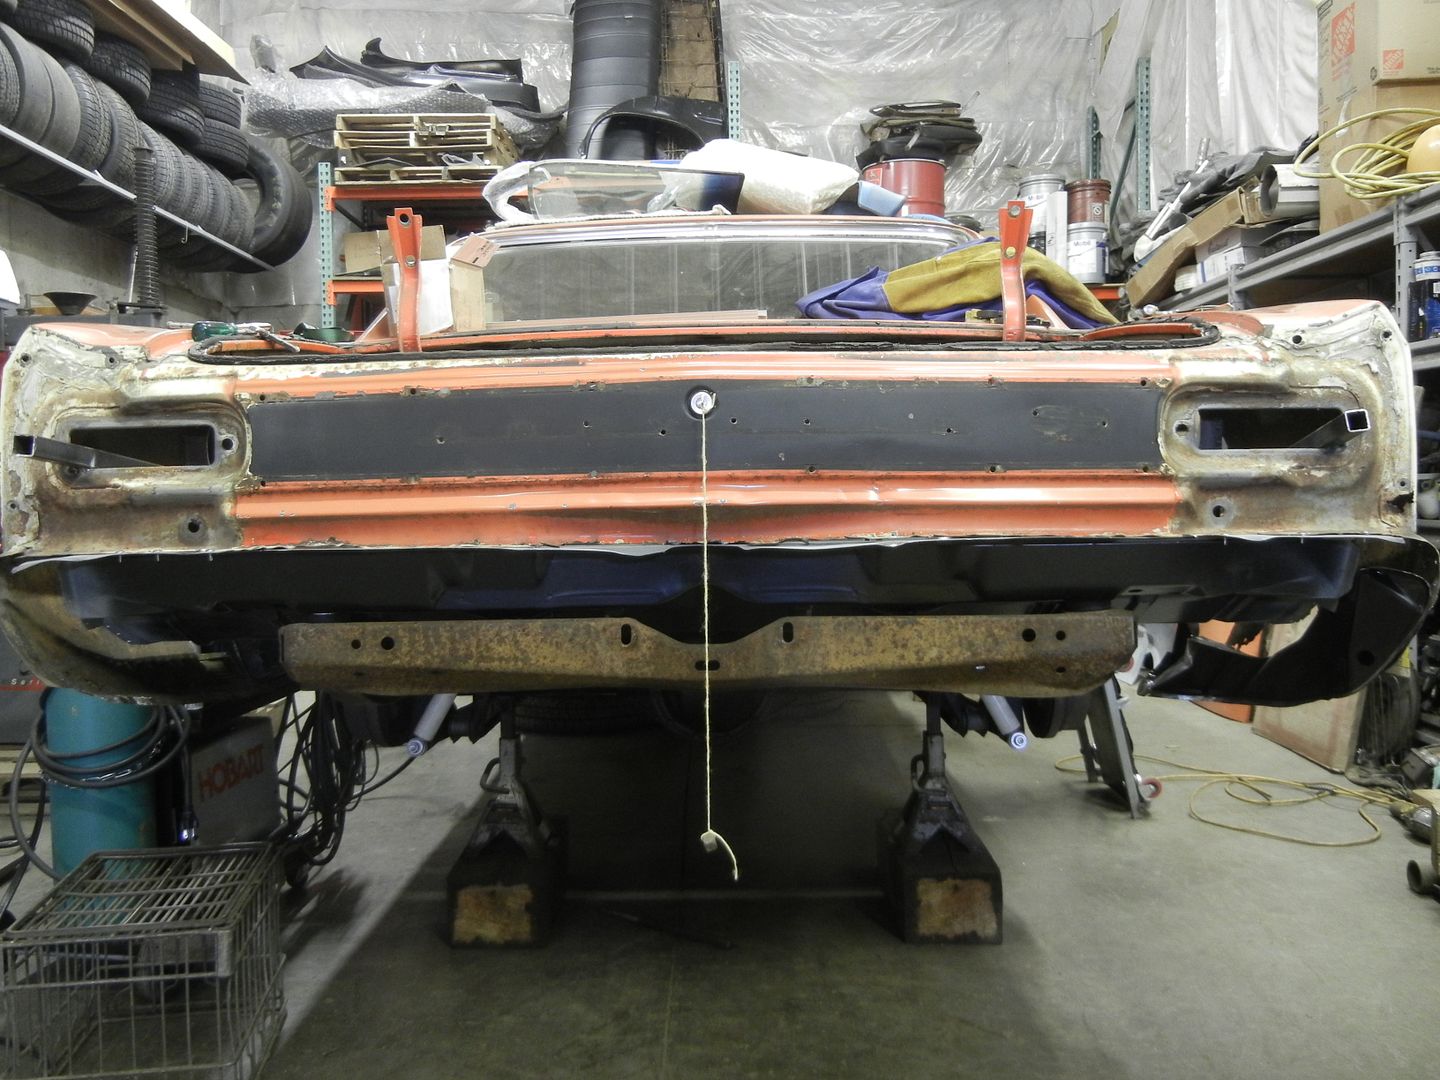
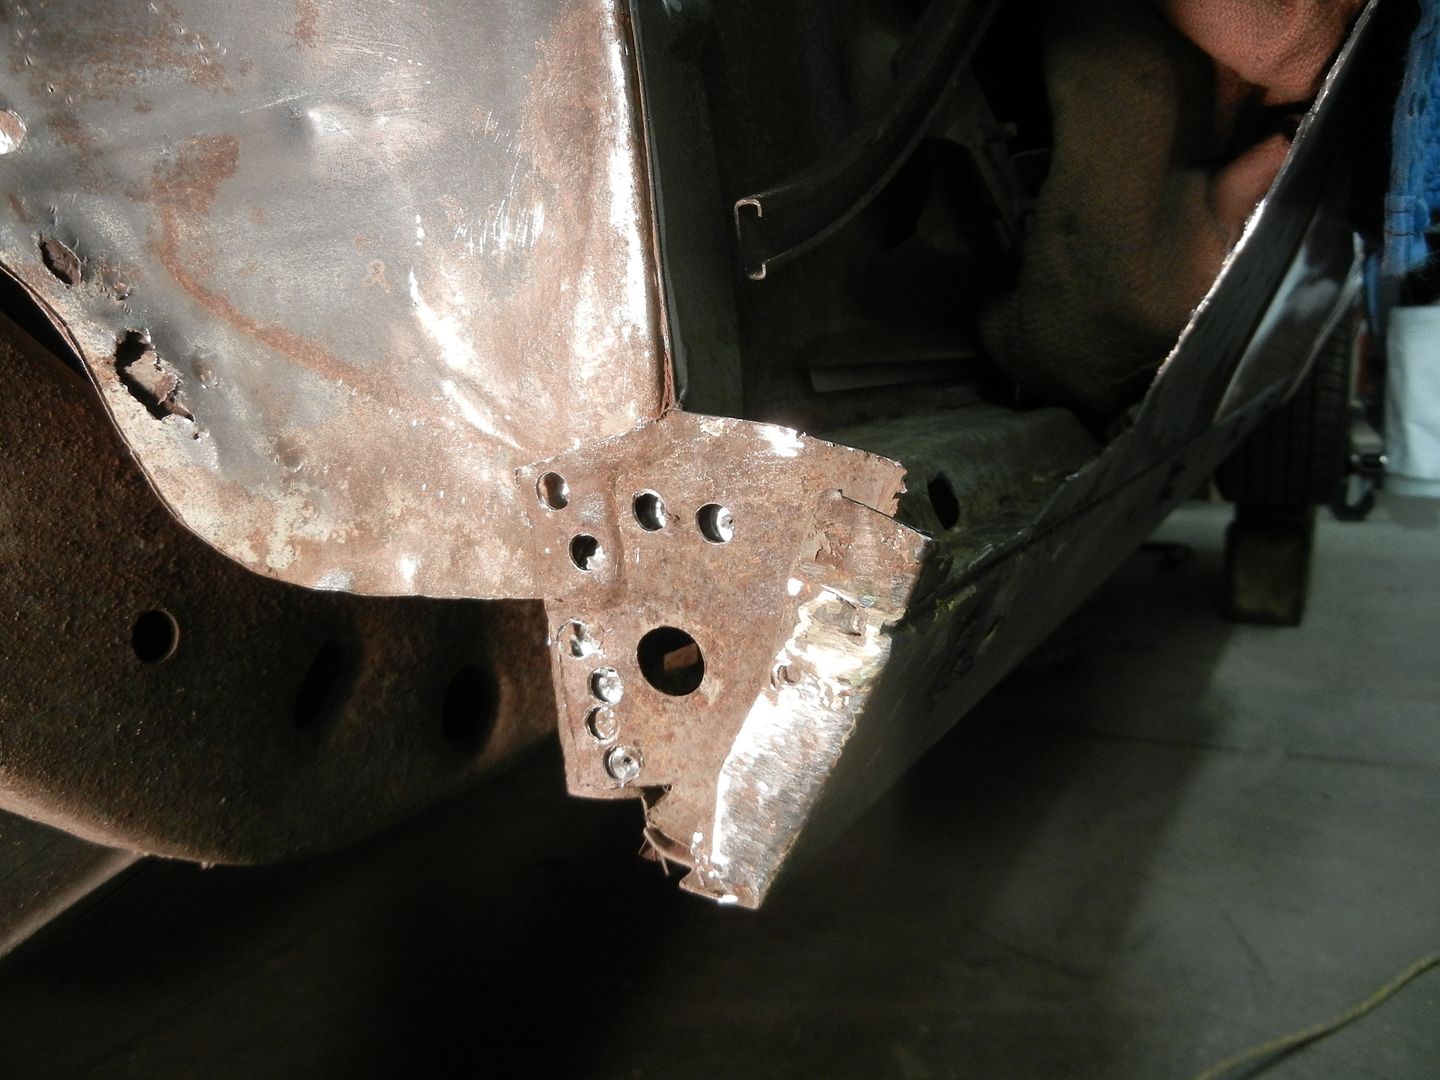
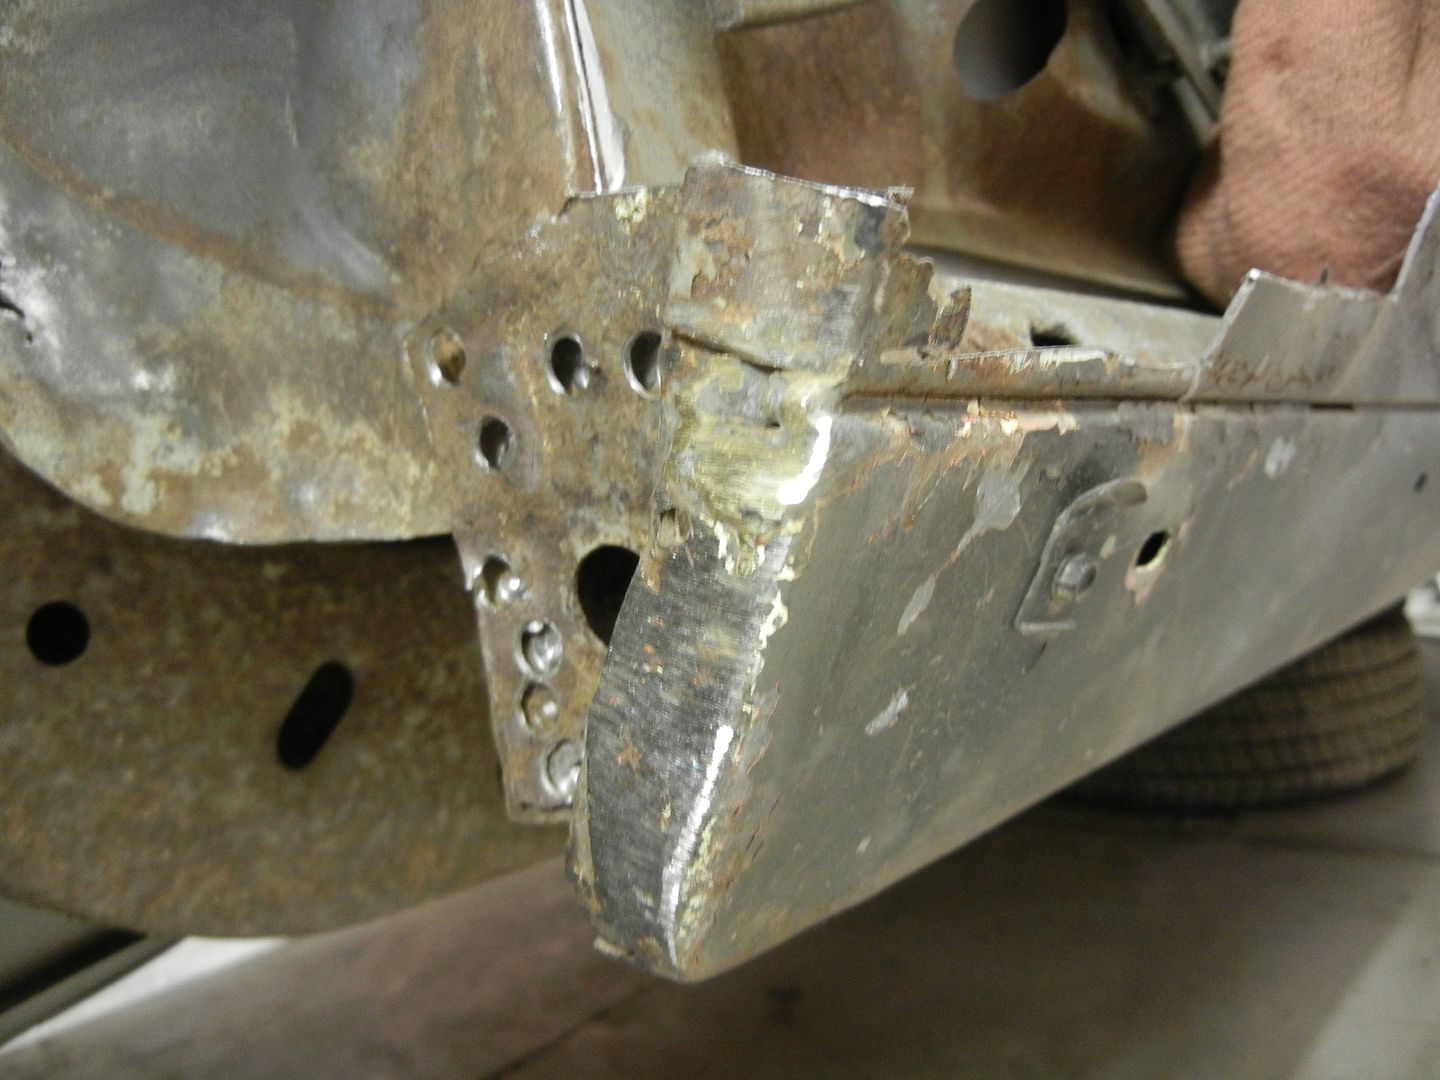
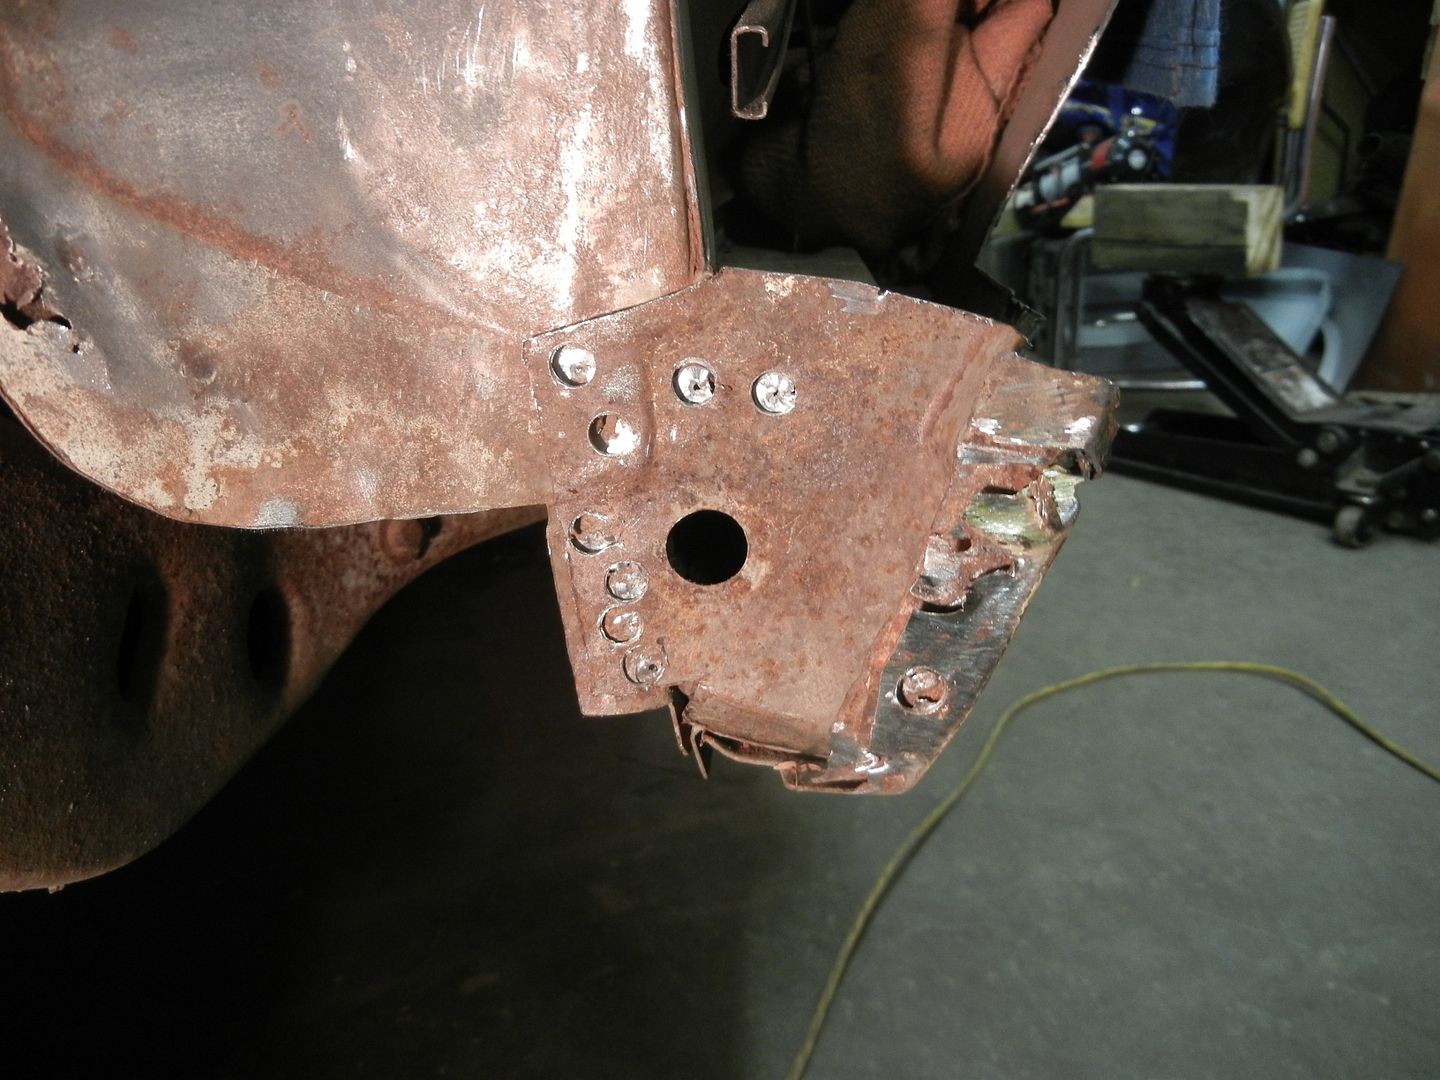
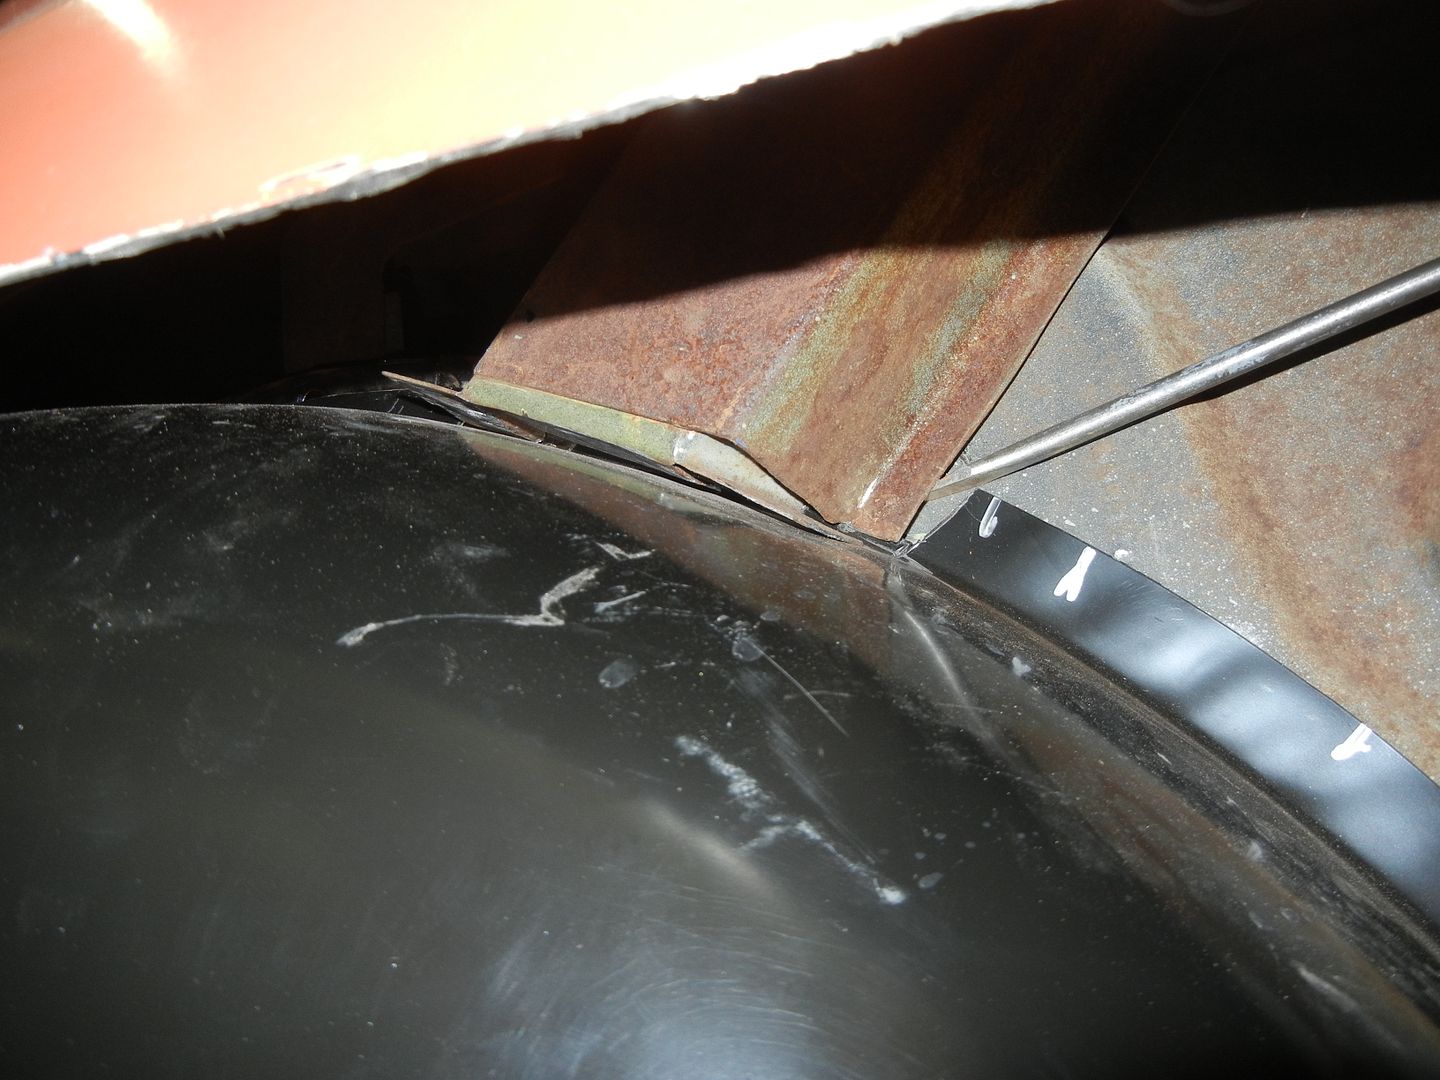
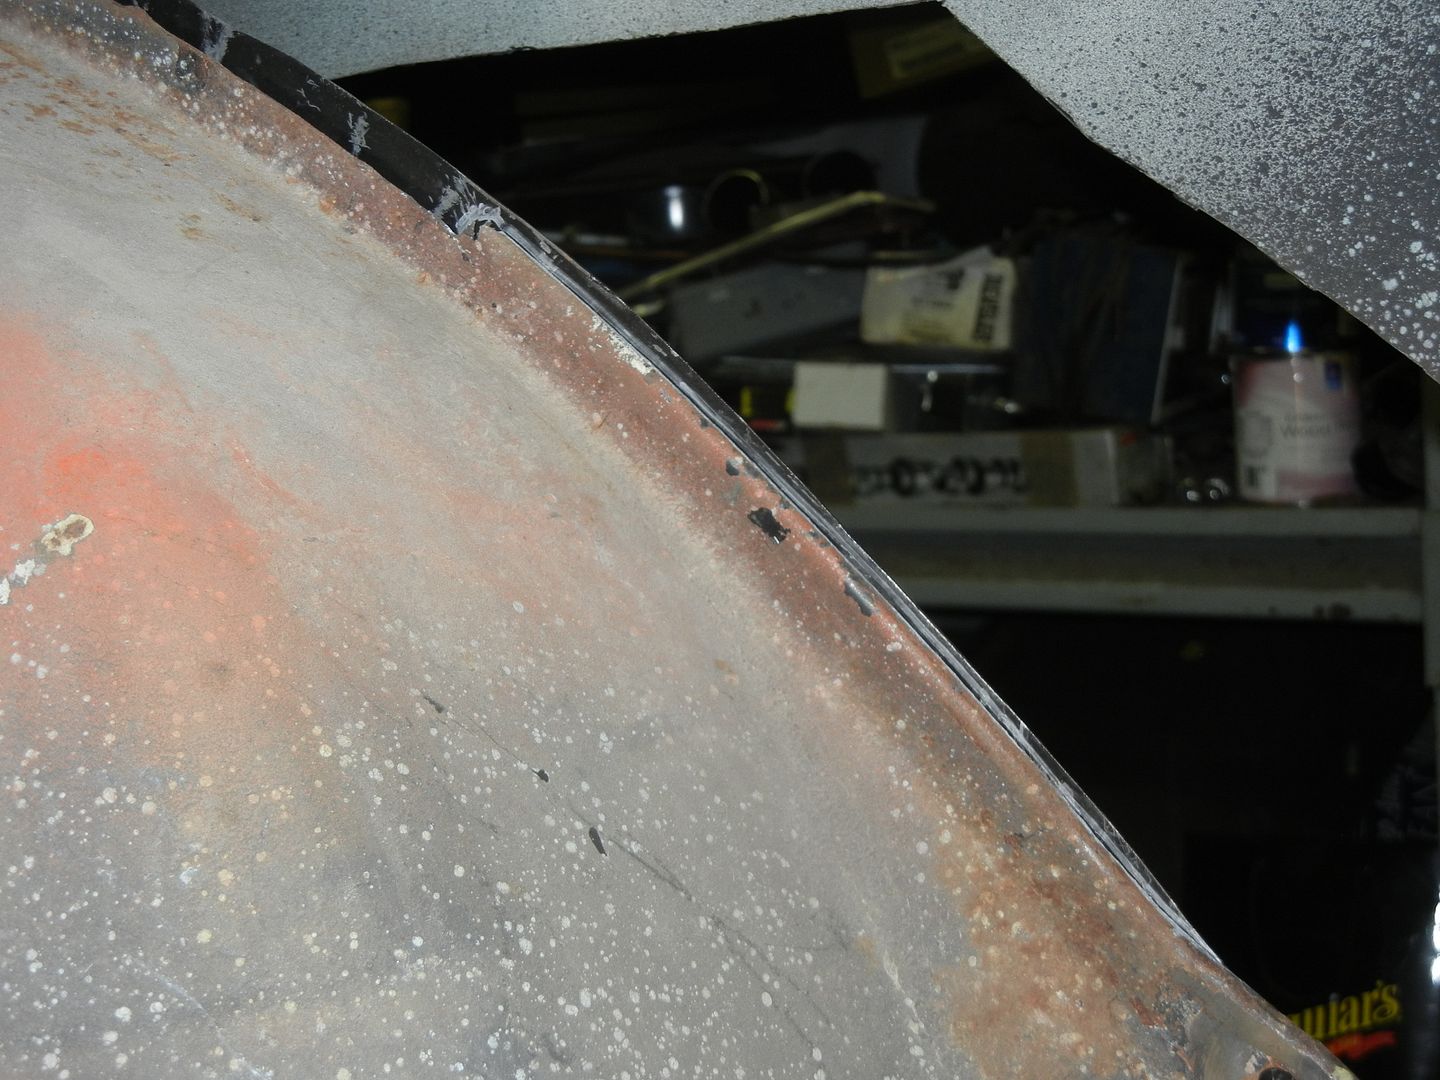
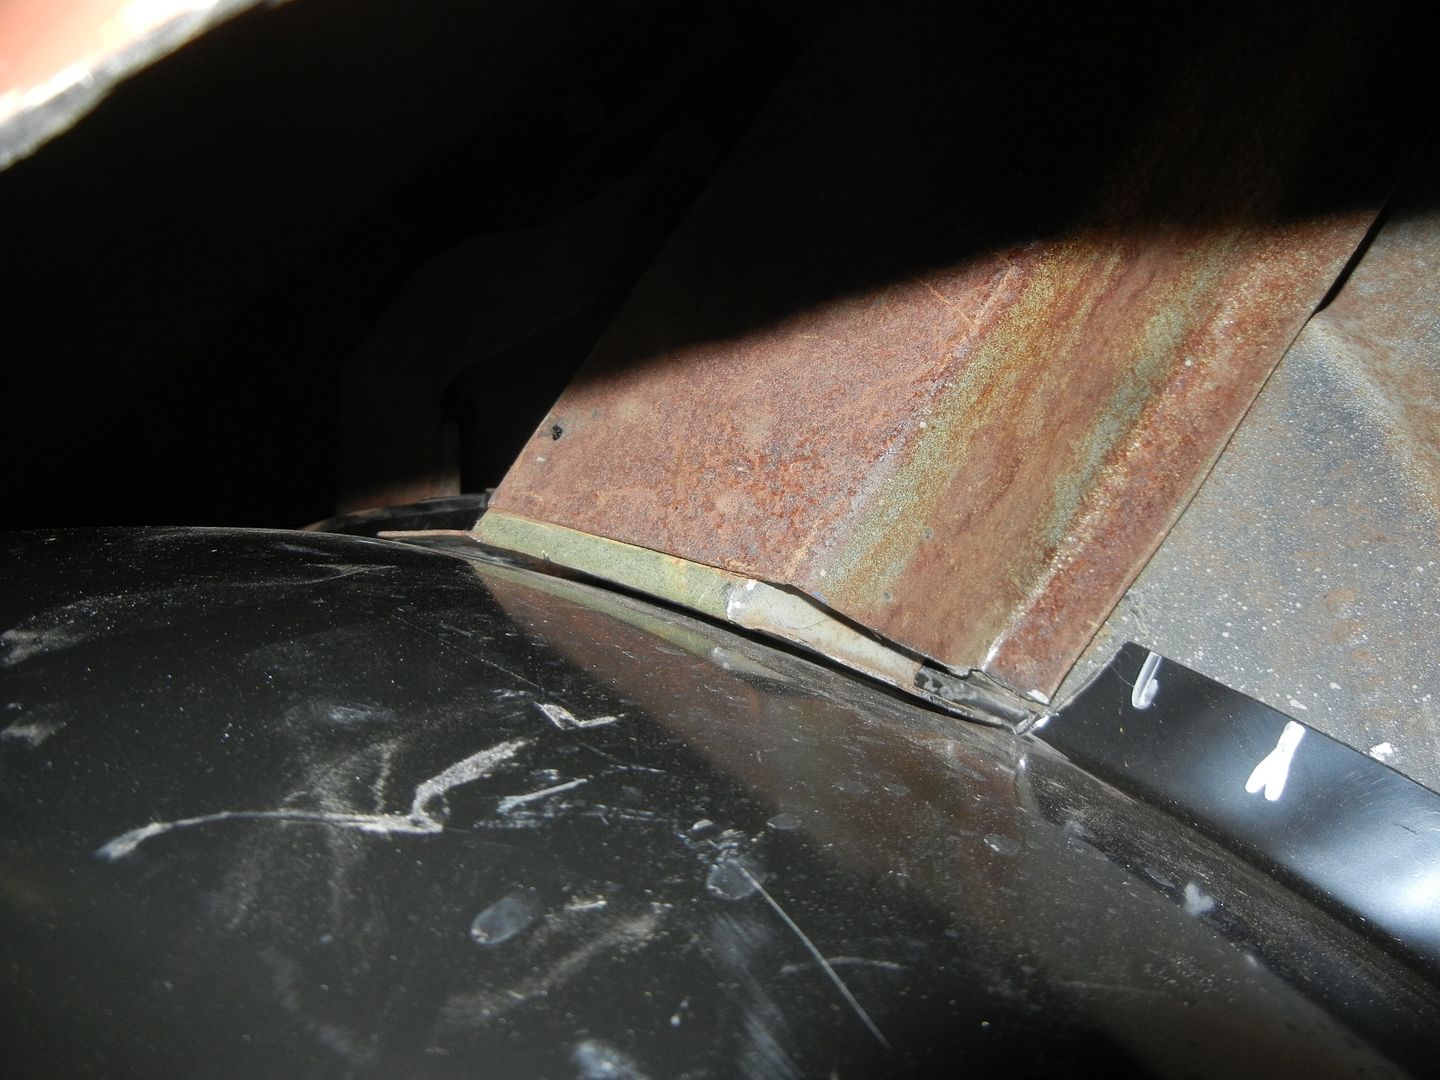
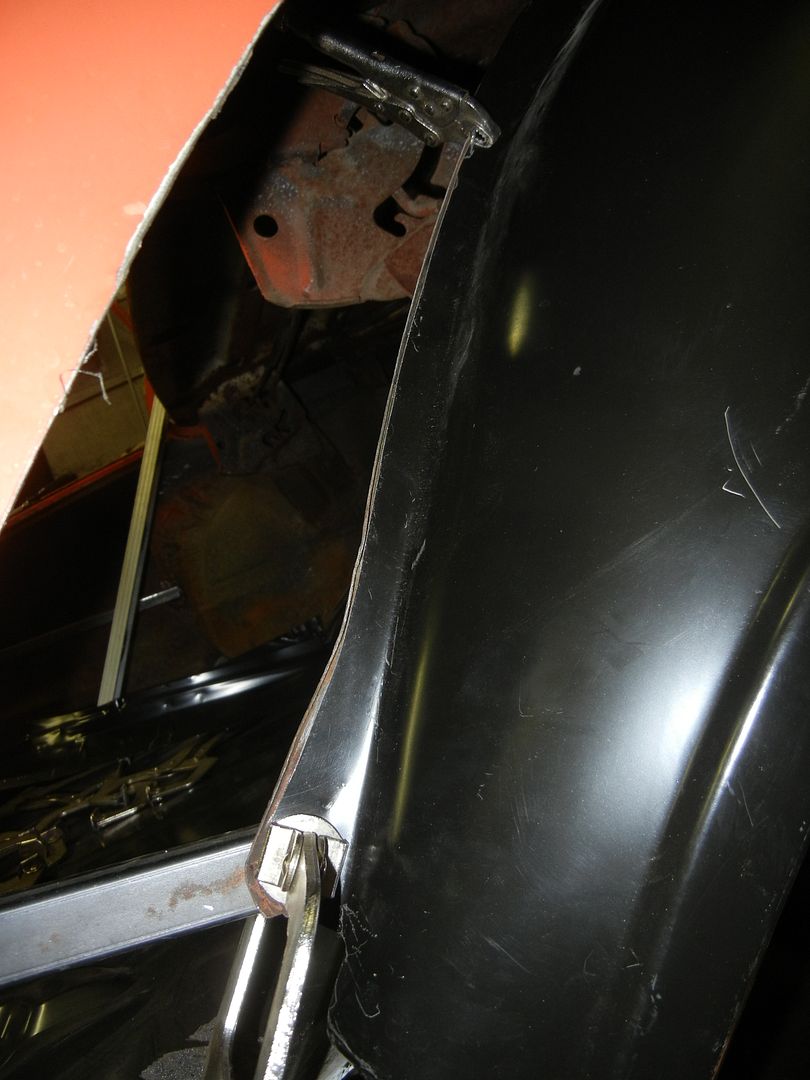
Today's progress. John came over and removed the horizontal trim and helped me get the fuel tank out and bumper off. Then he removed the extension housings.
-- Edited by Lost in the 60s on Tuesday 4th of November 2014 03:31:20 PM
Lost in the 60s said
Nov 4, 2014
Well, I exercised my credit card just now...
Got an AMD 1 piece trunk floor coming along with the drops, tail panel and window filler panel...
SShink said
Nov 4, 2014
Mitch, was the car originally the cream/butternut color I see where the tail light buckets used to be?
Lost in the 60s said
Nov 4, 2014
SShink wrote:
Mitch, was the car originally the cream/butternut color I see where the tail light buckets used to be?
Yes, Lemonwood Yellow. Kind of a "dainty" color for an SS car. Pretty sure it was a rare 3 speed manual too, as there is no L designation for a 4 speed.
dashboard said
Nov 5, 2014
Mitch is the body coming off the frame? If so will you do the trunk floor first? You've already done the floors or back seat forward haven't you.
Lost in the 60s said
Nov 5, 2014
No body-off. That's a snowball I don't have the time or funds for right now.
jim larson said
Nov 5, 2014
Lost in the 60s wrote:
Yes, Lemonwood Yellow. Kind of a "dainty" color for an SS car. Pretty sure it was a rare 3 speed manual too, as there is no L designation for a 4 speed.
If it came with a three speed, then there may not be a hole for the speedometer 4 sp cable down low on the passenger side along with the clips for the cable on the bottom of the passenger floor pan.
Lost in the 60s said
Nov 5, 2014
jim larson wrote:
Lost in the 60s wrote:
Yes, Lemonwood Yellow. Kind of a "dainty" color for an SS car. Pretty sure it was a rare 3 speed manual too, as there is no L designation for a 4 speed.
If it came with a three speed, then there may not be a hole for the speedometer 4 sp cable down low on the passenger side along with the clips for the cable on the bottom of the passenger floor pan.
No it didn't have that hole. When I swapped out the Saginaw it came with for the Muncie, I routed the cable thru there per pics you posted a couple years ago for reference...
67ss said
Nov 5, 2014
Are you painting it aztec bronze or leaving it orange for now?
Lost in the 60s said
Nov 5, 2014
67ss wrote:
Are you painting it aztec bronze or leaving it orange for now?
Need to see what the funds look like when all this is done but YEAH, I would love to keep going and get into Bronze...
I got a full American Auto Update harness kit for the Malibu today. I'm contemplating ordering a gauge conversion package for the Malibu dash and installing that in the SS and moving the light dash to the Malibu. They are both floor shift speedometers so I can mix and match...
Lost in the 60s said
Nov 5, 2014
The wiring kit came today. Looks like a mess of spaghetti...
hkgmillette said
Nov 5, 2014
Looks like a kit form American Auto Wire. I used that one with my restoration. Nice kit to work with and if you have any questions, their Customer Support was great.
SShink said
Nov 6, 2014
Lost in the 60s wrote:
67ss wrote:
Are you painting it aztec bronze or leaving it orange for now?
Need to see what the funds look like when all this is done but YEAH, I would love to keep going and get into Bronze...
The paint/materials are the cheap part Mitch compared to the cost of body panels... the bodywork is free with your skills!
dashboard said
Nov 6, 2014
Lost in the 60s wrote:
No body-off. That's a snowball I don't have the time or funds for right now.
I know the feeling you need to know when to say no and when to stop.
Not so long ago
Lost in the 60s wrote:
With all due respect, Sir, now is the time to do the frame. To go thru ALL that at a later date will only risk scratching the new paint and use a LOT of time and funding, you already have invested at this point, again.
SShink wrote:
Ain't that the truth!!!
Lost in the 60s wrote:
I knew you would relate, Stan. You didn't plan on a frame off either but it's the only sensible thing to do when you're in that far.
Jim Larson wrote:
LeRoy mentioned $250 to sandblast frame and $200 to powder coat. Do it now, so you don't have to take it off the frame later. The rest of the stuff can be done anytime. With the car on the frame and the engine in and ready to drive.
Dashboard wrote:
Your correct, then why not just go ahead and stick the body on a rotisserie and while the body’s off just go ahead and replace the brake, fuel lines and cables, while doing that it would be a good time to upgrade the suspension and brakes and then I might as go to a posi rear end, and then and then I might be able to drive the car by August; there is next year. If we put the house on the market this spring I need this car to be mobile.
I need to stop somewhere and this is where I’ve chosen to stop, for now, I still need to replace the top and add AC.
Lost in the 60s said
Nov 8, 2014
Thanks to Karl, I now have a real '66 dash to paint...
The black one that came with the car is a '67...
Bungy L-76 said
Nov 10, 2014
So what are the differences between the 66 and 67?
Nevermind, I just read your explanation in another post.
-- Edited by Bungy L-76 on Monday 10th of November 2014 11:53:13 AM
Lost in the 60s said
Nov 10, 2014
This project has been digging at the back of my brain for a week now and as hard as I have tried to push it out, the ugly truth is NOW is the time to pull the body and do the frame completely. If I don't and get the body painted, there's no way I would ever get around to restoring the frame and risk mucking up the paint.
AAAAAARRRRRRGGGGGGG.......
SOMEBODY talk me out of this.....
67ss said
Nov 10, 2014
This is why I have not touched a thing on my chevelle as I cannot commit to it and I would just get it apart and never get back to it.
It hopefully will not be near the project the GTO was as you will hopefully not be replacing ever piece of sheetmetal on it. So sorry I don't think I can talk you out of it.
John D said
Nov 10, 2014
"Got time to do it right, or time to do it over?"
jim larson said
Nov 10, 2014
I can't see any negatives. It will be more expensive to complete the frame off in the future. No one is getting any younger. Enjoy it now. Then drive it while you complete the blue 66. You can always work on the blue one when there is a temporay stoppage on the bronze one.
Grajmahal said
Nov 10, 2014
I only see one way out of this conundrum: sell it off cheap to someone on this list.
:)
John
Lost in the 60s said
Nov 10, 2014
Grajmahal wrote:
I only see one way out of this conundrum: sell it off cheap to someone on this list.
:)
John
The guy helping me do this is named John also and has been trying to talk me into this for 2 weeks so it is done when I "sell it to him"...
I guess the consensus is to quit procrastinating and get to work...
John will be here tomorrow and I guess the clip will come off. Just need to figure out where to put all the parts.
Lost in the 60s said
Nov 11, 2014
We decided to work on getting the trunk floor out before removing the front clip.
I did this as a test to see if I could put the new floor in from the back.
I welded these bars in before cutting the floor to eliminate sagging of the quarter panels like the GTO did.
And just about the time we got this out, the NEW FLOOR arrived...
Once I cut the drops out, this will slide right into place...
UPS freight beat the he!! out of the box, but only a minor dent in the floor.
-- Edited by Lost in the 60s on Tuesday 11th of November 2014 04:05:45 PM
dashboard said
Nov 11, 2014
Mitch, you've captured my interest with this, I’m looking at replacing the trunk pan in the red car. Post lots of pictures and details.
Lost in the 60s said
Nov 14, 2014
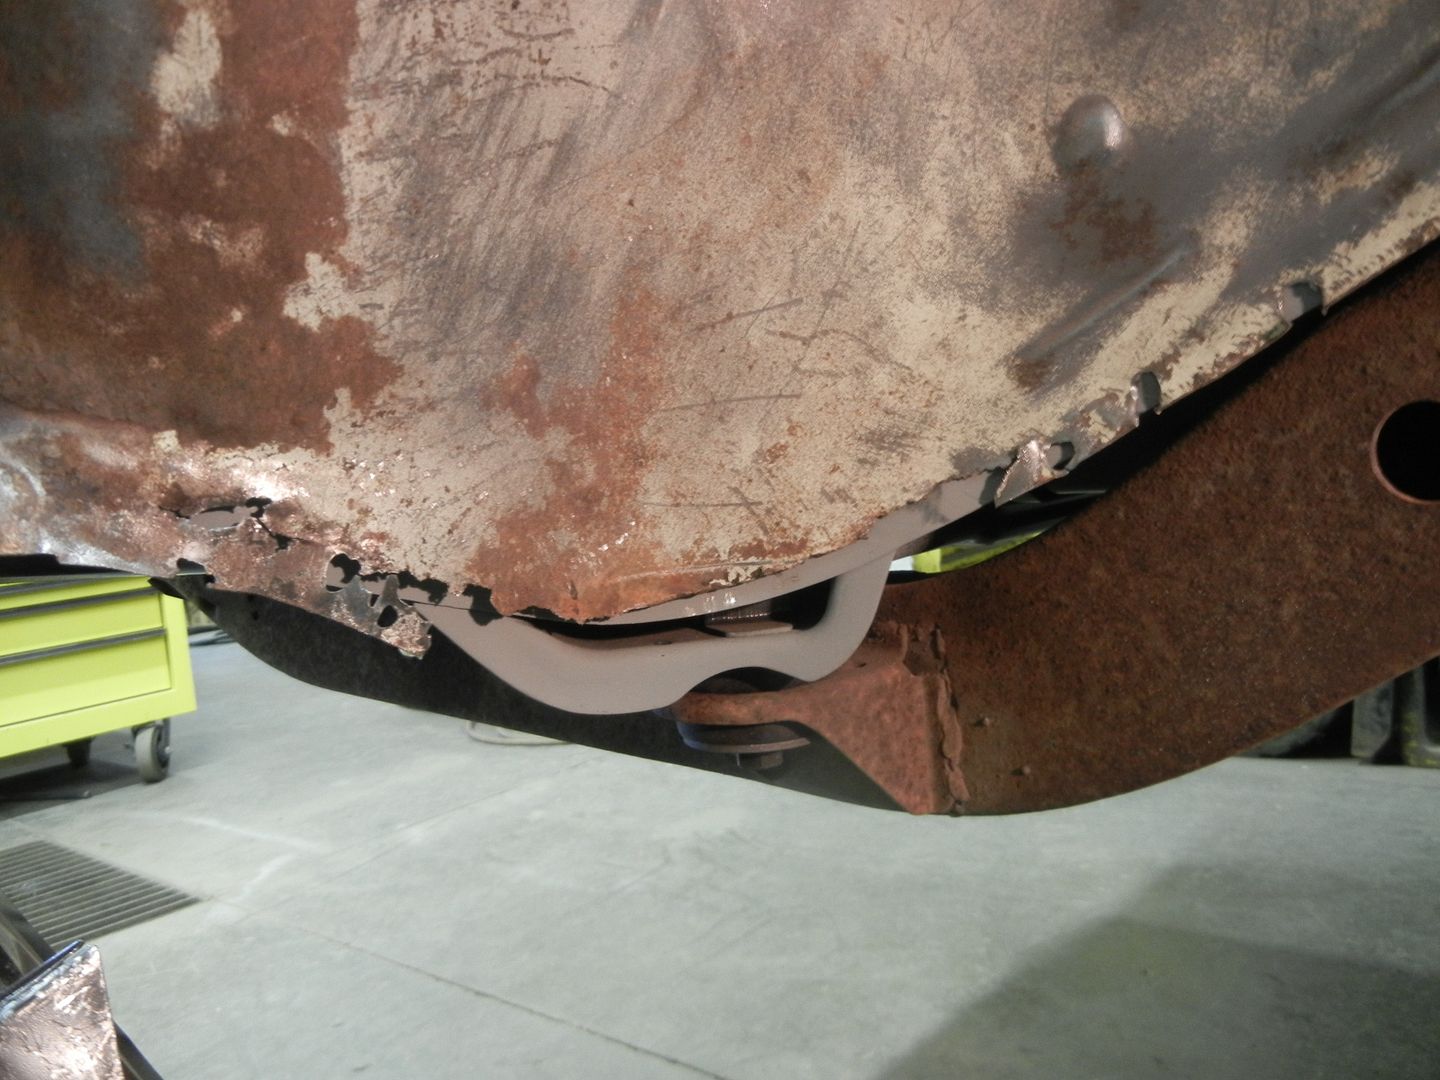
John and I worked on getting the rest of the floor out today. He drilled out the spot welds in the wheel wells and I hacked up the front seam with the air chisel. Way too much screwing around to drill out the welds up there.
I also chiseled off the remnant of the pan under the tail panel.
I cut out the trunk drop and trimmed off all other remnants.
We then slid the floor in place. It fits the body like a glove..
The true test will be when it is mocked in with drill screws and set on the bushings. I'm hoping it sits on them instead of 1" above like the GTO pan did. So far, I'm really impressed with this piece. All the original stampings, holes and even wire clips are present and match what came out.
John D said
Nov 14, 2014
NICE!
Lost in the 60s said
Nov 18, 2014
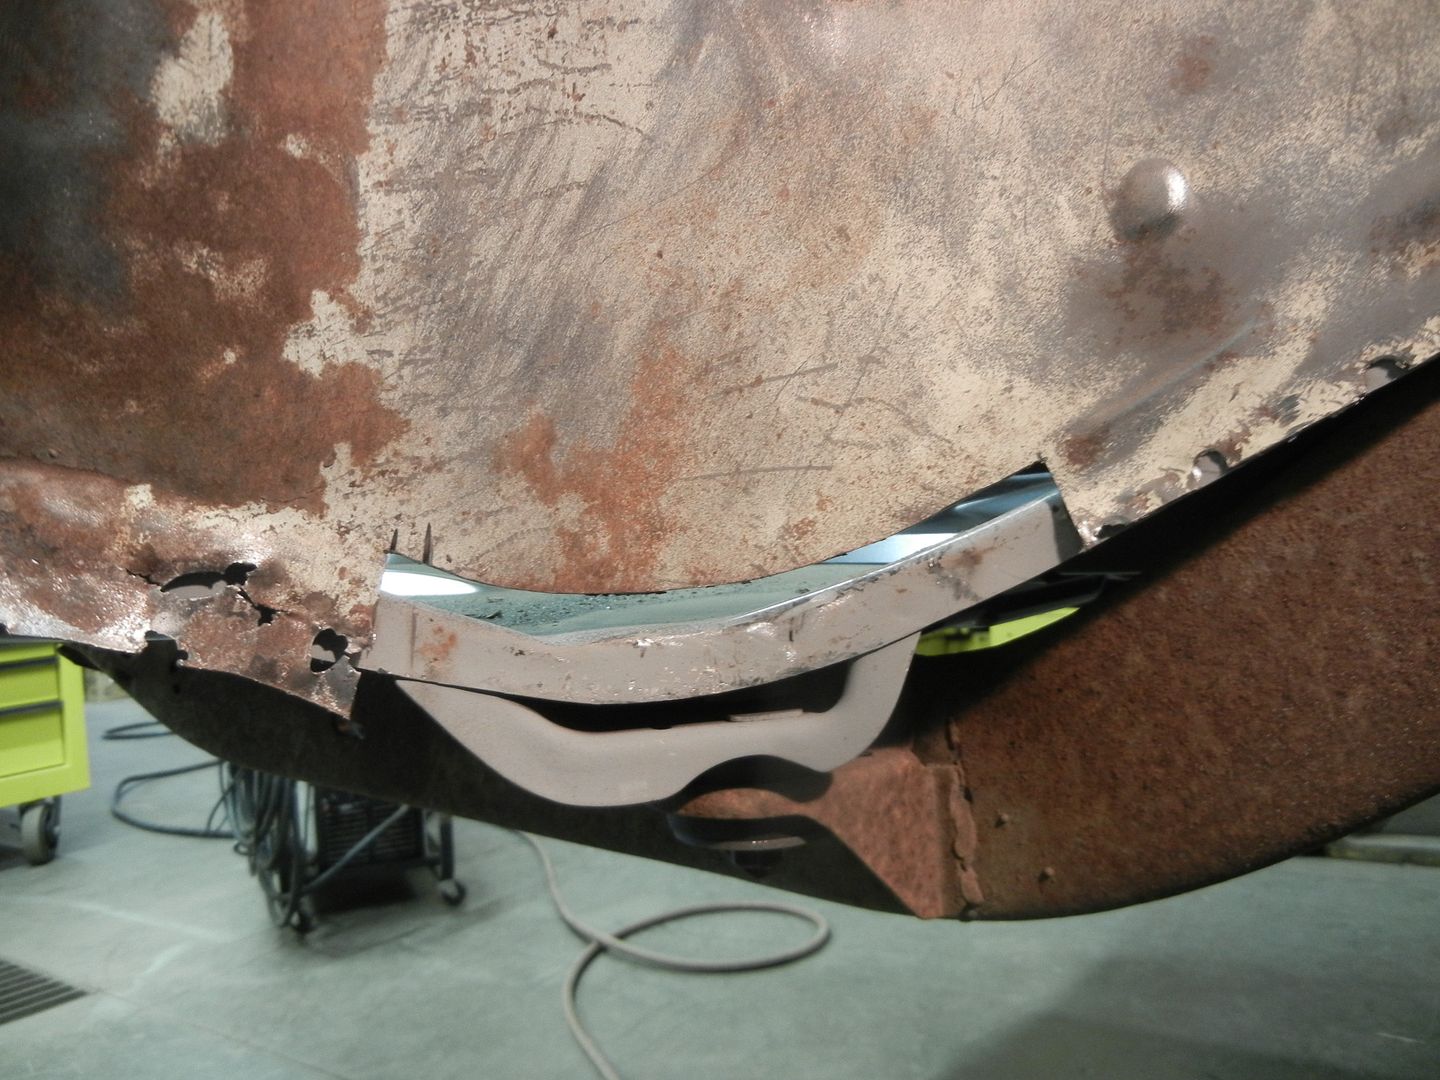
John and I were back on it today. He helped me clean off all the remnants of the drops and we slid the floor back in. It fit good enough that we lowered the body back onto the frame. All the bolt holes lined right up and we bolted it down. Frame and floor mated well and are level !!
John had to leave then to go buy a rebuilt 12 bolt axle for his 72...
I started fitting the trunk drops. I bought AMD drops thinking they would fit the floor but neither of them did...
I had a pair of Dynacorn drops and dug them out. The left side fit better than the AMD, so I spent almost 2 hours coaxing it into submission.
There was a big gap between the floor and drop. Part of that was caused by the drop leaning away from the rear crossmember.
I used a ratchet strap to pull it in and secured it with drill screws.
That closed the gap about halfway. I then used drill screws to pull them together.
The gap is almost closed now. Much more manageable to weld and seam seal.
It fit the profile of the quarter very well too.
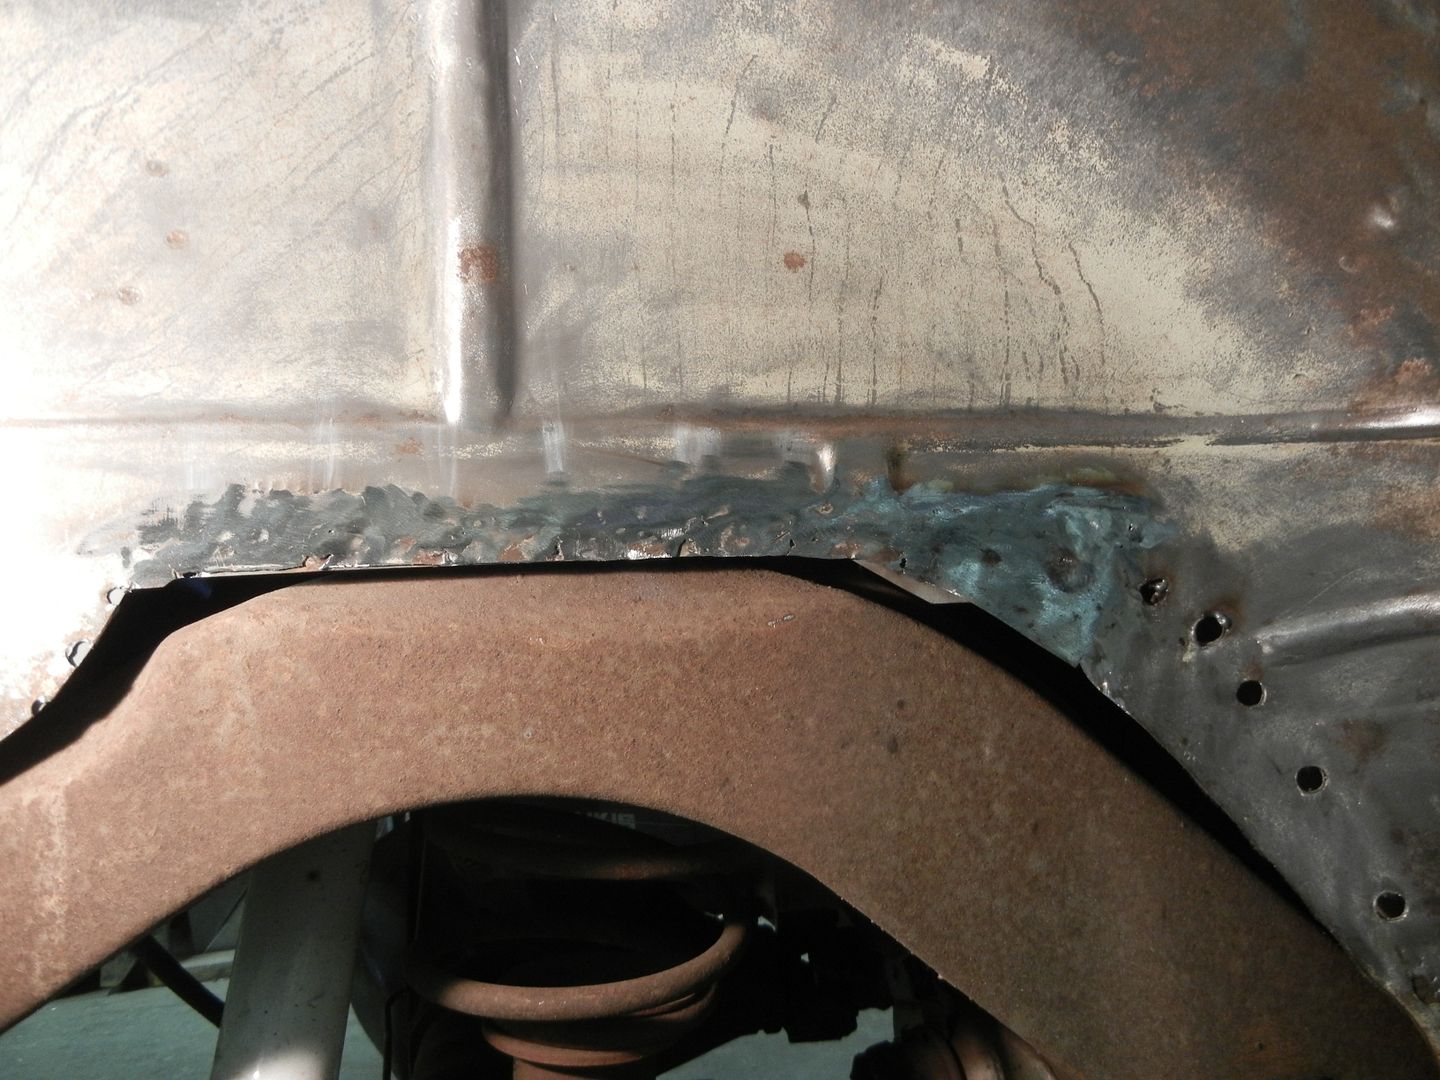
Then I went to the right side. Neither The AMD or Dynacorn drop fit the profile of the floor at the wheel well at all. I used the AMD drop because it fit the floor OK with enough clamps on it.
Blurry pic but the end of the drop is sticking above the floor and should be UNDER it !!
I cut a slot in the floor and bent it up while forcing the drop under it. It still doesn't fit good and puts a tension bind on everything.
It was 5 pm and I was about ready to cut the floor up more but decided to walk away. I will leave it until I replace the outer wheel well and get them to fit together with the floor..
Lost in the 60s said
Nov 22, 2014
More slicing and dicing. Getting into the wheel house for replacement.
BLyke said
Dec 3, 2014
Looks like your making good progress Mitch. For me this is a "preview of coming attractions", as i will be needing a floor and some rear panels too.
thanks for all of the pictures, keep them coming.
BLyke said
Dec 3, 2014
Looks like your making good progress Mitch. For me this is a "preview of coming attractions", as i will be needing a floor and some rear panels too. Thanks for all of the pictures, keep them coming.
Lost in the 60s said
Dec 3, 2014
Thanks Bruce.
The SS got stalled while I put the 7 piece trunk floor in my Malibu. Of the 2 choices, I will always go the 1 piece route in the future. I got the 7 piece kit with the car, so decided to use it but it's a LOT more work fitting and welding than throwing 1 part in, lining it up and welding the perimeter.
Scott Parkhurst said
Dec 3, 2014
Go get 'em Mitch! Great work pal..
Chris S said
Dec 3, 2014
Lookin good Mitch! Thanks for the updates.
Lost in the 60s said
Dec 13, 2014
I got the tail panel yesterday that had been on back order from Summit for a month.
Uh, Houston, we got a problem....
Seems the boys in Taiwan forgot one step. I had ordered another panel from RPC on Monday along with the quarter skins. They called back a short time later and told me of this little issue. AMD stopped shipment of the remaining panels immediately. By then, thankfully, this one was in transit. AMD pulled the rest from stock and ordered another batch. It'll be another 3 MONTHS before they get them. I can probably make a lock hole in less time than that...
It does appear to be a nice fit with all the correct stampings when set on the Malibu.
SShink said
Dec 13, 2014
That sucks... Are they shipping you a new one and letting you keep this one?
Quality control escape with the missing punch operation. Something that seems obvious to us, but to the guy on the line in Taiwan, they don't understand how/where the part is used, so probably didn't even think about it. A lot of mfg. plants I've worked with use go/no go final inspection gauges with Asia suppliers to 'dummy proof' escapes like this. All it needed is a fixture with a large pin to check that opening along with the others...
3 months is 'quick' lead time from Asia and usually longer like 4 months including 4-6 weeks in the shipyard, transit time, and customs clearance. Sounds like they are standing behind the product though, which is good.
Lost in the 60s said
Dec 13, 2014
Stan, I don't have 3-4 months to wait and am very happy that this one got out of their hands before they discovered the boo-boo. I will make the hole and keep moving.
RPC offered a Dynacorn in its place, which is less expensive, but doesn't have the trim holes already in it.
They also offered a Goodmark with the trim holes but I've never cared much for the way the Goodmark parts fit, so turned them both down.
Chris R said
Dec 13, 2014
Cutting out the hole yourself means your guaranteed its going to be right. Given its a pain in the you know what to do. At least it wasnt something you would have had to redo if they didnt cut it right to begin with so there is that.
Lost in the 60s said
Jan 9, 2015
Alright, the holidays are over, I got the trunk floor in the Malibu good enough to install the gas tank so it is mobile. I'm back on the SS...:D
Previously, we had only fitted the trunk floor. Tuesday we took it out again and prepped it for install. I installed new body bushings, pried things around until they were sqaure and centered and tack welded the front seam on.
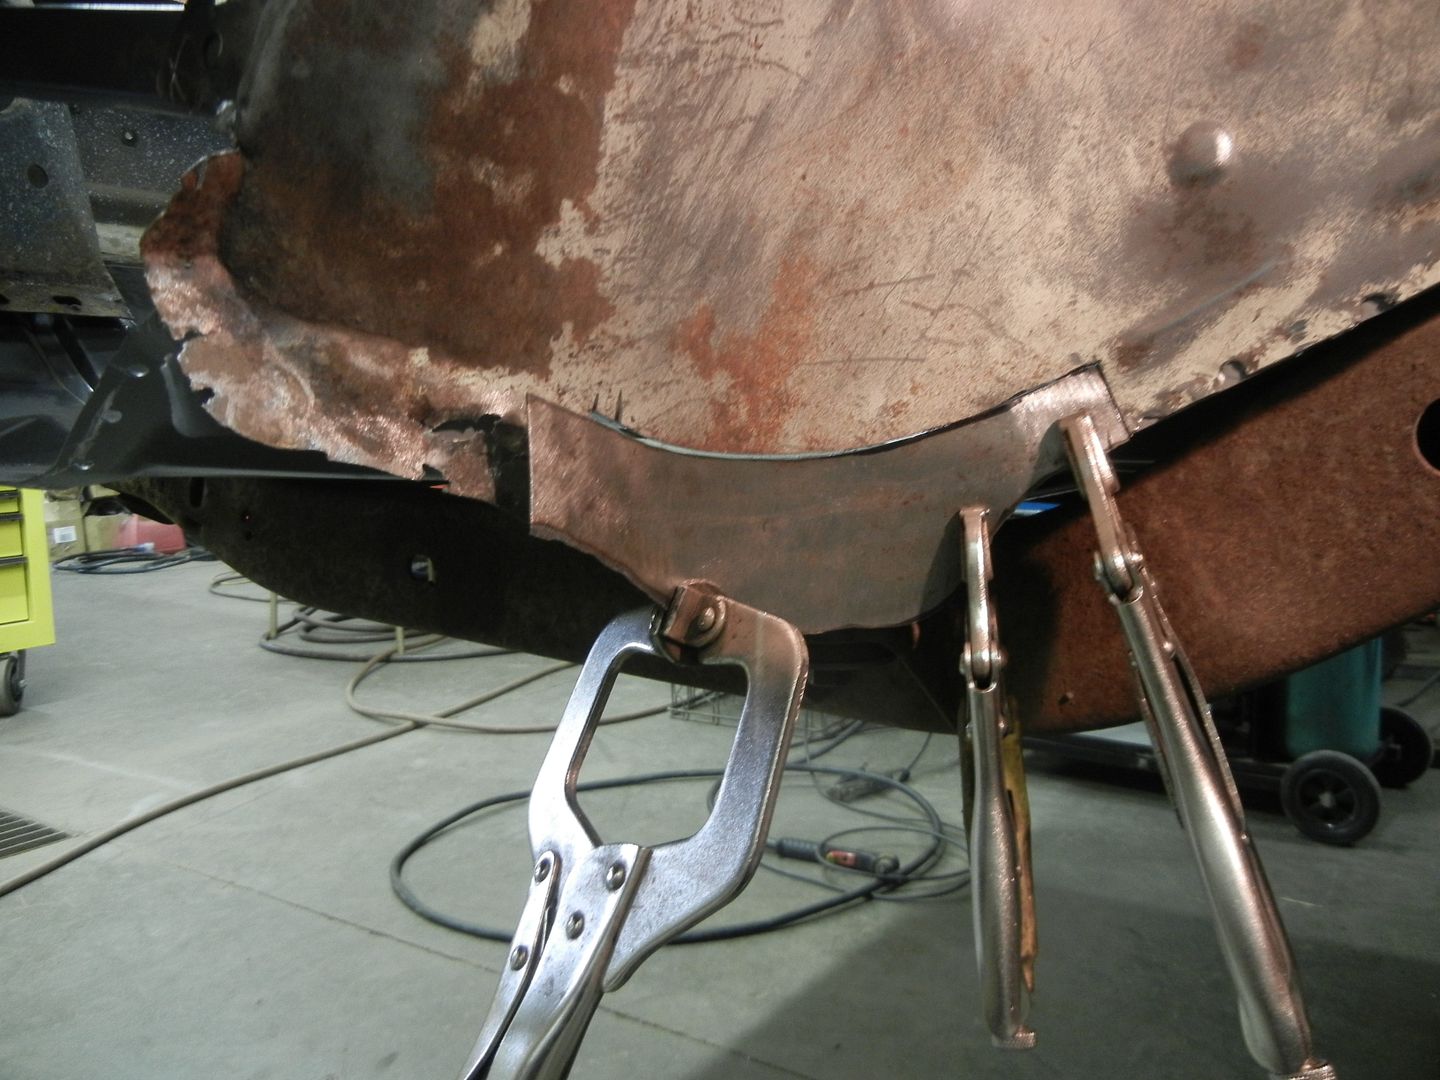
Removed the rest of the outer wheel well.
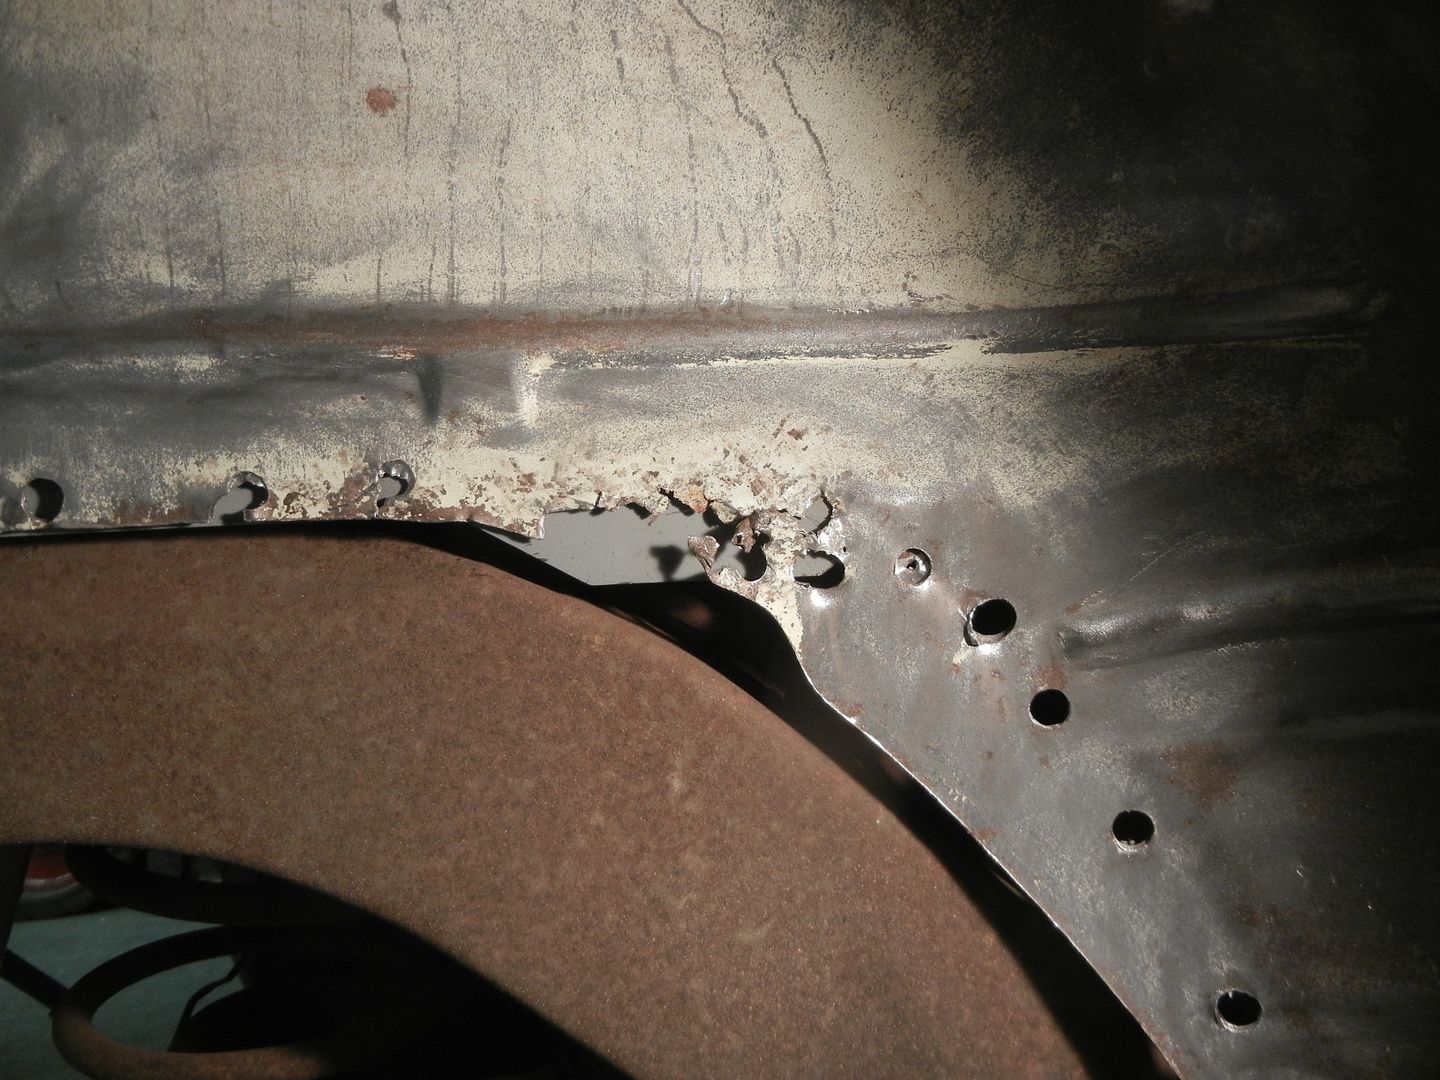
Decided now would be a good time to repair the rust damage on the inner well, since I had so much room to work.
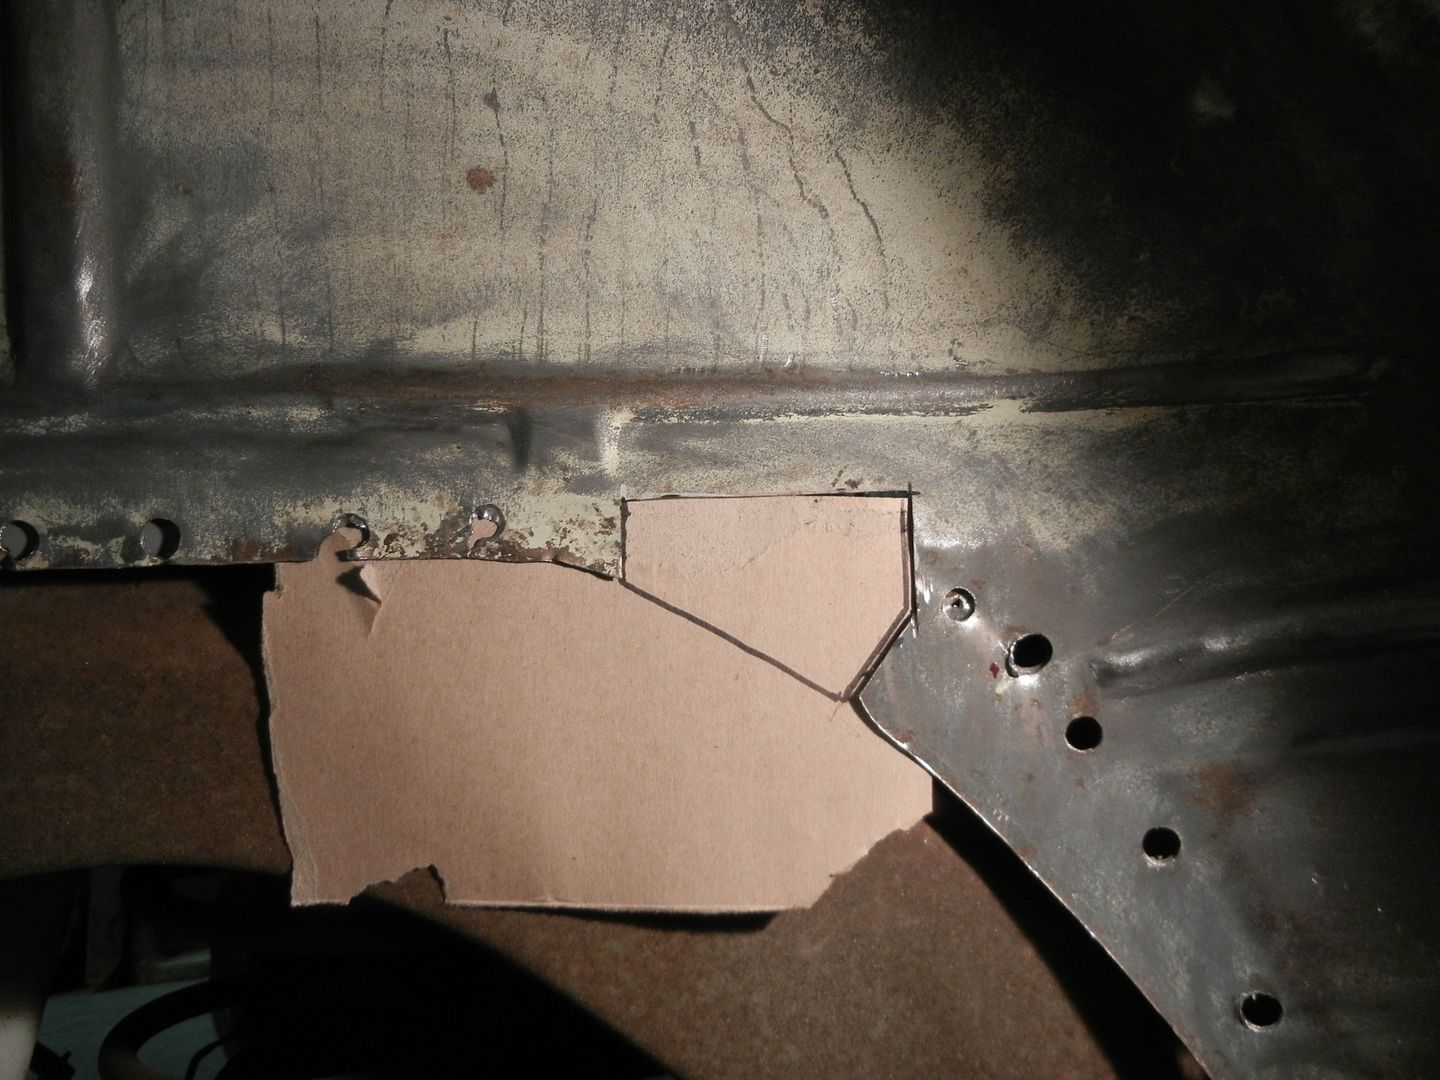
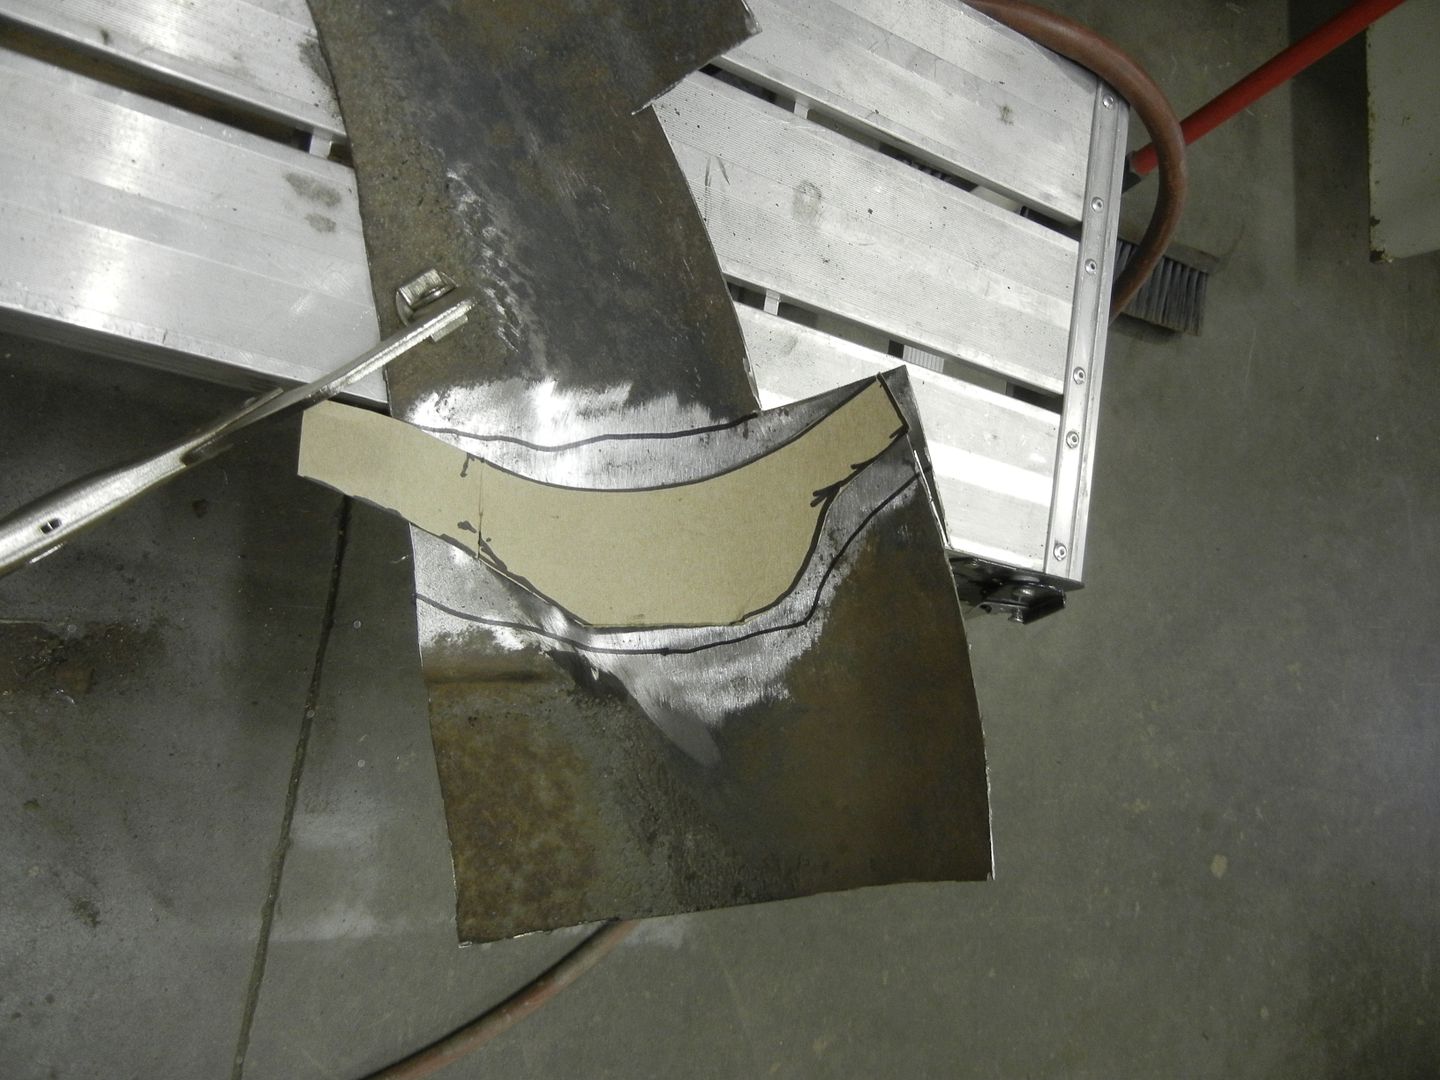
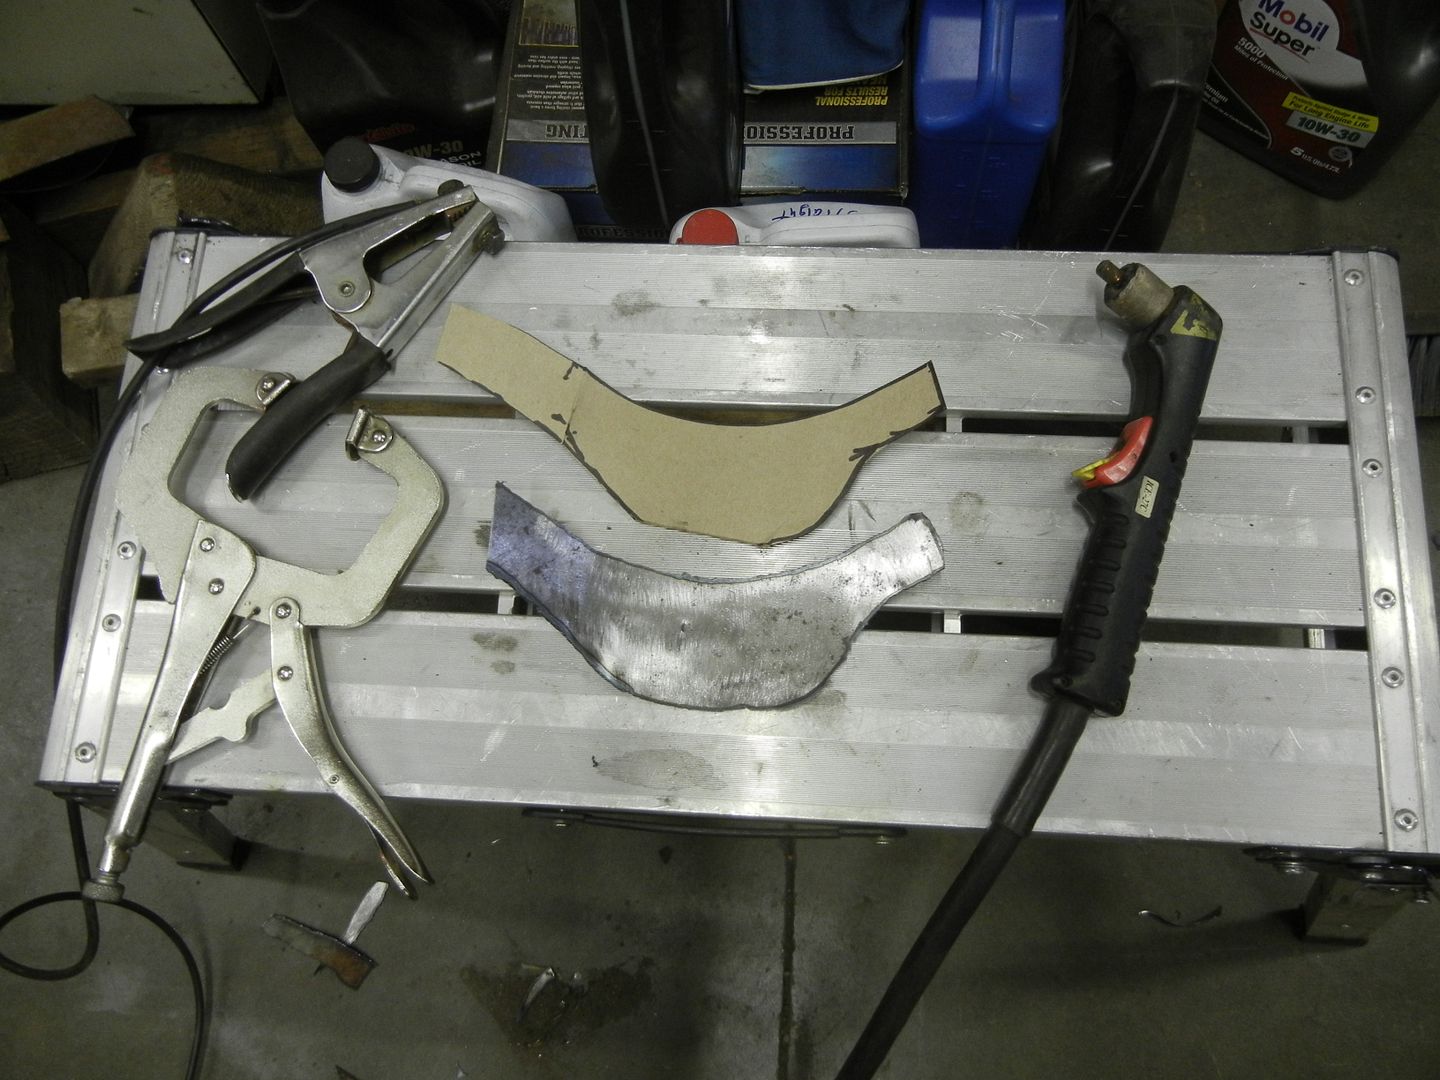
I made a template from cardboard.
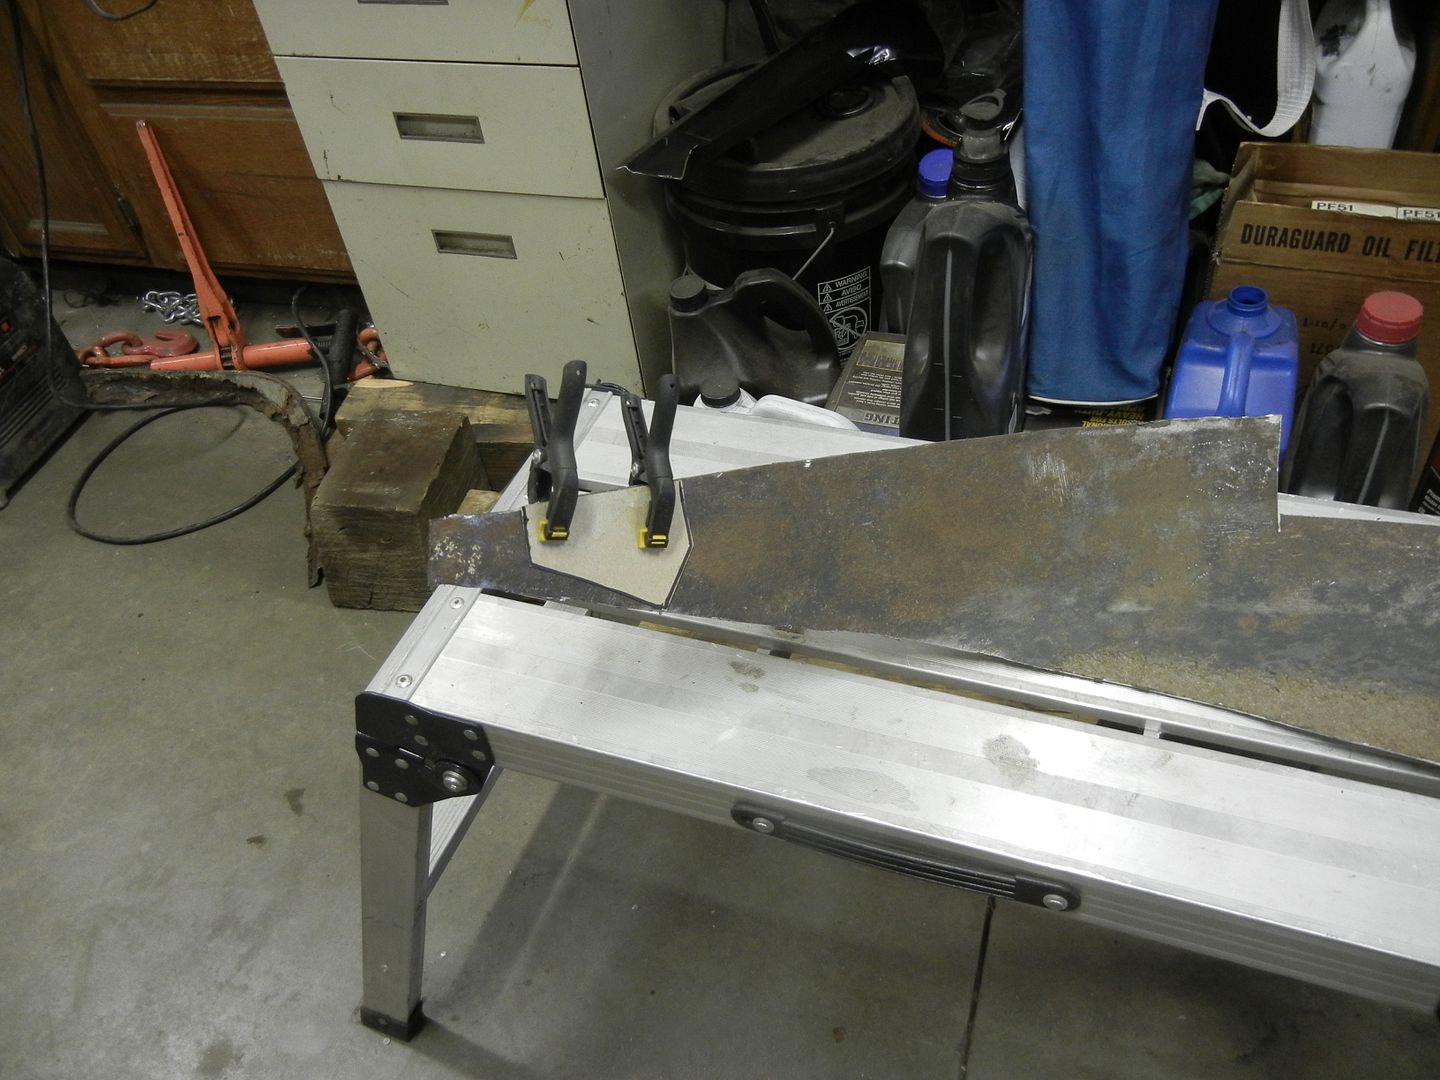
I cut it out of the piece of outer I had just removed.
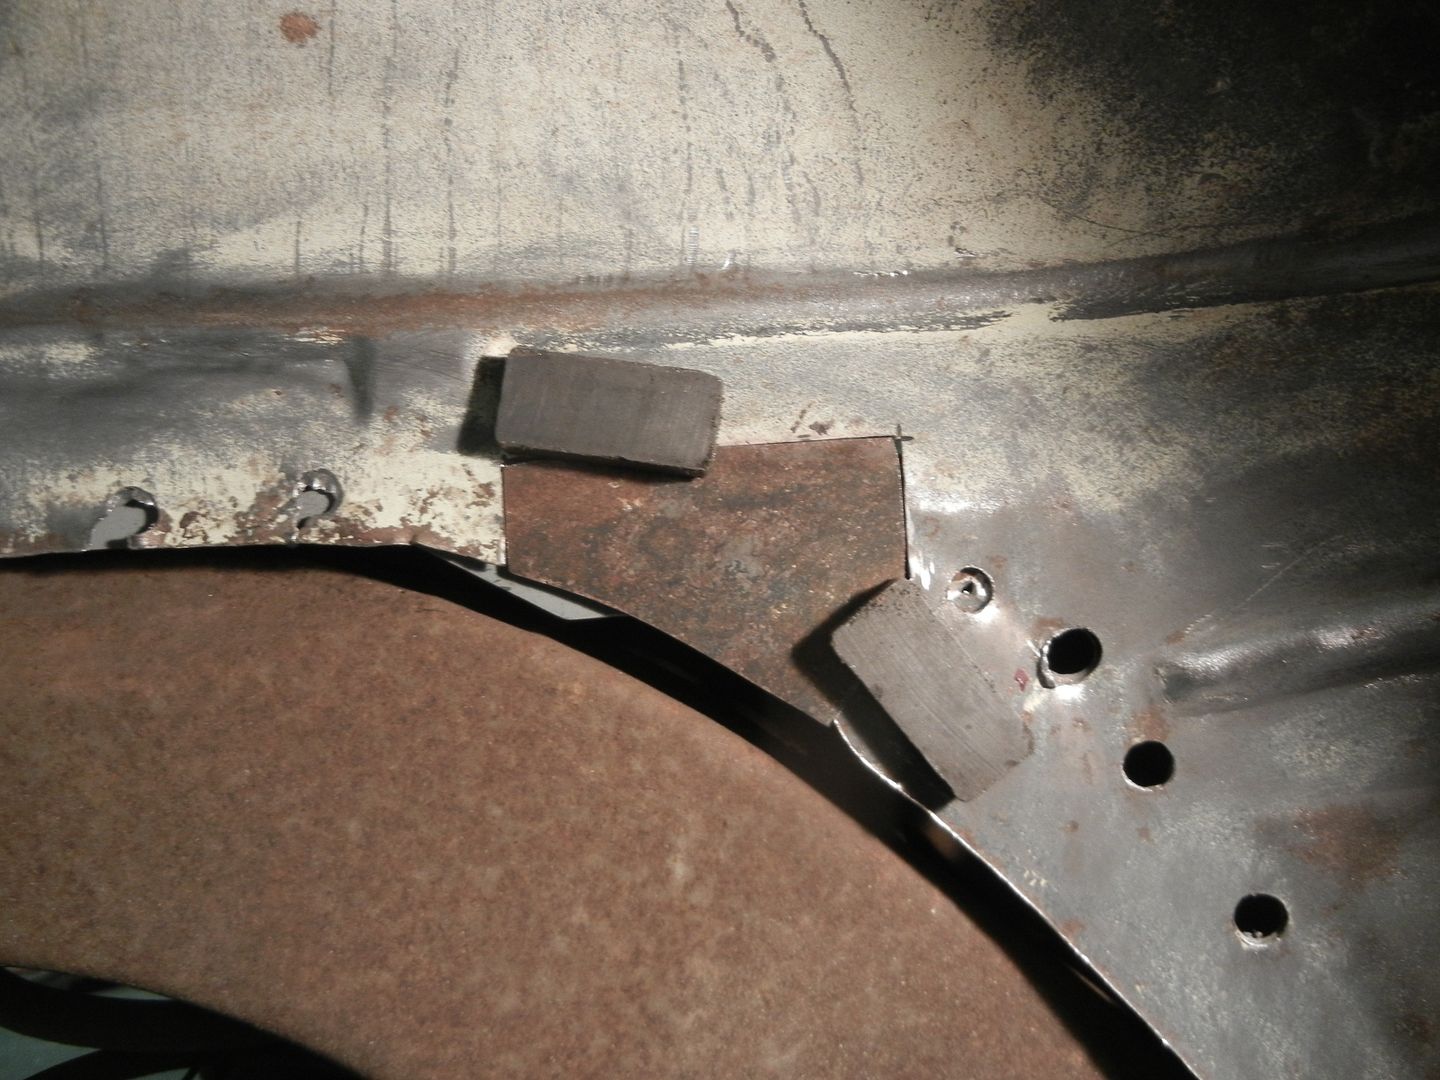
Once I had it fitted, I sanded it all off, punched a bunch of holes to plug weld it on and the camera battery went dead..:(
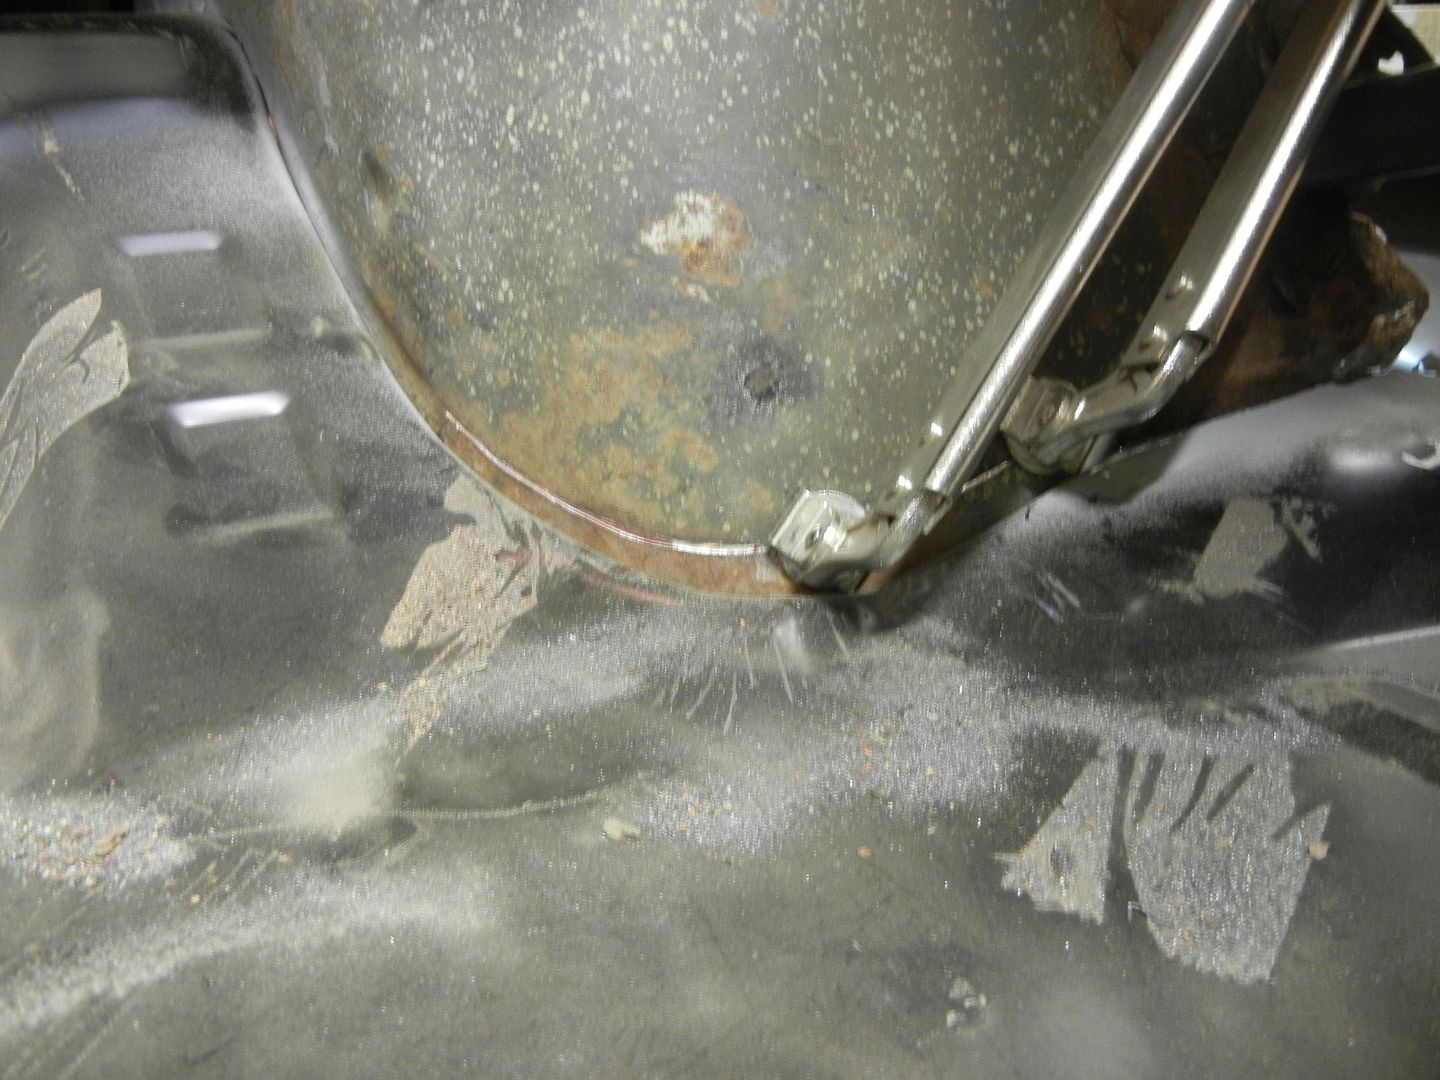
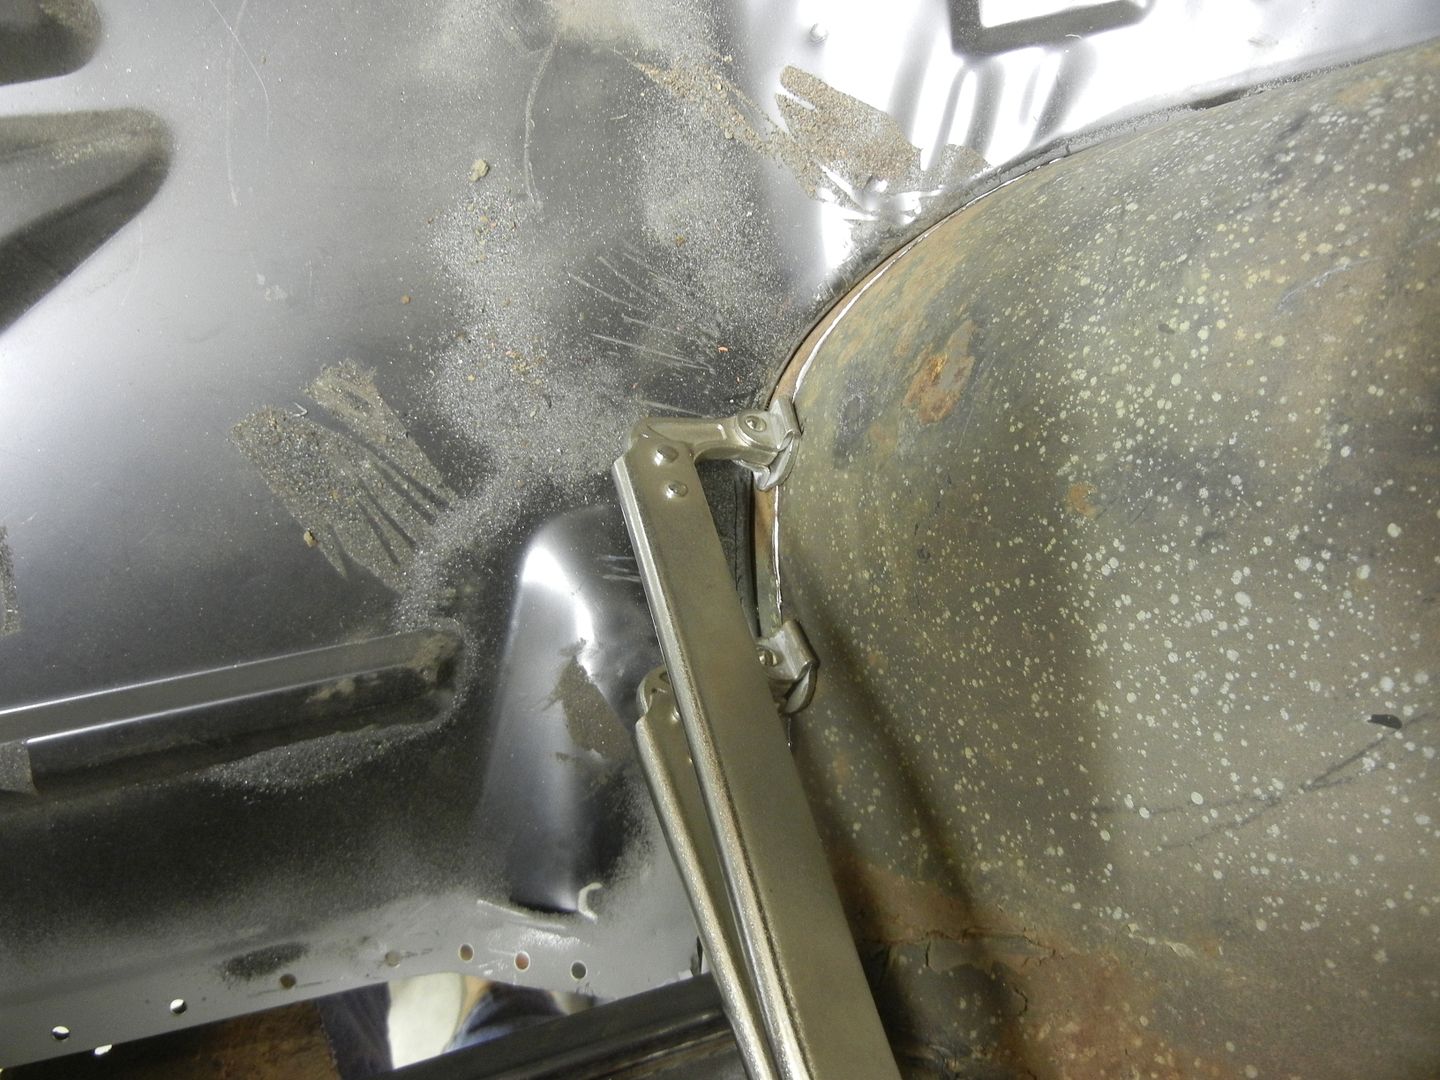
By the time the battery charged, I had the patch and the spot weld holes to the left welded in and ground off.
Then to the rear of the well.
Another template, the outer cut-off and the plasma had a shape in a few minutes.
Initial fit was OK but it was going to take a while to get it to bend to the proper shape...about another 90 minutes...:drunk:
It is a good fit but it was 5pm and time to come in for supper. The final prep and weld in will another day.
Should be a clean butt weld...
dashboard said
Jan 9, 2015
Mitch, do you think your to old to be adopted? I could sure use you around here this spring when I start on the red car.
Jon H said
Jan 9, 2015
dashboard wrote:
Mitch, do you think your to old to be adopted? I could sure use you around here this spring when I start on the red car.
Careful what you wish for Kevin. I would love to see what Mitch could do to someone else's check book!
Lost in the 60s said
Jan 10, 2015
Jon H wrote:
dashboard wrote:
Mitch, do you think your to old to be adopted? I could sure use you around here this spring when I start on the red car.
Careful what you wish for Kevin. I would love to see what Mitch could do to someone else's check book!
You've got that right. I have to do this in stages as my cc permits. If I had unlimited funds, I could cause major devastation...
The '47 Ford I'm building at work is a prime example, but that is also the owners doing. He wants all top shelf bling. MAN is it fun spending his money...
Lost in the 60s said
Jan 11, 2015
OK, the wife got tired of me pestering her and kicked me out for a couple hours.
Today, I removed the rest in the outer well in the rocker panel.
Lots of brazing where the rocker and quarter meet the inner.
Ready to come out.
Nice pile of dirt and leaves inside the rocker.
The flange is supposed to be on the inside of the inner structure, but I wasn't going to drill all the spot welds out and pry the inner half open enough to get the old flange out. I bent 5" of the flange to lay flat inside the well and cut reliefs for the upper roof brace.
Not a good fit. I had to cut some of the brace off below the screw driver to allow the well to go up higher.
I also needed to trim down the flange to fit in the step of the inner.
Once the extra trimming was done, it fit good enough to move on to the next stage.
I had to rotate the well up in the front to get it to line up with everything else and it left a gap at the bottom.
I will use drill screws to hold it in place for now. It looks OK but the bottom line is, it needs to match the quarter skin more than anything else. I will leave it loose until I have fitted the skin and know the opening fits correctly.
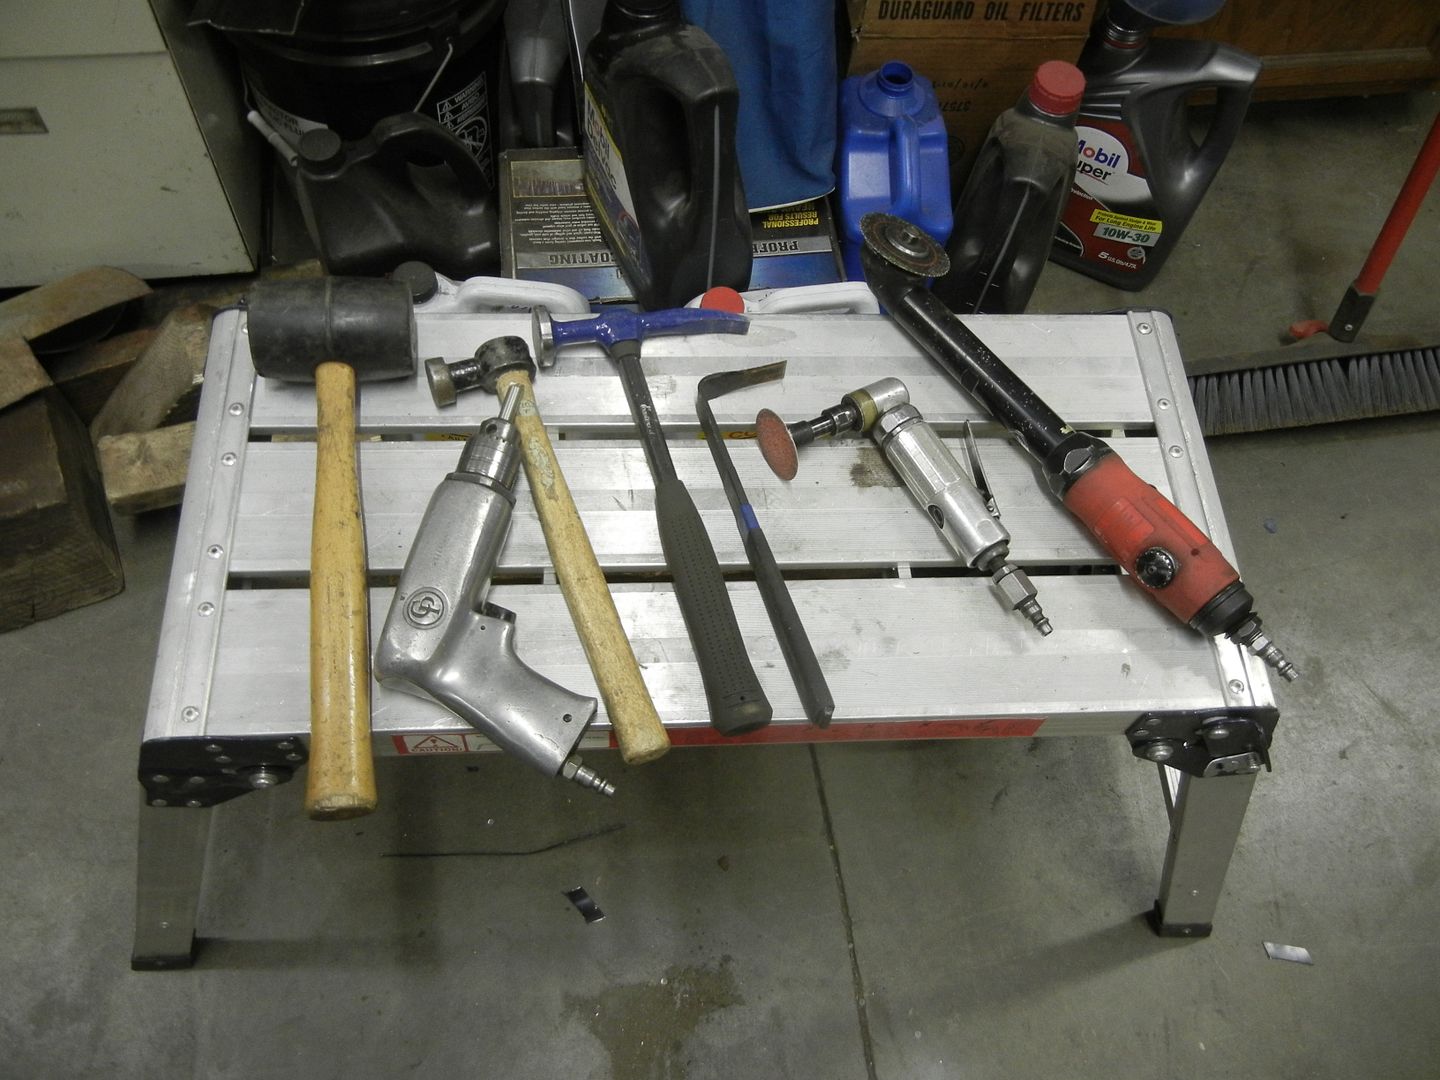
Gotta have a few tools to do this stuff.
-- Edited by Lost in the 60s on Sunday 11th of January 2015 07:11:29 PM
John D said
Jan 11, 2015
Love it!! Harkens back to my HS shop teacher... "It's just metal... cut/replace/weld/repeat...
(what he didn't relate is the size of the cahones it takes to take the plunge!)
Lost in the 60s said
Jan 16, 2015
Well, no going back now...
Started cutting up the new panel...
It's close, another 1/16 down and it'll be good.
Still a lot of trimming and flanging to get the final fit.
BLyke said
Jan 17, 2015
The car is looking good Mitch, sorry i did not get a chance to get a full update today at Karl's,we had to leave fairly early.
what is your timeline to get the body done?
Lost in the 60s said
Jan 18, 2015
BLyke wrote:
The car is looking good Mitch, sorry i did not get a chance to get a full update today at Karl's,we had to leave fairly early. what is your timeline to get the body done?
Bruce, I don't set time lines. They just come and go and I get frustrated when I don't meet them.
I WILL drive the car again this summer. That is the only parameter I set. Wherever I'm at around the beginning of May, it gets put back to road worthiness. I don't want it sitting in the shop all summer. I have a lot of work I want to do to my '52 truck and a vintage camper I bought.
Then there is finishing the trunk floor in the Malibu and more mods to the '38...I need to live to 135 to get all this done...
And so it begins.
I saw a few pin holes and started pushing with a screw driver. Debating whether to replace the whole tail panel or patch this. The rest looks good...
I removed the lower trim piece to dig at the bondo...
Bondo and parts that fell out. There was a fuel injector in there too...
I'll be skinning it from the door back and replacing the outer half of the wheel house too.
You will be busy this winter. Wish I had you skills.
Kind of leaning towards the one piece trunk floor and new tail panel. It's a lot more money but a much cleaner install than stitching the 7 piece kit together that I have.
Maybe I could talk Derek into bringing the floor back from Chicago....
I don't think we'll have any room... we may be hauling back a '68 L72/M21 all date correct for my brother's original L72 Biscayne.
The floor could sit on top of it and provide weather cover...
If the engine deal falls thru, I'm willing to contribute to the gas fund...
Today's progress. John came over and removed the horizontal trim and helped me get the fuel tank out and bumper off. Then he removed the extension housings.
-- Edited by Lost in the 60s on Tuesday 4th of November 2014 03:31:20 PM
Well, I exercised my credit card just now...
Got an AMD 1 piece trunk floor coming along with the drops, tail panel and window filler panel...
Mitch, was the car originally the cream/butternut color I see where the tail light buckets used to be?
Yes, Lemonwood Yellow. Kind of a "dainty" color for an SS car. Pretty sure it was a rare 3 speed manual too, as there is no L designation for a 4 speed.
If it came with a three speed, then there may not be a hole for the speedometer 4 sp cable down low on the passenger side along with the clips for the cable on the bottom of the passenger floor pan.
No it didn't have that hole. When I swapped out the Saginaw it came with for the Muncie, I routed the cable thru there per pics you posted a couple years ago for reference...
Are you painting it aztec bronze or leaving it orange for now?
Need to see what the funds look like when all this is done but YEAH, I would love to keep going and get into Bronze...
I got a full American Auto Update harness kit for the Malibu today. I'm contemplating ordering a gauge conversion package for the Malibu dash and installing that in the SS and moving the light dash to the Malibu. They are both floor shift speedometers so I can mix and match...
The wiring kit came today. Looks like a mess of spaghetti...
The paint/materials are the cheap part Mitch compared to the cost of body panels... the bodywork is free with your skills!
I know the feeling you need to know when to say no and when to stop.
Not so long ago
Lost in the 60s wrote:
With all due respect, Sir, now is the time to do the frame. To go thru ALL that at a later date will only risk scratching the new paint and use a LOT of time and funding, you already have invested at this point, again.
SShink wrote:
Ain't that the truth!!!
Lost in the 60s wrote:
I knew you would relate, Stan. You didn't plan on a frame off either but it's the only sensible thing to do when you're in that far.
Jim Larson wrote:
LeRoy mentioned $250 to sandblast frame and $200 to powder coat. Do it now, so you don't have to take it off the frame later. The rest of the stuff can be done anytime. With the car on the frame and the engine in and ready to drive.
Dashboard wrote:
Your correct, then why not just go ahead and stick the body on a rotisserie and while the body’s off just go ahead and replace the brake, fuel lines and cables, while doing that it would be a good time to upgrade the suspension and brakes and then I might as go to a posi rear end, and then and then I might be able to drive the car by August; there is next year. If we put the house on the market this spring I need this car to be mobile.
I need to stop somewhere and this is where I’ve chosen to stop, for now, I still need to replace the top and add AC.
Thanks to Karl, I now have a real '66 dash to paint...
The black one that came with the car is a '67...
So what are the differences between the 66 and 67?
Nevermind, I just read your explanation in another post.
-- Edited by Bungy L-76 on Monday 10th of November 2014 11:53:13 AM
This project has been digging at the back of my brain for a week now and as hard as I have tried to push it out, the ugly truth is NOW is the time to pull the body and do the frame completely. If I don't and get the body painted, there's no way I would ever get around to restoring the frame and risk mucking up the paint.


AAAAAARRRRRRGGGGGGG.......
SOMEBODY talk me out of this.....
This is why I have not touched a thing on my chevelle as I cannot commit to it and I would just get it apart and never get back to it.
It hopefully will not be near the project the GTO was as you will hopefully not be replacing ever piece of sheetmetal on it. So sorry I don't think I can talk you out of it.
I can't see any negatives. It will be more expensive to complete the frame off in the future. No one is getting any younger. Enjoy it now. Then drive it while you complete the blue 66. You can always work on the blue one when there is a temporay stoppage on the bronze one.
:)
John
The guy helping me do this is named John also and has been trying to talk me into this for 2 weeks so it is done when I "sell it to him"...
I guess the consensus is to quit procrastinating and get to work...
John will be here tomorrow and I guess the clip will come off. Just need to figure out where to put all the parts.
We decided to work on getting the trunk floor out before removing the front clip.
I did this as a test to see if I could put the new floor in from the back.
I welded these bars in before cutting the floor to eliminate sagging of the quarter panels like the GTO did.
And just about the time we got this out, the NEW FLOOR arrived...
Once I cut the drops out, this will slide right into place...
UPS freight beat the he!! out of the box, but only a minor dent in the floor.
-- Edited by Lost in the 60s on Tuesday 11th of November 2014 04:05:45 PM
John and I worked on getting the rest of the floor out today. He drilled out the spot welds in the wheel wells and I hacked up the front seam with the air chisel. Way too much screwing around to drill out the welds up there.
I also chiseled off the remnant of the pan under the tail panel.
I cut out the trunk drop and trimmed off all other remnants.
We then slid the floor in place. It fits the body like a glove..
The true test will be when it is mocked in with drill screws and set on the bushings. I'm hoping it sits on them instead of 1" above like the GTO pan did. So far, I'm really impressed with this piece. All the original stampings, holes and even wire clips are present and match what came out.
John and I were back on it today. He helped me clean off all the remnants of the drops and we slid the floor back in. It fit good enough that we lowered the body back onto the frame. All the bolt holes lined right up and we bolted it down. Frame and floor mated well and are level !!
John had to leave then to go buy a rebuilt 12 bolt axle for his 72...
I started fitting the trunk drops. I bought AMD drops thinking they would fit the floor but neither of them did...
I had a pair of Dynacorn drops and dug them out. The left side fit better than the AMD, so I spent almost 2 hours coaxing it into submission.
There was a big gap between the floor and drop. Part of that was caused by the drop leaning away from the rear crossmember.
I used a ratchet strap to pull it in and secured it with drill screws.
That closed the gap about halfway. I then used drill screws to pull them together.
The gap is almost closed now. Much more manageable to weld and seam seal.
It fit the profile of the quarter very well too.
Then I went to the right side. Neither The AMD or Dynacorn drop fit the profile of the floor at the wheel well at all. I used the AMD drop because it fit the floor OK with enough clamps on it.
Blurry pic but the end of the drop is sticking above the floor and should be UNDER it !!
I cut a slot in the floor and bent it up while forcing the drop under it. It still doesn't fit good and puts a tension bind on everything.
It was 5 pm and I was about ready to cut the floor up more but decided to walk away. I will leave it until I replace the outer wheel well and get them to fit together with the floor..
More slicing and dicing. Getting into the wheel house for replacement.
thanks for all of the pictures, keep them coming.
Looks like your making good progress Mitch. For me this is a "preview of coming attractions", as i will be needing a floor and some rear panels too.
Thanks for all of the pictures, keep them coming.
Thanks Bruce.
The SS got stalled while I put the 7 piece trunk floor in my Malibu. Of the 2 choices, I will always go the 1 piece route in the future. I got the 7 piece kit with the car, so decided to use it but it's a LOT more work fitting and welding than throwing 1 part in, lining it up and welding the perimeter.
Lookin good Mitch! Thanks for the updates.
I got the tail panel yesterday that had been on back order from Summit for a month.
Uh, Houston, we got a problem....
Seems the boys in Taiwan forgot one step. I had ordered another panel from RPC on Monday along with the quarter skins. They called back a short time later and told me of this little issue. AMD stopped shipment of the remaining panels immediately. By then, thankfully, this one was in transit. AMD pulled the rest from stock and ordered another batch. It'll be another 3 MONTHS before they get them. I can probably make a lock hole in less time than that...
It does appear to be a nice fit with all the correct stampings when set on the Malibu.
That sucks... Are they shipping you a new one and letting you keep this one?
Quality control escape with the missing punch operation. Something that seems obvious to us, but to the guy on the line in Taiwan, they don't understand how/where the part is used, so probably didn't even think about it. A lot of mfg. plants I've worked with use go/no go final inspection gauges with Asia suppliers to 'dummy proof' escapes like this. All it needed is a fixture with a large pin to check that opening along with the others...
3 months is 'quick' lead time from Asia and usually longer like 4 months including 4-6 weeks in the shipyard, transit time, and customs clearance. Sounds like they are standing behind the product though, which is good.
Stan, I don't have 3-4 months to wait and am very happy that this one got out of their hands before they discovered the boo-boo. I will make the hole and keep moving.
RPC offered a Dynacorn in its place, which is less expensive, but doesn't have the trim holes already in it.
They also offered a Goodmark with the trim holes but I've never cared much for the way the Goodmark parts fit, so turned them both down.
Cutting out the hole yourself means your guaranteed its going to be right. Given its a pain in the you know what to do. At least it wasnt something you would have had to redo if they didnt cut it right to begin with so there is that.
Alright, the holidays are over, I got the trunk floor in the Malibu good enough to install the gas tank so it is mobile. I'm back on the SS...:D


Previously, we had only fitted the trunk floor. Tuesday we took it out again and prepped it for install. I installed new body bushings, pried things around until they were sqaure and centered and tack welded the front seam on.
Removed the rest of the outer wheel well.
Decided now would be a good time to repair the rust damage on the inner well, since I had so much room to work.
I made a template from cardboard.
I cut it out of the piece of outer I had just removed.
Once I had it fitted, I sanded it all off, punched a bunch of holes to plug weld it on and the camera battery went dead..:(
By the time the battery charged, I had the patch and the spot weld holes to the left welded in and ground off.
Then to the rear of the well.
Another template, the outer cut-off and the plasma had a shape in a few minutes.
Initial fit was OK but it was going to take a while to get it to bend to the proper shape...about another 90 minutes...:drunk:
It is a good fit but it was 5pm and time to come in for supper. The final prep and weld in will another day.
Should be a clean butt weld...
Careful what you wish for Kevin. I would love to see what Mitch could do to someone else's check book!
You've got that right. I have to do this in stages as my cc permits. If I had unlimited funds, I could cause major devastation...
The '47 Ford I'm building at work is a prime example, but that is also the owners doing. He wants all top shelf bling. MAN is it fun spending his money...
OK, the wife got tired of me pestering her and kicked me out for a couple hours.


Today, I removed the rest in the outer well in the rocker panel.
Lots of brazing where the rocker and quarter meet the inner.
Ready to come out.
Nice pile of dirt and leaves inside the rocker.
The flange is supposed to be on the inside of the inner structure, but I wasn't going to drill all the spot welds out and pry the inner half open enough to get the old flange out. I bent 5" of the flange to lay flat inside the well and cut reliefs for the upper roof brace.
Not a good fit. I had to cut some of the brace off below the screw driver to allow the well to go up higher.
I also needed to trim down the flange to fit in the step of the inner.
Once the extra trimming was done, it fit good enough to move on to the next stage.
I had to rotate the well up in the front to get it to line up with everything else and it left a gap at the bottom.
I will use drill screws to hold it in place for now. It looks OK but the bottom line is, it needs to match the quarter skin more than anything else. I will leave it loose until I have fitted the skin and know the opening fits correctly.
Gotta have a few tools to do this stuff.
-- Edited by Lost in the 60s on Sunday 11th of January 2015 07:11:29 PM
(what he didn't relate is the size of the cahones it takes to take the plunge!)
Well, no going back now...
Started cutting up the new panel...
It's close, another 1/16 down and it'll be good.
Still a lot of trimming and flanging to get the final fit.
what is your timeline to get the body done?
Bruce, I don't set time lines. They just come and go and I get frustrated when I don't meet them.
I WILL drive the car again this summer. That is the only parameter I set. Wherever I'm at around the beginning of May, it gets put back to road worthiness. I don't want it sitting in the shop all summer. I have a lot of work I want to do to my '52 truck and a vintage camper I bought.
Then there is finishing the trunk floor in the Malibu and more mods to the '38...I need to live to 135 to get all this done...